
Recently Available
Features that have graduated out of Labs and are now on for everyone.
These features were previously experimental (hidden behind a Labs toggle) and are now available by default. Each also has its own detailed page in Omniscio's help library.
- Clipboard history — a clipboard-history button in the chat composer that keeps your recent copies (text + images) so you can re-insert them.
- Inbuilt terminal — a real shell terminal inside Omniscio, scoped to a project (xterm.js + node-pty), with Terminal command blocks that mark each command's exit code and add fold, copy, and re-run per block.
- Ask about this page — a floating button (and Ctrl+J) opens a popover that asks Claude about whatever is on screen.
- Weekly Session Analysis — a developer-tools panel that mines your past agent sessions for friction patterns, with an opt-in weekly deep-analysis report.
- Dev Pipeline — the hubs-bar panel that oversees the dev-pipeline workflow — see every active run, control gate auto-approval, and watch the auto-lander land ready branches.
- Native slash commands — type /model, /clear, /cost, /context, and /status in the composer and have them run for real in Claude Code.
- Trim unused snooze times — drops the snooze durations you never pick so the menu shows only the ones you use.
- Share Comments — viewers can leave inline or general comments on your shared links, cross-posted to Team Chat and your inbox.
- Custom Providers (bring your own web AI provider) — add an OpenAI- or Anthropic-compatible endpoint and run it as a named provider in the Claude Code harness.
- Portable Backup — export one encrypted backup file you can carry to another computer, and import it back.
- Pre-send spend warning — warns you before you send a prompt estimated to cost more than a threshold you set.
Omniscio
Your command center for managing multiple AI coding agents. One app to launch, monitor, and respond to all your Claude Code sessions — across every project.
Get Started →What is Omniscio?
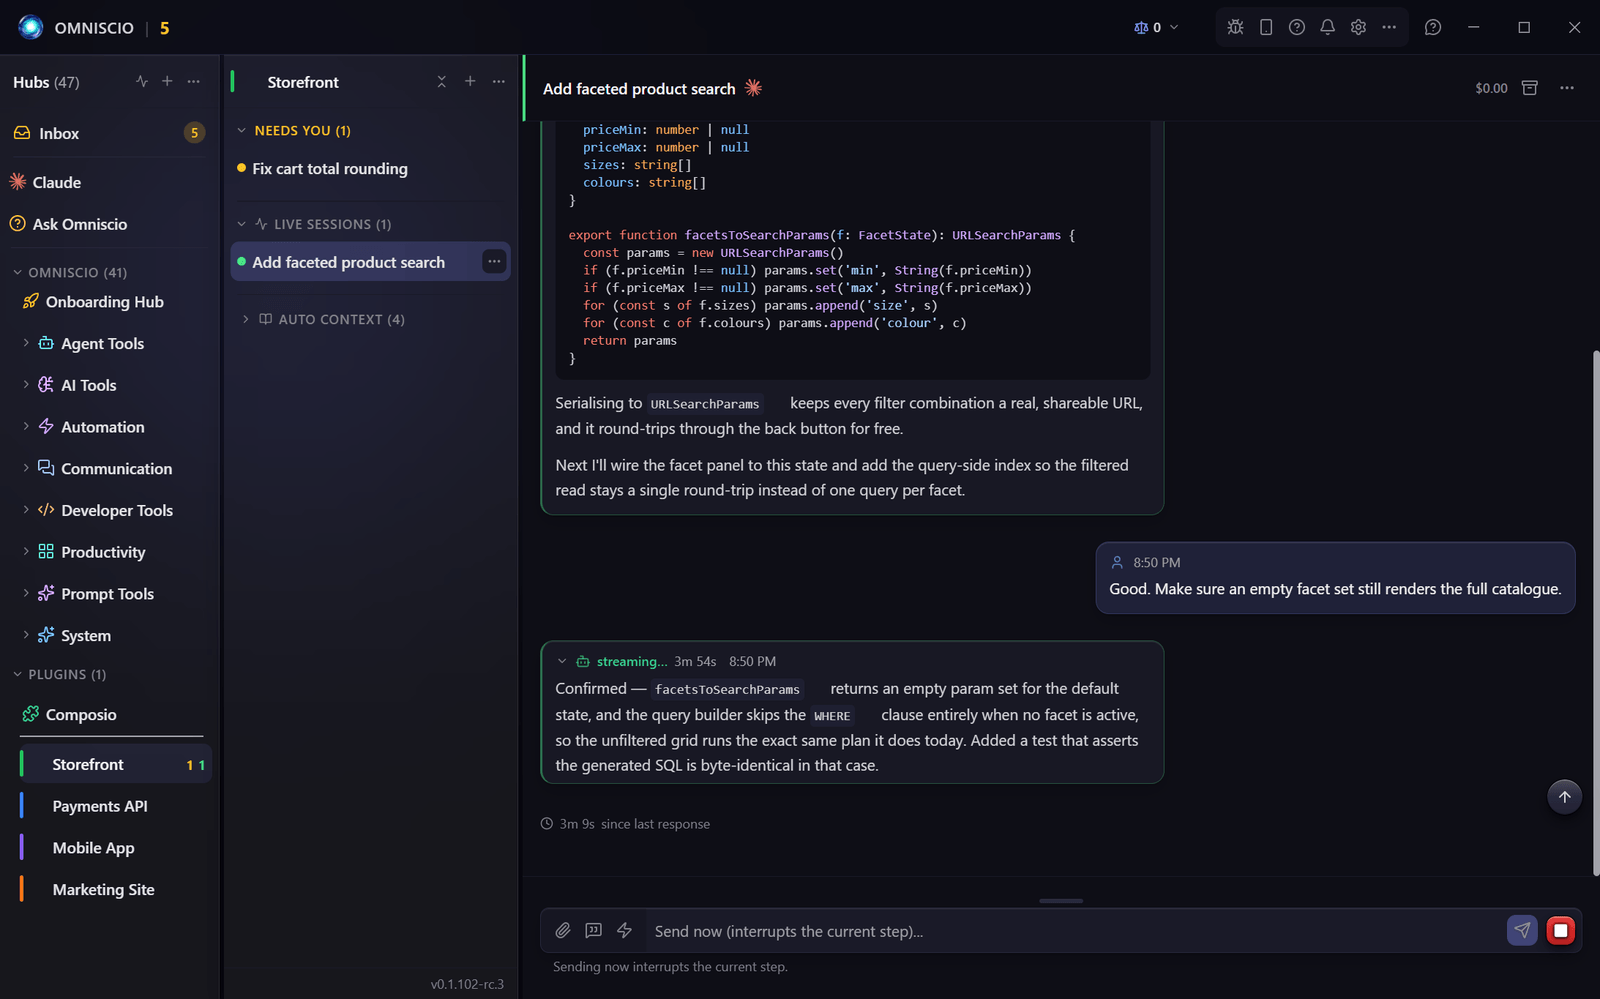
Omniscio is a desktop application that lets you run multiple Claude Code sessions at the same time and manage them all from a single window. Think of it like a mission control center at NASA — you can see what every agent is doing, jump in when they need your help, and keep everything organized by project.
Instead of opening separate terminals for each AI coding session, Omniscio gives you:
- One dashboard to see all your sessions at a glance
- An Inbox that collects everything that needs your attention
- Automations that respond to your agents automatically when you set up rules
- Recipes for multi-step AI workflows that run on their own
- Integrations with Gmail, GitHub, Google Calendar, SMS, and more
- Voice control so you can talk to your agents hands-free
 1
1
The Omniscio dashboard with projects on the left, session chat in the center, and the inbox on the right.
Key Features at a Glance
Multi-Session Management
Run dozens of AI coding sessions simultaneously. Each gets its own chat panel.
Smart Inbox
Never miss when an agent needs your help. Everything that needs attention lands here.
Recipes
Multi-step AI workflows. Chain multiple agent tasks together with approval gates.
Automations
Set up rules that automatically respond to your agents based on conditions you define.
Away Mode
Step away from your computer and let Omniscio handle agent questions with auto-responses.
Voice Control
Talk to your agents using a wake word. Dictate responses hands-free.
Integrations
Connect Gmail, Calendar, GitHub, SMS, and more. Agents can read your emails and events.
Mobile Access
Use Omniscio from your phone's browser — on your Wi-Fi, or anywhere via Tailscale.
Onboarding Guardian (invisible setup assistant)
An invisible AI that watches your first-time setup and the interactive tour and offers a gentle hint only when you seem stuck. On by default; turn it off any time in Settings.
App Tour
Guided walkthroughs that point at the real controls, one step at a time.
A tour dims the rest of the app, cuts a spotlight around the element it is describing, and shows a short card beside it explaining what that control does. Welcome and completion steps are full-screen cards instead. Tours are opt-in walkthroughs — nothing ever starts one for you.
Taking a tour
- Open Settings → Setup Wizards. Every available tour is listed, with a checkmark beside the ones you have already finished.
- Click a tour to start it. Use Next and Back to step through; the dots at the top of the card show how far along you are.
- Press Esc to leave at any point, or click Skip — either one marks the tour finished, so it shows a checkmark on your next visit.
A few tours are offered rather than listed: when you first switch on a feature such as Gmail, Voice Commands or Screen Capture, a toast offers its tour. Accept it, or dismiss it for good with Never show again.
Show me around the app
The first-run walkthrough is the Interactive Demo. It runs on a sandboxed sample workspace with made-up hubs and sessions, so you can watch how the dashboard, the inbox and a conversation behave without touching anything real. It plays once during first-time setup, and you can run it again any time from Settings → Setup Wizards. Some of its steps are hands-on: instead of pressing Next you perform the real action, and the tour moves on when you do. Because the demo is sandboxed, nothing you do there creates anything.
Managing Your Sessions, launched from the Tours menu in the top toolbar, works the same way on a sample workspace — walking you through pausing, snoozing, undoing and archiving while showing each result and its shortcut.
Some tours hand you off to a natural next one when they end: a toast appears a moment later inviting you to continue. Users with ten sessions or more are not offered these hand-offs.
Setup Wizards
Re-run the first-time setup, replay a tour, or retake any guided walkthrough.
Settings → Setup Wizards gathers every guided setup and walkthrough in the app onto one page. (Settings search finds it under “Setup Assistant” too.) Nothing here runs by itself — the page only starts something when you click it.
What is on the page
- Setup Wizard — walks the first-launch setup again: account, toolchain, theme and mobile access.
- Interactive Demo — the sandboxed walkthrough of the dashboard, with sample hubs and sessions. See App Tour.
- Onboarding Tour — replays the guided welcome tour: the inbox, replying to a session, the daily briefing, and finding your spend. Shows a green check once you have played it.
- App Tours — the full list of guided tours, each with a checkmark when completed.
- Vault Quick Reference — take or retake the knowledge vault's first-time card. Marked with a checkmark if you have done it before.
- Writer Studio Setup — the first-time setup for Writer Studio, replayable on its own.
The cards appear only for the surfaces you have. If a feature is switched off, its card is not shown here at all.
Installation
How to download and install Omniscio on your computer.
System Requirements
| Requirement | Details |
|---|---|
| Operating System | Windows 10/11 (64-bit), macOS (Apple Silicon and Intel), or Linux. Ready-to-install downloads for all three are on the download page — the Mac builds are signed and notarized by Apple, so they open without a Gatekeeper warning. The macOS version floor is whatever the bundled Electron runtime supports — it moves with Electron rather than being a number Omniscio pins, so check the download page for your macOS version. |
| Processor | 64-bit quad-core minimum (a recent Intel or AMD chip, or Apple Silicon). 8 or more cores recommended for many simultaneous sessions. Integrated graphics is fine — no dedicated graphics card needed. |
| Memory | 8 GB RAM minimum (16 GB recommended for many simultaneous sessions) |
| Disk Space | ~500 MB once extracted (the unzip-and-run build), or ~1.6 GB free while it runs if you use the single-file portable .exe — that one unpacks its full payload into a temp folder on every launch |
| Internet | Required for AI sessions (connects to Anthropic's API) |
| Claude Code CLI | Required — Omniscio launches Claude Code sessions under the hood |
Installing Omniscio
Omniscio ships in three Windows formats — a standard installer plus two portable builds. You'll get the ones your distribution channel offers:
- Installer
.exe(Omniscio-Setup-<version>.exe) — the standard Windows setup. It creates Start-menu and desktop shortcuts and updates itself in place, so it's the easiest way to stay on the current version. Like the portable builds it is code-signed as JLS Publishing LLC. - Single-file
.exe(Omniscio-Portable-<version>.exe) — double-click and it runs; nothing to unzip. The trade-off is a slower startup: it unpacks itself to a temp folder on every launch (see Startup Splash below). Best when you just want one file to hand to someone. - Unzip-and-run
.zip(Omniscio-<version>-unzip-and-run.zip) — extract it once to a folder, then runOmniscio.exeinside. It launches instantly with no per-launch unpacking. Best for daily use.
Whichever you pick, Windows may still show a SmartScreen warning — the app is signed as JLS Publishing LLC, but a brand-new signing certificate takes time to build SmartScreen reputation. Click "More info" then "Run anyway." On first launch you'll be prompted to sign in — see Authentication for details.
Portable builds do not auto-update. To move to a newer version, download the latest .exe or .zip from your distribution channel and replace your copy. Your settings, sessions, and accounts live separately in your user-data folder, so they carry over to the new version automatically.
Clicking Check for updates in the header's … menu on a portable copy tells you exactly that — "This build doesn't update itself. Download the latest to upgrade.", with a Download button. It will never report "You're up to date" on a portable build, because no check is possible there.
Startup Splash (portable .exe)
Each time you double-click Omniscio Portable.exe, two things happen before the main window appears:
- Unpacking (tens of seconds, every launch) — the single-file portable wrapper unpacks its ~1.6 GB payload into a temp folder. A static dark splash reading "Omniscio — Unpacking files, please wait — The app will open automatically" appears on your primary monitor. This happens on every launch, not just the first — it's the price of the single-file format. The unzip-and-run zip skips this step entirely and goes straight to Boot.
- Boot (~2–10 s) — a small frameless splash window appears with the Omniscio logo and an indigo spinner, showing a 5-phase checklist — Loading settings → Preparing your data → Restoring your work → Signing in → Opening the app — where each phase shows a check when finished, a pulsing dot while active, and stays dim until reached. A live line underneath names the current step ("Applying the latest updates...", "Restoring previous sessions...") — during database updates it even counts them off ("Applying update 3 of 12...") — and nothing but real progress ever changes that line, so it always names the work actually being done. If a single step goes quiet for a while, a second, quieter line appears beneath it saying only that Omniscio is still working ("Still working — larger projects can take several minutes...") so a longer wait never looks frozen. It closes automatically the moment the main Omniscio window is ready.
If the boot splash ever gets in your way, set the env var AMC_DISABLE_SPLASH=1 before launch — Omniscio will start straight to the main window with no splash. A built-in 90-second watchdog force-closes the splash if startup hangs, so you'll never be stuck staring at a frozen "Loading..." box.
Prerequisites: Claude Code CLI
Omniscio uses Claude Code (Anthropic's command-line coding tool) under the hood to run AI sessions. You need to have it installed:
- Open a terminal and run:
npm install -g @anthropic-ai/claude-code - Verify it's installed:
claude --version - Omniscio will automatically detect Claude Code and use it for sessions.
Omniscio includes a Toolchain Manager that can check for and install required tools automatically. See Tools & Toolchain.
Install on Your Phone
Put Omniscio on your phone as an app — its own home-screen icon, opening full-screen like a regular app. Works on Android and iPhone.
Omniscio isn't in the App Store or Google Play. Instead it installs straight from your own computer as a web app: you open it on your phone once, then add it to your home screen. The whole thing takes about a minute. There are two parts — (1) get Omniscio open on your phone, then (2) save it as an app.
The computer running Omniscio and your phone need to be on the same Wi-Fi network. (Want to use it away from home, on cellular? That works too — set up Mobile Access once for anywhere-access, then follow the same install steps below.)
Step 1 — Open Omniscio on your phone
- On your computer, click the phone icon 📱 in Omniscio's toolbar (top-right corner).
- Click Enable & Show QR. Omniscio shows a QR code (and a link you can copy).
- Open your phone's camera and point it at the QR code, then tap the link that pops up.
- Omniscio opens in your phone's browser, already signed in. Have a look around — this is the full mobile interface.
Open Omniscio on your phone once (Step 1) before you install it (Step 2). That first visit saves your sign-in, so the installed app opens straight to your sessions instead of asking you to connect again.
Step 2 — Save it as an app
With Omniscio open in your phone's browser, save it as an app. The steps differ slightly on Android and iPhone.
🤖 Android (Chrome)
- With Omniscio open in Chrome, tap the ⋮ menu (three dots, top-right).
- Tap Install app (on older versions of Chrome it's called Add to Home screen).
- Confirm. Omniscio is now installed on your phone. Its icon shows up in your app drawer (swipe up from the bottom of the screen to see all your apps) — and on some phones it's added to your home screen automatically too.
- Open Omniscio from the app drawer — it runs full-screen, with no browser address bar, just like a regular app. To keep it handy, press and hold its icon and drag it onto your home screen.
If you'd rather the app stay in portrait instead of flipping to landscape when you tilt your phone, turn on Settings → Sessions → “Lock to portrait on mobile” (off by default). On your first tap the app switches to full-screen to lock the screen — that hides the status/address bar, and swiping out of full-screen unlocks it (your next tap re-locks). If your phone refuses to lock, a “rotate to portrait” screen keeps the app upright instead — so it works on iPhone too, not just Android.
🍎 iPhone & iPad (Safari)
- Open Omniscio in Safari — on iPhone/iPad this must be Safari, not Chrome.
- Tap the Share button (the square with an up-arrow, at the bottom or top of the screen).
- Scroll down and tap Add to Home Screen.
- Tap Add (top-right). An Omniscio icon appears on your home screen and opens full-screen.
The phone app talks to Omniscio on your computer, so your computer needs to be on and running Omniscio for it to work. If your computer sleeps or drops off Wi-Fi, the app disconnects and reconnects when it's back — a Reconnecting… strip at the top of the screen shows while it does, and Waiting for your computer… means the link is still up but your computer hasn't answered yet. On iPhone, the Add to Home Screen option only appears in Safari — iOS doesn't allow it from Chrome.
Use it away from home (optional)
By default the phone app works on your home Wi-Fi. To use it from anywhere — on cellular, at work, travelling — turn on Access from anywhere in the same phone dialog. Omniscio offers to install Tailscale (a free, secure-connection app) and walks you through a one-time sign-in. After that, the installed app keeps working off your home network too. Full details and troubleshooting are in Mobile Access.
Authentication
How to sign in and manage your Anthropic accounts.
Omniscio supports two ways to authenticate with Anthropic's AI service:
Option 1: OAuth Login (Recommended)
This is the easiest way to get started. It uses the same login you'd use on console.anthropic.com.
- Click "Sign In" on the authentication screen.
- A browser window opens to Anthropic's login page.
- Sign in with your email, Google, or GitHub account.
- Authorize Omniscio to access your account.
- You're redirected back to Omniscio — you're all set!
Omniscio requests permission to create API keys, access your profile, run inference, and manage Claude Code sessions. These are the minimum permissions needed for full functionality.
Option 2: API Key
If you prefer, you can use an Anthropic API key directly.
- Go to console.anthropic.com/settings/keys and create a new API key.
- In Omniscio, choose "Use API Key" on the auth screen.
- Paste your API key and click "Save."
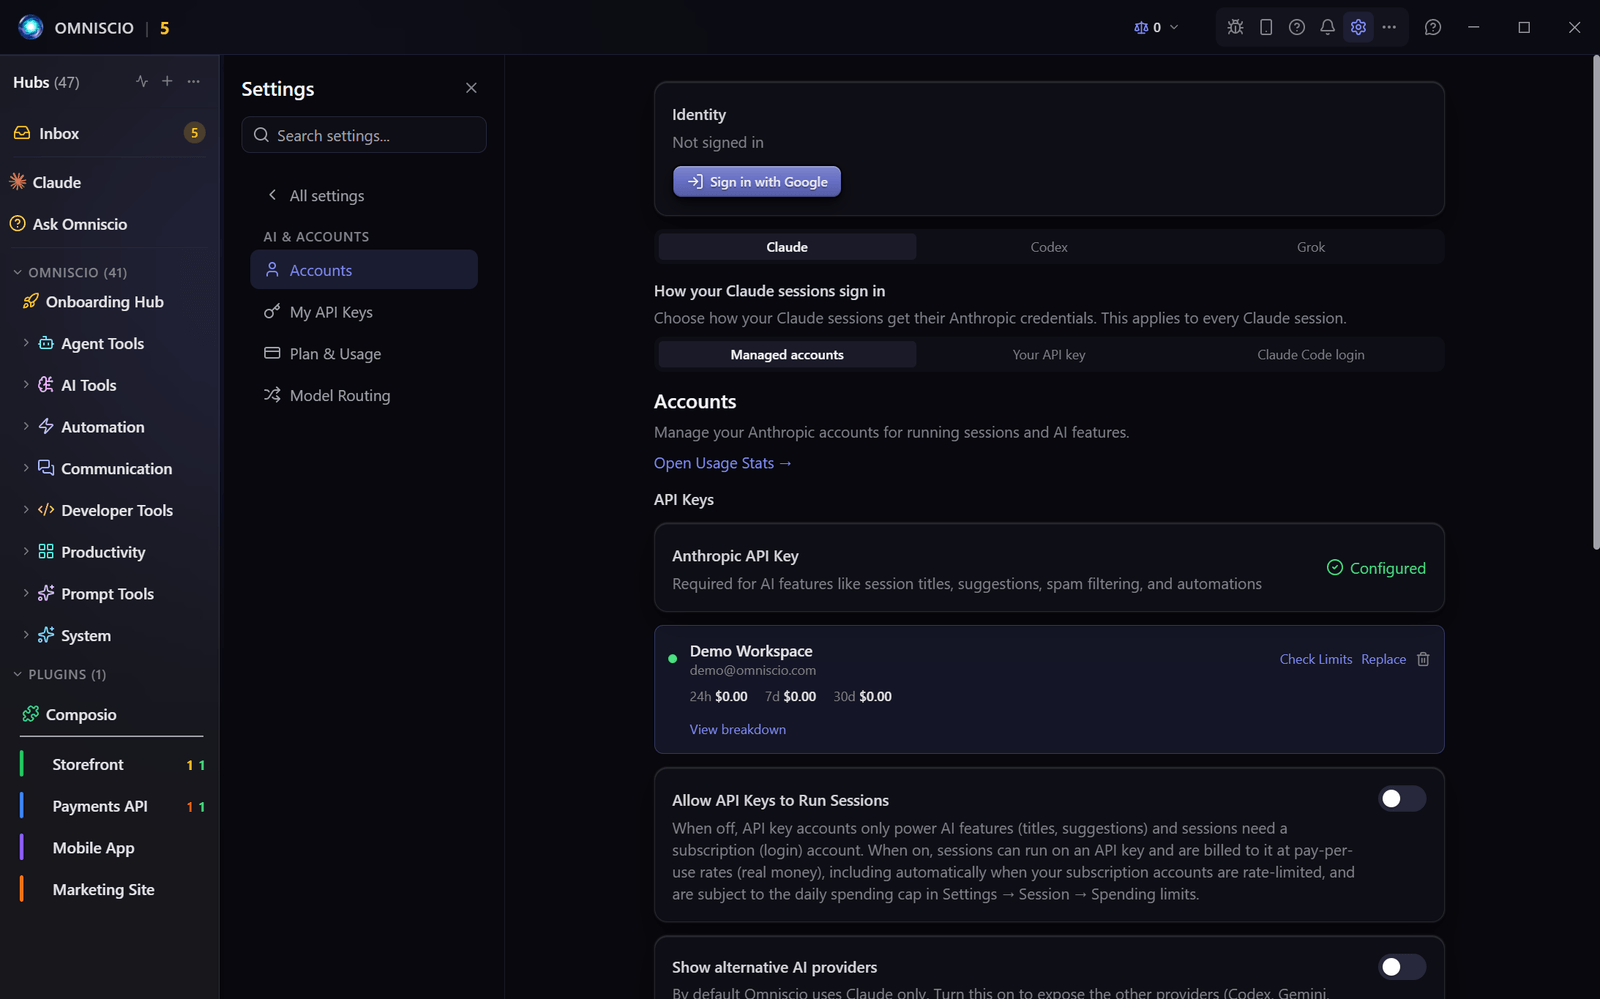
API key accounts cannot spawn new sessions by default (this is a safety setting you can change in Settings). API keys also cannot use some AI-powered features like suggestions, which require the Messages API directly.
Multiple Accounts
You can add multiple Anthropic accounts to Omniscio. This is useful if you have a personal account and a work account. Omniscio will automatically switch between them for rate-limit recovery — if one account hits its usage limit, Omniscio can continue working with another. When every usable account is at its limit, the affected sessions show the orange Rate Limited (Waiting) state — not the amber “Needs You” state — write a “Waiting for account capacity” note in their chat, and resume automatically when a limit resets or an account frees up. No action is needed from you.
Distribute Sessions Across Accounts goes a step further: instead of piling every session onto one account until it caps, Omniscio spreads new sessions across all your login accounts by usage — with a gentle preference for an account whose usage window is about to reset — weighted most toward the weekly (7-day) window, since a whole week's unused budget is the bigger thing to lose — so capacity that would otherwise expire unused gets used first. It also caps how many sessions stack on any one account, so new work fans out to accounts with room instead of a single account running away with the fleet. With three accounts you get roughly three times the effective 5-hour window, each account drains slower, and there's no synchronized "switch everything at once" stall — when one account caps, only that account's sessions move. Each session otherwise stays on its own account. It is off by default — turn it on at Settings → Accounts (the setting appears once you have 2+ login accounts). Until you do, every new session lands on the single active account; switching it on turns on the fan-out described here, and switching it back off restores the single-active-account behavior exactly. When it's on, the account pill at the top of the window shows a balance-scale icon with the number of accounts currently working, plus a green/amber/red health mark for whether your whole pool is on track to last until reset — and opening it tags each account with how many of its sessions are actively running versus parked waiting on you (for example "7 running · 6 waiting") — so a big count next to low usage isn't a mystery, since the parked ones aren't burning anything. An account that's maxed out instead shows a single muted "waiting" tag, since those sessions can't run until it frees up. If one account gets busy — or is simply holding far more sessions than its fair share — while others sit idle, Omniscio also nudges a couple of its sessions onto a freer account before they stall (when the account isn't near its limit it moves only idle sessions, so nothing you're actively working on is interrupted), and parks a session that keeps bouncing across a fully-maxed pool until capacity returns. On a phone, the same balancing indicator appears on the account button in the mobile header.
Credential Security
Your credentials are stored securely on your computer using your operating system's own keyring — Windows DPAPI, macOS Keychain, or Linux libsecret. Omniscio never transmits them to any server other than Anthropic's API — nothing sends them anywhere on its own.
The one way credentials can travel is if you deliberately carry them, and both routes are opt-in and encrypted. Ticking Include my saved credentials on a Portable Backup re-encrypts your API keys and sign-in tokens into that one file so they can be restored under the new computer's own secure storage — it is off by default, so an export without it carries no secrets at all. And Backup Mirror copies your config to a folder you choose (Dropbox, OneDrive, iCloud); encrypted credentials stay encrypted in the mirror.
Because DPAPI keys are tied to your Windows install and hardware, a major hardware change (swapping your CPU or motherboard) can reset them, after which Omniscio can no longer decrypt accounts you signed in before the change. When that happens Omniscio sets the affected account aside instead of looping on it, and shows a "Login Expired — sign in again" notice for that specific account — just re-sign in at Settings → Accounts and it picks back up right away, no restart needed. The same applies to a saved Anthropic API key: its card under Settings → Accounts turns amber "Can't be read — re-enter" instead of a false green — the key is still valid, Omniscio just can't read its encrypted copy — so paste the same key back into that card and it's repaired in place. You don't have to go hunting for it, either — when a saved API key can't be read, Omniscio also drops a notice in your Inbox the next time you open the app, pointing you to re-enter it; re-entering clears it.
This page is about your Anthropic account (the AI service that powers your sessions). That is separate from your Omniscio sign-in account — the "Sign in to continue" screen Omniscio shows when you open the app — signing in is required to use it. For managing that sign-in, deleting it, and what data it involves, see Account & Sign-In.
Database Encryption
Beyond your credentials, Omniscio can encrypt your entire local database at rest — mission-control.db and its cold-storage archive — so the files on disk are unreadable ciphertext without your key. It's off by default (if you never turn it on, nothing changes), and you switch it on from its own Database Encryption settings page — it has no sidebar row, so see the Database Encryption guide for the way in. A random key is sealed in your computer's keychain (or, for zero-knowledge, a passphrase you set), and enabling it re-encrypts your existing database crash-safely on the next restart.
Turning on Database Encryption requires a recovery code — shown once, and your only way back in if the keychain is ever lost (an OS reinstall, a new machine, a corrupted profile). Save it somewhere safe when you enable the feature.
Buy Credit
You can top up your prepaid gateway AI credit with a credit card straight from Omniscio. The Buy Credit card lives on the one money screen — Settings → Plan & Usage — directly under your Credits remaining balance, so adding more is right where you check what's left. (Settings → My API Keys shows the same balance but has no purchase control; it just links you across to Plan & Usage.)
- Open Settings → Plan & Usage and find the Buy Credit card under your Credits remaining balance.
- Pick an amount — a one-tap preset ($10 / $25 / $50 / $100) or a custom amount from $5 to $1,000.
- Omniscio opens Stripe's hosted Checkout page in your browser. You enter your card on Stripe's own page — card details never go through Omniscio.
- Finish paying and return to Omniscio. Your balance updates shortly after — if you don't see it right away, refresh the balance.
Buying credit is 1:1 face value: pay $25 and you get $25 of credit. The card processing fee is absorbed — it's not added on top and it doesn't shrink the credit you receive.
The 1:1 promise above is about the purchase. When you spend that credit, each request is billed at the real upstream provider cost plus a flat 10% surcharge — so $25 of credit buys roughly $22.73 of AI at provider list prices. That surcharge is what covers running the gateway; it is the only markup, it is applied per request rather than deducted up front, and it is why your balance draws down slightly faster than a provider's own pricing page would suggest. Using your own API key instead bills that provider directly and skips both the credit balance and the surcharge.
Credit is added by a verified Stripe webhook after the payment confirms — not by the browser returning — so a closed tab or a flaky network can never leave you paid-but-not-credited; the balance simply catches up on the next refresh. If a payment is later refunded or charged back, the matching credit is automatically removed from your balance.
Plan & Usage
Omniscio keeps everything about your plan and spending on one screen — Settings → Plan & Usage (renamed from "Plan & Billing" and expanded in 2026 — the screen is the Plan & Billing (Pro subscription) screen). See the plan you're on and this month's AI allowance (it resets at the start of each month), see and top up your prepaid credit balance, compare Free / Pro / Team and upgrade or manage your subscription (Pro is $15/mo through Stripe), and bring your own API key. Your recurring subscription and your prepaid Buy Credit balance are still separate money paths that never cross — you just see and manage both in one place here.
Account & Sign-In
The Omniscio sign-in, why it's required, and how to delete your account and the data tied to it.
When you open the app, Omniscio shows a "Sign in to continue" screen. This is the Omniscio sign-in — it's separate from how you connect to Anthropic's AI service (covered under Authentication). Sign in with Google to continue into the app — signing in is required to use Omniscio, and it's what unlocks features like running recipes.
Signing in is required to use the app, so if you're using Omniscio you have an Omniscio sign-in account — this page covers managing or deleting it. Signing in is what creates it.
Signing in
- A verified email is required for new accounts — you confirm your email address before the account is active.
- Once you're signed in, Omniscio remembers it on your device, so you won't have to sign in again every time you open the app (you stay signed in even when you're briefly offline).
- You can sign out at any time from Settings → Accounts; the sign-in screen reappears the next time it's needed.
Self-serve workspaces
When your install uses the optional cloud sign-in (Global Auth), an eligible signed-in user on a paid plan can create and own their own workspace — a separate organization with its own members — and belong to several at once. A workspace switcher in the User Management header moves you between the workspaces you belong to; switching re-loads that workspace's data without signing you out on your other devices. If you're on the free plan and try to create a workspace, Omniscio sends you to the Plan & Usage screen to upgrade. A workspace owner or admin also gets a scoped view of User Management for managing just their own workspace's members. This is an owner/admin feature and appears only when cloud sign-in is turned on.
Account deletion & your data
You can delete your Omniscio sign-in account yourself, from inside the app — you don't need to email anyone or wait for someone to action it.
- Open Settings → Accounts.
- Choose Delete my account and confirm.
- Your account is removed immediately — this is a permanent (hard) delete of the sign-in account, including the cloud sign-in record. It is not a "soft delete" you can undo.
- The data on this computer is cleared the next time you open Omniscio, and you land on a fresh setup. It can't happen instantly because the local database is open and in use while the app is running.
Removed right away: your Omniscio sign-in account and its cloud sign-in record (your account email, display name, and plan/tier as held for sign-in), your Team Chat messages, and your membership of any shared workspace.
Cleared on this computer at the next launch: the whole local database and your settings file — your projects, every session and its full chat history, quick replies, recipes and automations, saved logins, notes, and any attachments or reports saved on disk. This includes messages pulled in from connected channels (SMS, email, Slack, Telegram).
Kept: your billing history — how much was spent, when, and with which provider. Those records hold no message content and are retained because they have to be.
Not retracted: content Omniscio already sent to an outside service to run a feature (text sent to an AI model, a bug report you submitted), and any backup you made before deleting — a backup keeps its contents until it ages out. For the full picture of what is stored and where, see Privacy & Your Data.
Want a copy first? Use Export your data in the same card before you delete. The export covers your local data; Team Chat messages live in the cloud and are not included.
What the app operator can see about your account
When sign-in is active, the person running this Omniscio install can see, for a signed-in user, your account email, display name, and plan/tier — for example, attached to a support, help, or bug-report message so they know who it came from. Your sign-in tokens (the secret part of logging in) are never shared this way. When no one is signed in, those messages are anonymous.
Asking us to delete your data
Besides deleting your own account, you can request deletion of data held about you. How requests are handled — and the rights you have — will be set out in the Privacy & Your Data policy when it's published.
Banned or removed accounts are also disabled on the server side immediately, so access stops right away rather than at the next restart.
Privacy & Your Data
What Omniscio stores, where it goes, and your choices.
This page describes, in plain language, what data Omniscio collects, where it goes, and the choices you have over it. A formal, legally-reviewed Privacy Policy will follow before general availability; if anything below changes, we’ll update this page.
Omniscio keeps a working copy of much of your data — your projects, sessions, chat history, and messages from connected channels — in a database on your own computer. As a multi-user cloud product it also keeps your account and some synced data on our servers, and several features send data to outside services to work (for example, an AI model needs your text to summarize it). In plain language, here’s what that means:
- What personal data is stored, and where — in the local database on your machine, and on our servers for your account and synced data.
- Which outside services receive data when a feature runs — AI models, voice, email, crash reporting, and so on — and what each one gets.
- How long data is kept, and how to remove it.
- Your choices and rights — including turning features on or off, deleting your account (see Account & Sign-In), and requesting deletion of data held about you.
You can already delete your Omniscio sign-in account at any time — see Account & Sign-In → Account deletion. Deleting your account also clears the data stored locally on that computer, on the next launch.
Health & error reporting
To catch crashes and bad releases across everyone's installs, Omniscio sends a small, anonymous stream of usage and error health data. It is always on — there is no setting that turns it off; the disclosure lives at Settings → System on the “Usage telemetry (always on)” card, which says so in as many words. What you can control is Auto-Email Crash Reports at Settings → System → Auto-Email Crash Reports: it decides whether a crash also emails a scrubbed log excerpt, and turning it off does not stop crash capture itself (a restart applies the change).
What's sent — all tied to a random per-install ID, never your name or machine:
- Crash and error signals — the first line of the message, with secrets and personal details scrubbed out and truncated.
- A once-a-day health summary — which features were used and how often, uptime, error/warning counts, session stats, and your total AI spend. All counts, never content.
- Anonymous automation reliability counts (recipe supervisor, PM automations, and CLI failures — as fixed codes and counts, never the content) and feature-adoption counts (voice and saved-browser-login usage — counts only, never transcripts or login names).
- App version and platform (e.g.
win32).
If you're signed in, the same daily numbers (your AI spend and usage counts) are also tagged with your user ID, so the maintainer's admin console can show per-user totals. Still counts only — never your name, email, messages, or files. Deleting your account removes them.
Never sent: your username, file paths, project names, message or conversation content, API keys, or account emails.
The emails Omniscio sends the maintainer — the crash report and the periodic digest — each end with a short machine-identity block carrying your hostname (the name of your computer), plus platform, OS release and app version, so reports from different machines can be told apart. On a personal computer that hostname is often your own name. Those emails are delivered by Resend, a third-party mail provider. Crash reporting is on by default, capped at 15 crash emails a day. Your OS username is deliberately stripped from both. To stop it, turn Error Reporting off — or turn off just the crash-alert email, which leaves the digest running.
The telemetry payload — the counts and usage numbers listed above — is encrypted on your machine before it's sent and only decrypted on Omniscio's server, so it isn't readable in transit or by anything in between.
The emailed reports (the crash report and the digest) work differently: they are ordinary email, protected by TLS in transit but not sealed on your machine, so Resend — the mail provider that delivers them — can read the contents. That body carries the machine-identity block described above, the scrubbed error and stack trace, recent log lines, and size-capped log-file attachments. It is a real difference in protection, which is why it's called out here rather than folded into the sentence above.
Turning Error Reporting off stops all of it.
Data erasure (F033)
When you delete your account, Omniscio performs a comprehensive, automated data erasure across every surface where your data is stored:
- Team Chat messages — all message bodies you authored are redacted and replaced with a deletion tombstone, while the conversation structure stays intact for other members.
- Search index — every searchable copy of your messages is deleted so your content no longer appears in search results.
- Device tokens and preferences — your push notification tokens, notification preferences, presence data, and saved items are hard-deleted.
- Direct messages — your PII (display name, email, photo) is scrubbed from connection records.
- Denormalized fields — channel previews showing your name are cleaned.
- Scheduled messages — any pending or dead-lettered scheduled messages you authored are deleted.
A daily reconciler automatically re-drives any residual erasure that could not complete in a single pass (for example, for very prolific users), so nothing is left behind.
Enterprise SSO & SCIM
Domain claiming and automated user provisioning for organizations.
Omniscio's enterprise identity features are per-organization: your settings, your SCIM token, your claimed domain, independent of every other organization.
SCIM provisioning is not live by default. The endpoint ships switched off and answers 404 to every request until Omniscio activates it, and your organization then has to be provisioned on top of that. So pointing your identity provider at it before we've turned it on will fail every call — talk to us first and we'll confirm it's live for your org. This is deliberate: an enterprise provisioning surface stays inert until someone switches it on on purpose.
Domain verification
Organizations can verify and claim their email domain. Verification uses a DNS TXT record challenge — you publish a verification token in your DNS, and Omniscio confirms ownership before claiming the domain for your organization.
- Domain verification — prove ownership with a DNS TXT record.
- One org per domain — domains are transactionally claimed to prevent conflicts.
- Per-org configuration — each organization's identity settings are independent of every other organization's.
You cannot currently require members to sign in through your corporate identity provider. Omniscio signs in with Google or GitHub; SAML and OIDC federation are on the roadmap, not shipped, and enforced IdP sign-in depends on them. Claiming your domain today establishes that the domain is yours — on its own it does not restrict how members sign in. If enforced SSO is a requirement for your rollout, talk to us before you plan around it.
SCIM v2 provisioning
SCIM v2 (System for Cross-domain Identity Management) lets your identity provider automatically create, update, and deactivate user accounts in Omniscio. Each organization gets its own SCIM endpoint.
- Automated provisioning — new hires get access automatically when added in your IdP.
- Automated deprovisioning — departing employees are removed when disabled in your IdP.
- Per-org SCIM token — your organization gets its own bearer token, scoped to your org alone (stored hashed, plaintext shown to you once when it is minted). Omniscio mints and rotates it for you on request — see below.
- Per-org endpoint —
/scim/v2/{orgId}, speaking SCIM 2.0 over the Users resource (see the supported subset below).
This is a deliberate first release scoped to the Users resource, not full specification coverage. Plan your connector around what is here:
- Supported — create, update, deactivate and delete a user, plus an existence check filtered by
userName eq "value". A user is identified by their email address. - Not yet supported — Groups (group push will fail), the discovery documents an IdP fetches first (
/ServiceProviderConfig,/Schemas,/ResourceTypes), pagination, the wider filter grammar, bulk operations, and ETags. Anything that is not the Users resource returns 404. - Listing users returns an empty result on purpose — an unfiltered
GET /Usersdeliberately enumerates nobody, so your directory can't be read back out through the provisioning endpoint.
In practice: Okta or Entra connector validation and group push will not pass as-is. If your rollout depends on either, talk to us first — the remaining pieces are a tracked fast-follow.
SCIM tokens are stored as cryptographic hashes — the plaintext is shown once when minted and never persisted or logged. Each token is verified in constant time against your own organization's stored hash, so one organization's token can never act on another's. SCIM never grants a global role, and deprovisioning never disables a user who belongs to another organization.
Rotation is available at any time — contact Omniscio and we'll rotate it for you. Enabling SSO/SCIM, minting and rotating the SCIM token, and verifying your domain are currently concierge operations performed by Omniscio on your behalf; there is no self-serve admin screen for them yet. A customer-facing configuration UI is planned. Rotation takes effect immediately, so have the new token ready to paste into your IdP before you ask for it.
The Dashboard
Your command center — everything you need in one view.
The dashboard is the main screen you see when you open Omniscio. It's divided into three main areas:
Left Sidebar: Hubs & Sessions
The left side shows all your hubs (folders on your computer that you've added to Omniscio). Under each hub, you can see its sessions (active AI conversations). Click a session to open its chat in the center panel.
At the top of the sidebar, you'll see tabs to switch between:
- Regular view — Your hubs organized by folder, with sessions underneath
- Inbox view — Only sessions and items that need your attention
Center: Session Chat
The center area shows the conversation with the currently selected session. This is where you read what the AI agent is doing and type your responses. See Chat Interface for details.
Top Toolbar
The toolbar at the top contains quick-access buttons for various features:
| Button | What It Does |
|---|---|
| 🔔 Notifications | Shows recent notifications and alerts |
| 🎤 Voice | Toggle voice control / dictation |
| 🐞 Debug | Open the debug console for troubleshooting |
| 💬 Feedback | Send feedback about Omniscio |
| 📱 Mobile | Set up mobile access (QR code) |
| 🎫 Tours | Start guided tours of Omniscio features |
| 🔖 Bookmarks | Open your saved URLs, files, programs, commands, and in-app jumps (sessions, hubs, virtual hubs) |
| 🍳 Recipes | Open the recipe run dashboard |
| 🧠 MemPalace | Access the memory palace |
| 🌐 Team Time | World clock dashboard for managing team members across timezones — live clocks with working-hours status, meeting planner with overlap detection, and timezone converter. Opt-in: Settings → Features → Team Time. |
| 🚀 PR Merge Queue | Triage open GitHub pull requests across configured repos into 8 lanes (fast / standard / batch / risky / etc.) and spawn Omniscio merge sessions in one click — refreshes in the background, nudges your Inbox for each pull request that needs you, takes your own merge instructions, and can merge a related group together. Opt-in: Settings → Features → PR Merge Queue. |
| ✨ Super Prompts | Browse and use prompt templates |
| ✨ Super Prompt Creator | Design a brand-new Super Prompt through a guided interview (in the Prompt Tools sidebar group) |
| 🍰 Bake-Off | Launch one prompt across many projects and harness setups at once (formerly Fan Out; in the Prompt Tools sidebar group) |
| 🔄 Updates | Check for app updates |
| ⚙ Settings | Open the settings panel |
Built-in sidebar integrations (such as Gmail, Stats, or Mind Map) and installed third-party plugins that have a sidebar panel also get a toolbar button automatically. These appear in the … (overflow) menu by default; right-click any item to pin it to the visible toolbar.
The header's right side is a row of draggable blocks: the whole shortcut bar is one block, and the account / balancer and Hardcore widgets sit as their own blocks beside it. Drag a widget block directly (a quick tap still opens its panel), or drag the shortcut bar by the small grip that appears when you hover it, to rearrange them — your layout is saved and survives restarts. Shortcut icons still reorder inside the bar, and Settings → Widgets controls which widgets show or hide.
System Tray
Omniscio also lives in your Windows system tray (the small icon area near the clock). The tray icon shows a badge count of sessions that need your attention. Left-click the icon to show / focus the window. Right-click for the menu:
- Show Mission Control — brings the window to the front (same as a left-click on the icon)
- Pause Wake Word / Resume Wake Word — only appears when wake-word voice activation is enabled in Settings → Voice Control
- Hard Reload — clears the renderer cache and reloads the window. Use it if the UI looks stuck or didn't pick up a change. Claude sessions keep running in the background — only the UI reloads.
- Restart Mission Control… — asks for confirmation, then relaunches Omniscio. Running Claude sessions are stopped gracefully (same as Quit) and will not auto-resume on the next launch — each one gets a “Session suspended — app was closed” marker. Use it after changing a setting that needs a restart, or if the app feels wedged.
- Open Developer Tools — opens Chrome DevTools for the Omniscio window in a separate detached window. Mostly useful for debugging or reporting issues.
- Quit — gracefully shuts down Omniscio: terminates every Claude CLI process, force-kills anything still running after 5 seconds, then exits
You can configure Omniscio to minimize to the system tray when you close the window instead of quitting. Enable "Close to Tray" in Settings. This keeps your sessions running in the background.
Detached Session Window (Pop Out)
If you want a single session always visible on a second monitor while the main Omniscio window stays on its primary view, you can pop the session out into its own floating window. Open the session's ··· (overflow) menu in the session toolbar and pick Pop Out to Window — no setting to toggle, it's available on every session.
- The floating window shows the same chat, composer, and toolbar as the inline panel — there is only one conversation, both windows are views onto it.
- In the main window, the session's sidebar row shows a small "open in new window" chip, and the panel area is replaced by a placeholder with Bring window to front and Reattach here buttons. The session's ··· menu also swaps to Focus Detached Window while it's popped out.
- Omniscio remembers where you put each session's window and how big you made it — re-popping the same session restores that position and size.
- Closing the floating window (or clicking Reattach here) re-mounts the session in the main window.
- Pressing Ctrl+W / Cmd+W in the popped-out window opens a quick confirm — Close window (leave the session running in the background), Close & stop session (stop it too), or Cancel. The title-bar X still closes right away.
- If a session ends or is archived while popped out, the window stays open so you can keep reading the transcript — close it when you're done.
Every other pop-out window closes on Ctrl+W. A hub or app popped out into its own window (SuperMail, Tasks, Calendar, …), The Vault, Scratchpad, Writer, Support Chat, the Job Monitor and project docs all close on Ctrl+W / Cmd+W, exactly like their close button. If a dialog is open inside the window, the first Ctrl+W closes the dialog and the next one closes the window. It works while you are typing too, and a SuperMail reply you were writing is kept as a draft.
Reporting a Bug or Sending Feedback
The 💬 Feedback button in the top toolbar opens a short form: pick whether it's a bug, a feature idea, a question or general feedback, describe it, and optionally leave an email address so someone can reply to you.
- You get a reference number. After the report sends, the confirmation shows a short code such as
ref: a1b2c3d4. Keep it. If you ever need to follow up, quoting that code is the fastest way for us to find your exact report. - You can attach up to 5 files, 6 MB in total. Screenshots are the most useful thing to attach. If a file is too big, or the files together go over the limit, Omniscio tells you straight away rather than failing later.
- Some diagnostics ride along, and you can see them first. The form shows exactly what will be included before you send: app and platform versions, how long Omniscio has been running, how many sessions are active, and counts of any recent errors or crashes. Contact details and other sensitive text in your message are stripped out before it leaves your computer.
- Nothing is lost if you're offline. A report that can't be sent is saved on your machine and re-sent automatically later. If that happens you'll see a message saying so, with the same reference number.
Replies to your reports
Every report you send also opens a conversation with the support team, so they can answer you right inside Omniscio — you don’t need to turn on Get Help for this.
- You’re told when someone answers. A notification says An agent replied to your report, and the Feedback button shows a small dot until you read it. Click the notification to go straight to the reply.
- Find them under “Your reports”. Open the Feedback button and choose Your reports at the top of the form. The list shows each report you sent and where it stands: on its way, waiting on an agent, answered, or resolved.
- You can write back. While a report is open with the support team, type a reply at the bottom of it. Once it’s resolved it becomes read-only — send a new report if you need more help.
- A bug report or a feature idea goes to a person. Send one and you get a single email thanking you and saying someone is looking into it — then a person on the support team answers you here. Nothing is started automatically to work on it in the background, and a question or a general note works the way it always has.
- Only people answer these. The AI assistant never replies to a report conversation, and the conversation carries only what your report already sent: its text, plus the name and email on your account.
- You can switch it off. Turn off Report conversations in Settings → Lab and new reports no longer open a conversation, and Your reports is hidden.
Hubs
Organize your AI sessions by hub folder.
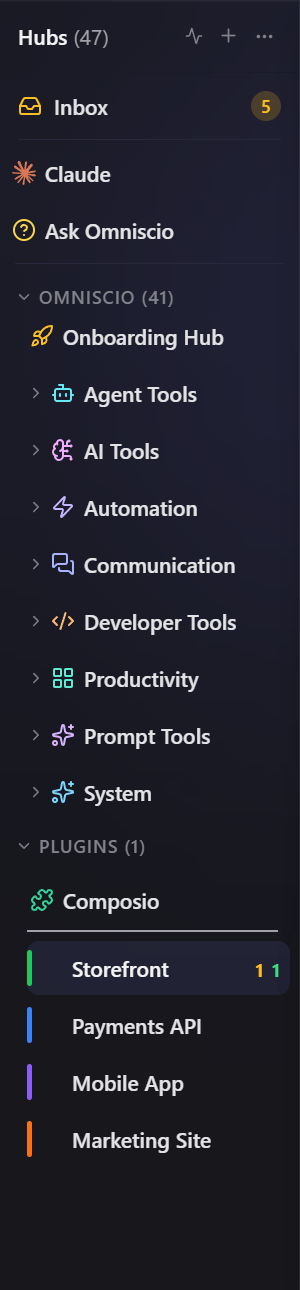
Hubs in Omniscio represent folders on your computer where you do your coding work. Each hub can have multiple AI sessions running at the same time.
Adding a Hub
- Click the "+" button at the top of the sidebar (or use the context menu).
- Choose "Add Hub" and browse to the folder on your computer.
- The hub appears in the sidebar with its folder name.
Hub Settings
Right-click a hub in the sidebar to access options. The most-used actions sit at the top level; the rest are grouped into hover/click submenus (look for the › chevron) so the menu stays short:
- New Session — Start a new AI session in this hub
- Run Recipe — Submenu: run a multi-step recipe against this hub
- Edit Hub — Change the hub name, color, group, or isolation
- Edit Notes — Jot freeform notes about the hub
- Files — Submenu: Open Hub Docs, Show in Explorer, Copy Path
- Appearance — Submenu: detect / choose / remove the hub icon, and show or hide the git branch in session headers
- Pin to Top / Unpin — Keep the hub pinned above the rest of the list
- Remove — Remove the hub from Omniscio (doesn't delete files)
The Files and Appearance submenus only appear for real folder-backed hubs — virtual hubs (Gmail, Calendar, Settings, etc.) show just the flat top-level items.
Moving a Hub to a New Folder
If you move a hub's folder on your computer — or just want to point Omniscio at a different location — you don't have to lose your history. Use "Move to a new folder…" in the Edit Hub dialog (right-click → Edit Hub), or "Locate moved folder…" on the red "hub folder is missing" banner.
- Open Edit Hub and click "Move to a new folder…" (just under the folder path).
- Pick the new folder.
- Omniscio re-points the hub to it — all your sessions and history come along automatically, because they belong to the hub, not the path. Sessions that are still running keep working where they started; only new sessions use the new folder. Nothing on disk is copied or deleted.
Merging two hubs. If a hub already exists at the folder you pick, Omniscio offers to merge the two instead: it shows how many sessions will move, takes a one-time safety backup of your data first, then combines everything into the hub already there and retires the duplicate. This is the clean way to fix a split caused by adding the same folder twice. The merge is all-or-nothing, so it can never leave your data half-moved.
Built-in hubs (Gmail, Calendar, Settings, etc.) can't be moved — they aren't real folders.
Hub Colors
Each hub gets a colored bar on the left side of its sessions. You can customize this color to visually distinguish your hubs at a glance.
Virtual Hubs
Omniscio includes several virtual hubs that aren't tied to a folder on your computer. These represent special features:
| Virtual Hub | Purpose |
|---|---|
| 💬 Claude | General Claude conversations not tied to any hub |
| ✉ Gmail | Gmail integration — see email summaries and agent conversations about your emails |
| 🐙 GitHub | GitHub integration — PR reviews, issue tracking |
| 📅 Calendar | Google Calendar integration — event summaries |
| 🔧 Tools | Toolchain management — install and manage development tools |
| ⚙ Settings | Quick access to specific settings categories |
| 📊 Job Monitor | Read-only dashboard of every long-lived test, build, dev-server, and sandbox process across your parallel-worktree agents — spot and kill runaway runners that are pinning your CPU, plus a wait queue showing which sessions are blocked waiting for a free test slot (with an hourglass badge in the sidebar) |
| 🔥 Performance Monitor | One live snapshot of how the app itself is behaving — startup and render timings, memory, how much of the machine your running agents are using, and how much work they actually finished at each session count. Read-only: open it when something feels slow to see what is actually holding things up before changing any setting. |
| 🤖 Telegram Bot | A Telegram bot you message to talk to your agents from your phone. Each chat (or forum topic) maps to its own session, so you can start work, answer a question, and read the reply without opening your computer. Separate from the Telegram integration above, which brings your own Telegram inbox into Omniscio. |
Repo Foundations
The Repo Foundations feature puts a Set up this repo card on the hub dashboard for every folder-backed hub (on by default). Clicking it runs the Repo Foundations skill, which installs a tailored documentation system and a Claude-rules baseline after showing you a preview to approve. The setup spawns a real paid session; you can turn the skill off any time in Settings → Features.
Groups
You can organize your hubs into groups — named, collapsible sections in the sidebar. To create one, click the + button at the top of the hubs sidebar and choose New Group, then give it a name. The same menu's other entry, Add Hub, creates a hub.
A group header shows how many hubs sit inside it. Click the header to collapse or expand the group, and use its controls to rename it, delete it, pin it to the top of the sidebar, or add a hub straight into it. Groups and hubs can both be dragged into the order you want.
Deleting a group removes the group, not the hubs inside it, and the toast it shows offers an Undo that puts the group back along with its hubs.
Clean Room
Talk to a totally fresh AI — none of your customizations, nothing added.
Clean Room is a special project in your sidebar (it sits alongside the built-in ones like Session Search — it isn't a folder on your computer). Every session you start inside it talks to a “vanilla” AI: a completely fresh version with none of your personal setup and none of the extra help Omniscio normally adds. It's like meeting the AI for the very first time, on a blank page.
Why would you want that? Because sometimes the AI does something surprising and you want to know why. Is it the AI itself — or is it one of your rules, your notes, a connected tool, or something Omniscio quietly adds behind the scenes? Clean Room is your control group: run the same request here with nothing added, and compare it to a normal session. It's also handy for testing a fresh prompt with zero head start.
Clean Room is for testing and comparing, not for real work. Because it has none of your rules, memory, or connected tools, it won't follow your usual conventions or reach your integrations. For actual work, use a normal project session.
Opening Clean Room
- Look in the sidebar for the Clean Room entry (🧼) among your projects.
- Click it to open the Clean Room start screen — a short explainer of what Clean Room is (what's turned off versus what stays), with an AI picker and a Start a Clean Room session button.
Starting a Fresh Session
- On the start screen, leave the AI on Claude (or pick another — see below), then click Start a Clean Room session.
- A blank session opens — just type your message and press Enter. The AI that answers is the fresh, blank-slate version, with no customizations and no added context.
You can run several Clean Room sessions at once, just like any other project.
Picking the AI
On the start screen, an AI picker lets you choose which AI answers before you begin. It's set to Claude by default, and you can leave it there. In this first version you can also pick one of the Claude-compatible models — DeepSeek, Kimi, GLM, or MiniMax. Whichever you pick, it's still the same fresh, stripped-back session — only the underlying AI changes. You can choose a different AI for each session.
What's Turned Off (and What Stays)
Here's exactly what a Clean Room session leaves out, and what it keeps.
| Turned off (nothing from here) | Still there |
|---|---|
Your global rules and memory (your personal ~/.claude setup) | The AI's own built-in personality — it's still Claude Code |
| Your custom skills | The AI's own built-in tools (reading files, running commands, etc.) |
| Project instructions and notes | A normal chat — you talk to it just like any other session |
| Connected tools (your integrations / MCP) | |
| Omniscio's added context — the note telling it it's inside Omniscio, Plain Speak, markers, and the publish / convert / download helpers | |
| Automations that normally run in the background (“hooks”) |
Each session also starts in its own private room — a blank, per-session workspace, so one Clean Room session can never see another's files, and the whole area lives outside the app's data folder so nothing sensitive sits next to it. A Clean Room session is fenced to its room: if it tries to read a file or run a command outside the room, it's blocked outright (see “What to Expect” below). To give a session files, use Open room folder and drop them in — it can freely read anything inside its own room.
What to Expect
A couple of things are worth knowing so nothing surprises you:
- It's still Claude Code, not a “bare” AI. Clean Room removes the extra layers around the AI, but the AI keeps its own built-in identity and its own tools. That's on purpose — it's what makes it a fair comparison to your normal sessions.
- It's a control group with a filesystem fence, not a locked-down sandbox. The AI's own built-in tools are still live and work freely inside its own room. But if a Clean Room session tries to read a file or run a command outside the room — like your real settings elsewhere on the computer — it's blocked outright (not just a prompt you might approve by reflex), so it can't be walked out of its folder. The room area also lives outside the app's data folder, so even a clever escape lands next to nothing sensitive. “Clean” means a blank context (none of your customizations, none of Omniscio's layers); the block adds a real limit on what it can reach on its own.
Sessions
AI conversations — the core of what Omniscio manages.
A session is a single conversation between you and a Claude Code AI agent. Each session runs in the context of a specific project folder on your computer.
Creating a Session
- Select a project in the sidebar.
- Click the "+" button next to the project name, or right-click the project and choose "New Session."
- Type your initial message (what you want the AI to do).
- Hit Enter to start the session.
Session handoff
Session handoff rolls a long session over into a fresh one that's already caught up — a "Hand off to a fresh session…" item in the session ⋯ menu, plus a one-per-session note once a chat has used a lot of context (and the same note when it gives up). The note never spends; only confirming the handoff pays for the one summary call.
Browser Logins
Browser Logins let you log into a website once and have every agent you run reuse that login automatically — many at the same time — until the site signs you out. Open Browser Logins in the left sidebar (under Agent Tools), click Add a login, and a real Chrome window opens; sign in to any site the normal way (passwords, 2FA codes and email magic links all work) and close the window. Passkeys are the one exception — Chrome turns them off in any browser window that is being driven automatically, which is how this feature works, so use a password in that window instead. That login is saved on your computer only — no passwords are ever stored, just the logged-in browser session — and each agent drives its own private copy, so they never collide. During first-run setup Omniscio installs the small browser-automation tool this uses in the background, so it's ready when you are. Remove a saved login anytime and it's erased from your computer along with its saved session.
Session Statuses
Each session has a colored status dot that tells you what's happening:
| Status | Dot Color | What It Means |
|---|---|---|
| Starting | Blue | The session is launching — setting up the AI agent. |
| Running | Green | The AI is actively working on your request. |
| Needs You | Amber (pulsing) | The AI has a question or needs your approval to continue. |
| Paused | Gray | You manually paused the session. It's frozen until you resume. |
| Error | Red | Something went wrong. Check the session for error details. |
| Ended | Gray | The session finished its work. |
| Archived | Gray | You archived this session — it's hidden from the main view. |
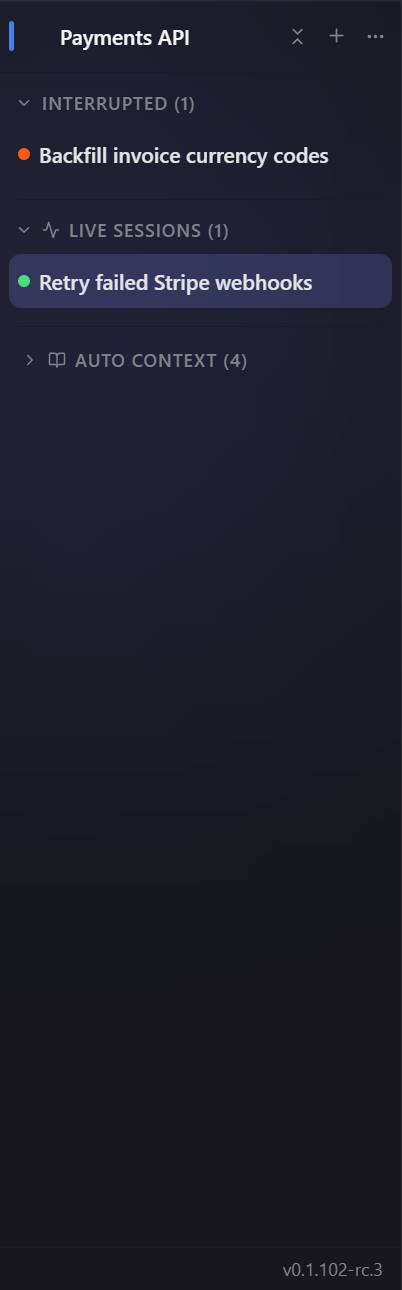
In a project's sessions sidebar these are grouped top-to-bottom into Needs You (sessions waiting on you — a question or an approval to continue), Interrupted (sessions whose process stopped or that hit an error or stalled — shown with an ember warning icon; revive one by sending it a message), Live (actively working or waiting on you), and Paused. Each group has a header you can click to collapse it, and the Interrupted group only appears when “show ended sessions” is turned on.
Errored and stalled sessions go quiet (updated 2026-08-11): a session that hits an error or stalls no longer pops into your Inbox, adds a project badge, or plays a chime. Instead it settles into the Interrupted group above — just like a session that ended — so you can get to it when you're ready without being interrupted. (One exception: if the app is already quietly reconnecting a dropped session, it stays in Live with a “Reconnecting…” dot until it comes back.) If a session truly can't recover on its own, it still surfaces in your Inbox as “Recovery failed” so you never lose track of it.
Project Count Badges
These session statuses roll up into small colored counts shown next to each project name in the sidebar, so you can see at a glance what's happening across a whole project without expanding it. They appear most-urgent first:
| Count | Color | What It Means |
|---|---|---|
| Red | Red | Sessions waiting on you in a failed state — you stopped it, auto-recovery gave up, or an API error. (Updated 2026-08-11: plain errored / stalled sessions no longer add a red count — they go quiet in the Interrupted group instead.) |
| Amber | Amber | Sessions waiting for your input — a question or an approval to continue. |
| Green | Green | Sessions actively running. |
Idle and finished sessions aren't counted, and a project with nothing going on shows no badge at all. The red count is split out from the amber one so a session that's waiting on you in a failed state never hides inside the “needs you” number. (Updated 2026-08-11: sessions that simply errored or stalled are no longer counted here, and no longer land in your Inbox or the tray badge — they settle quietly into the Interrupted group, like ended sessions, until you get to them.)
The same colored counts also ride on the “Sessions” tab of any feature panel that hosts AI agents — Tasks, The Vault, Mind Map, Flowchart, Whiteboard, and SMS — so you can tell an agent is running or waiting on you without switching to that tab. They follow the same rules: most-urgent first, only non-zero counts, and hidden while Focus Mode is on.
Managing Sessions
Right-click a session to see available actions:
- Pause / Resume — Temporarily stop the AI, then continue later
- Snooze — Hide the session from your inbox for a set time (15 min, 1 hour, etc.)
- Save — Bookmark a session to the collapsible Saved section in the sidebar. If a saved session later needs you, it pops back to Needs You until you handle it, then returns to Saved. Keyboard shortcut: B.
- Archive — Move the session out of your active view. You can still find it later.
- Move to — Re-file the session under a different project. Hover the row for a moment (or click it) and its submenu pops out — a searchable list of eligible projects appears; click one and the session moves immediately, with an Undo toast. Also available from the overflow menu at the top of an open session.
- End — Permanently stop the session
- Exports — A side menu for saving or sharing the transcript, grouped into sections by destination with dividers: Copy as Markdown to the clipboard and Copy since last compaction (just the most recent compaction onward — falls back to the whole thread if the session hasn't compacted yet); Export to Markdown (a
.mdfile), Export to Word (.docx) and Export to PDF; Export raw thread, a troubleshooting file with every message the session stored, word for word, each labelled with whether you saw it, could have expanded it, or never could (it is unredacted, so treat it as sensitive); Export to Google Docs; and Share the conversation as a read-only link (see Session Sharing). Export to Word and Export to Google Docs are off by default — turn Word on in Settings → Sessions and Google Docs on in Settings → Google Workspace; until then they stay hidden so the menu stays short. Apart from Export raw thread, the exports are visible-only — they contain just your messages and Claude's prose (including intermediate narration like “Let me check this file…”); the mechanical▸/←tool-call and tool-result lines are stripped, system rows are dropped, and turns that were only tool activity collapse to nothing rather than emit an empty### Claudeheader. A single line at the foot of the menu shows the size of what you'd export — words, characters, and tokens (e.g.1,234 words · 32k chars · ~7.1k tokens); “Copy since last compaction” shows its own smaller token count in parentheses when it differs, with the word/character breakdown on hover. - Fork / Aside — Start a side conversation branching from this session (see Asides)
Snoozing Sessions
When a session needs your attention but you're not ready to deal with it yet, you can snooze it. The session disappears from your inbox and reappears after the snooze period ends. Available snooze durations:
- 15 minutes
- 1 hour
- 4 hours
- Tomorrow morning
- Custom time
For custom times, you can type natural language like in 2 hours, friday 9am, compact shorthand like 805p or 8p, or tomorrow 6:00. When you skip the AM/PM marker on a clock time, the parser never picks sleep hours (12 AM–6 AM): hours 1–6 always resolve to PM (so tomorrow 1:00 means 1 PM tomorrow); for hours 7–12 after a day or date the time is genuinely ambiguous, so the palette offers both readings as two pickable rows (thursday 8 → 8 AM and 8 PM, so you pick the one you meant); and the word tonight forces evening (tonight 9 → 9 PM). Type the meridiem explicitly (6am) if you really want an early-morning time.
Typing a plain number is expanded into every interpretation it could mean, so you pick instead of guessing. A 3–4 digit number like 930 is read as a clock time and a date: it lists 9:30 PM, 9:30 AM (an ambiguous hour offers both, soonest first), then Sep 30 (the 9/30 date), then 930 minutes. 1231 lists 12:31 PM, Dec 31, and 1231 minutes. An impossible clock or date is skipped — 931 offers no “Sept 31” — and a smaller number keeps the older behavior (9 → 9:00 clock plus N minutes/hours/days).
The box also understands a much wider range of everyday phrases: the clock before the day (5pm tomorrow, eod friday), relative anchors (2 hours from now, a week from friday), business days (3 business days, skips weekends), ordinal days (the 15th, 25th of march), holidays (christmas, thanksgiving, christmas 9am), bare months (june, early august), vague waits (soon, shortly, in a while), end-of-period phrases (eom, eoy, cob), mealtimes (lunch, dinner, after work), and leading filler words (on friday, remind me in 2 hours, wake me at 7 all strip the filler automatically). Typing next monday when the nearest Monday is only a day or two away offers both This Monday and The following Monday; typing by friday offers both Friday 5 PM (End of day) and Friday 8 AM (Morning).
Archiving Sessions
Archiving a session hides it from your regular view but doesn't delete it. You can find archived sessions by searching or through the session history. Middle-click a session on desktop to quickly archive it.
Omniscio automatically cleans up blank sessions (ones where no messages were ever sent) when you start a new session in the same project.
Guided Missions (Windows)
On Windows, Omniscio offers guided missions — short, coached experiences that run inside the regular session panel as interactive cards. Four missions are available:
- Computer health check — scans for cleanable space, desktop clutter, and duplicate photos, then offers a one-click reversible tidy-up. This mission launches automatically the first time you create a project after setup.
- Start my first project — takes an idea you have in your head and sets up a folder with a plain-language plan and a starter file you can open right away. All undoable — one button removes everything the mission created, leaving the rest of your computer exactly as it was.
- Teach Omniscio about me — a short interview that asks a few friendly questions (what to call you, what you're working on, how you like answers), then saves a tidy “About me” block into your Custom Agent Instructions so every future session starts already knowing you. Fully reversible — one tap removes the saved profile and restores whatever you had before.
- Set up my daily briefing — picks a morning hour for your once-a-day digest of Omniscio activity, emails, calendar, and chats, then switches it on. Re-running the mission at any time just updates the hour. Fully reversible — one tap turns the digest back off and restores your previous settings.
To run a guided mission, click the Run a guided mission button that appears in any blank session (a session with no messages yet) or as a secondary action on the project empty-state panel. A small picker lets you choose which mission to start. The mission runs right there in the session, walking you through each step with buttons — no typing required until you want to.
How “Teach Omniscio about me” works
When you choose this mission from the picker, Omniscio starts a short, friendly conversation — four light questions you can answer (or skip) at your own pace:
- Kickoff — “Want me to learn a little about you?” → Yes, get to know me or Maybe later.
- Interview — A few plain-English questions: your name or preferred nickname, what you’re working on, how you like answers. Each one is skippable.
- Confirm — “Here’s what I’ll remember about you:” followed by a short summary. Tap Save it to apply, or Tweak something to go back.
- Done — Confirms the save and points you to Settings → Agent Instructions if you ever want to edit the profile by hand. An Undo button is always shown and restores the exact text you had before.
The profile is stored inside a clearly-marked section of your Custom Agent Instructions field — it never overwrites anything you had already written there. Re-running the mission later updates the same section in place.
How “Set up my daily briefing” works
When you choose this mission from the picker, Omniscio walks you through four quick steps:
- Kickoff — “Want a friendly summary of your day each morning?” → Yes, set it up or Maybe later.
- Pick a time — Choose one of the suggested slots (Early bird 6 am, Morning 8 am, Midday 12 pm) or enter any hour you prefer.
- Confirm — “Your briefing will be ready around <time> in Briefings…” → Turn it on to apply, or Tweak to go back and change the hour.
- Done — Confirms the digest is on and points you to the Generate now button if you want to see a sample straight away. An Undo button is always shown and restores the exact settings you had before.
The digest pulls from your connected sources (Omniscio activity, email, calendar, chats) — sources you haven’t connected simply don’t contribute, so you can turn the briefing on before everything is hooked up. Re-running the mission only updates the hour; your source settings are never touched.
Guided missions are currently available on Windows only. macOS and Linux support are planned for a future release.
Chat Interface
How to interact with your AI agent in a session.
The chat interface is where you communicate with your AI agent. It works like a messaging app — your messages appear on one side, and the agent's responses on the other.
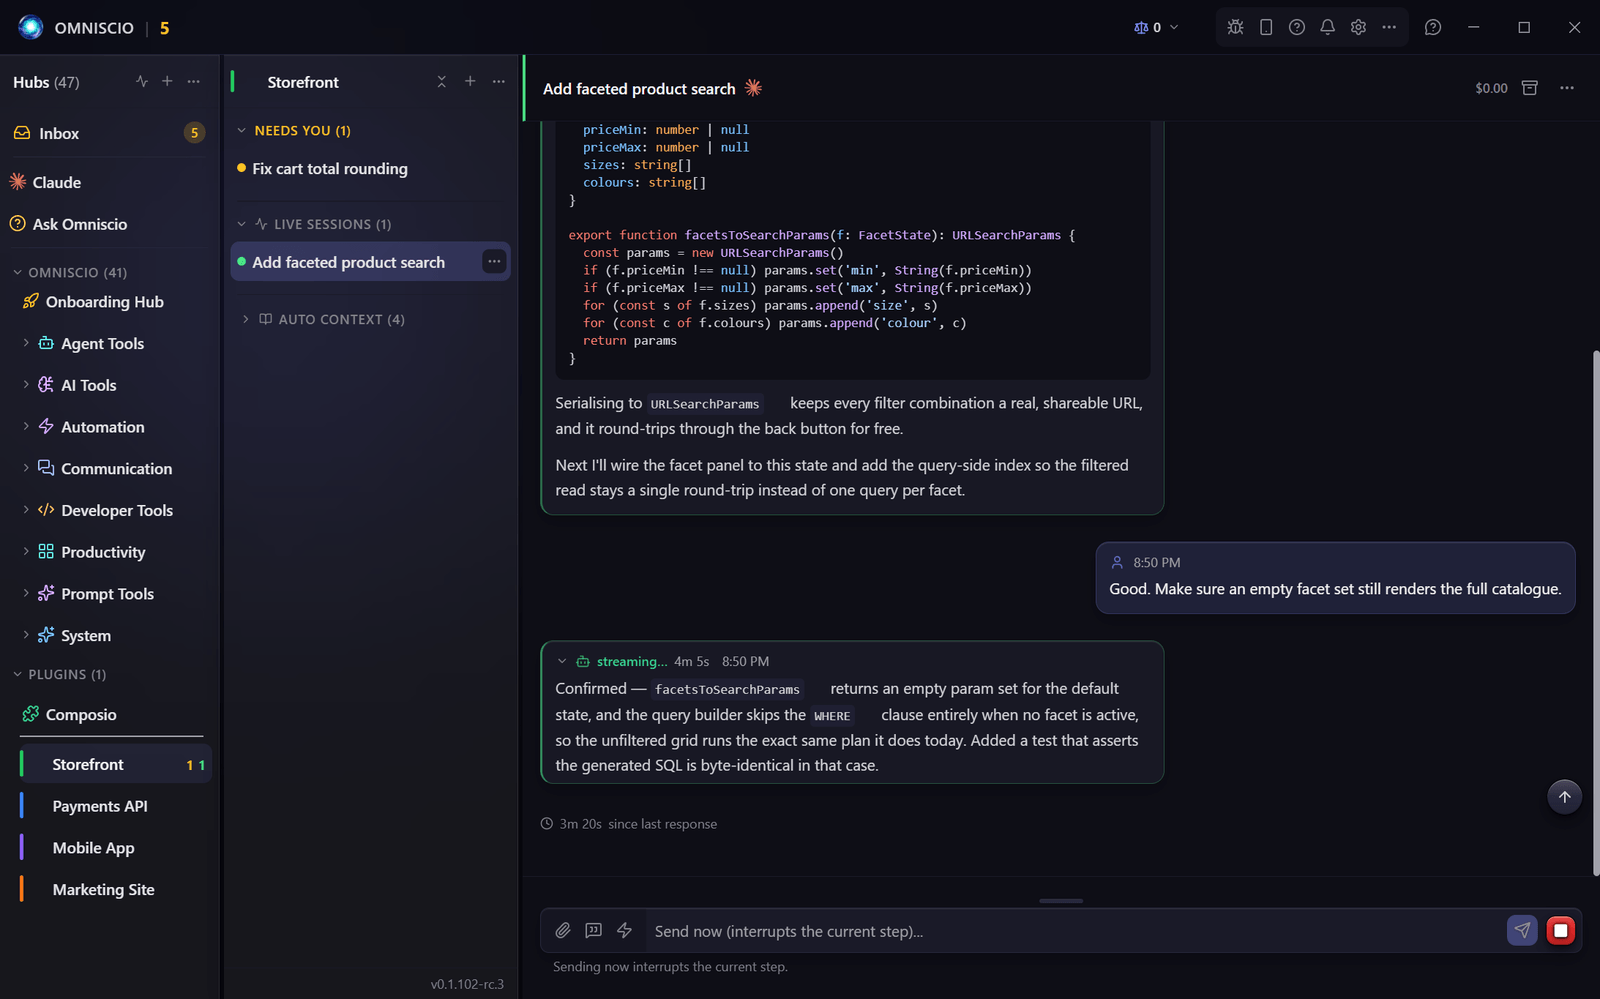
Sending Messages
- Type your message in the input area at the bottom
- Press Enter to send
- Press Shift + Enter for a new line without sending
- Press Ctrl + Enter as an alternative way to submit
Paste from anywhere. When a session is open, Ctrl + V (or Cmd + V on macOS) lands in this composer even if your focus is on the sidebar, the toolbar, or anywhere else — you don't have to click into the textarea first. The redirect is skipped when a modal is open, when your focus is already in some other text field, or when the session is ended / archived / paused.
List auto-continuation
When you're typing a bulleted (- , * , + ) or numbered (1., 2)) list in the composer and press the newline key, Omniscio pre-seeds the next line with the next marker so the list keeps going — numbered lists auto-increment (1. → 2. → 3.), bullets repeat, leading indentation is preserved. Press the newline key on an empty list item (marker present, no content after it) to exit the list. With the default submit key (Enter), the newline gesture is Shift + Enter; with Ctrl+Enter submit mode, it's plain Enter. Toggle the behavior at Settings → Sessions → List auto-continuation (default on).
Slash-command menu for skills
When you type / at the start of a message, Omniscio opens an autocomplete menu of your installed skills — each row shows the skill's /command and a one-line description, and the list filters as you keep typing. Use ↑ / ↓ to move the highlight, Enter or Tab (or a mouse click) to insert the chosen /<skill>, and Esc to dismiss. It only triggers on a leading slash, so a slash in the middle of a sentence (like and/or or a /path/to/file) is left alone. The menu lists the skills in your ~/.claude/skills folder plus any installed plugin skills (a plugin skill inserts as /<plugin>:<skill>). Built-in commands like /clear aren't in the menu — type those yourself. Toggle the menu at Settings → Sessions → Slash-command menu for skills (default on).
Fast typing in large sessions
On a very large session (thousands of messages), typing into the message box can start to feel laggy — characters appear a beat after you press the key. Omniscio isolates the message box so a keystroke only updates the box itself instead of re-drawing the whole chat panel, which keeps typing smooth no matter how big the conversation is (the lag is most noticeable in development builds). This is on by default; you can turn it off at Settings → Sessions → "Fast typing (isolated composer)". It's a live toggle — flip it off at any time, with no restart, to return to the classic composer. Drafts, paste, quick replies, voice, and scheduled send all work exactly the same either way.
Message Types
You'll see different types of messages in the chat:
- Your messages — What you typed or dictated
- Agent messages — The AI's responses, including code blocks, explanations, and tool usage
- System messages — Status updates like "Session ready," "Rate limit cleared," or "Conversation compacted"
By default, the chat panel shows just your conversation with the agent and folds away the "plumbing" rows Omniscio generates around it — plain system status events, the "Please continue" prompts Omniscio sends on your behalf (auto-continue, rate-limit / crash / restart recovery), and away-mode auto-replies. If you need to confirm that plumbing is working for a particular session, turn on Show system messages: open that session's three-dot (overflow) menu → More → Filter Messages → Show system messages. It reveals those rows for that one session only, remembers the choice across app restarts, and changes only what's shown — nothing is stored or deleted differently. Status markers like compaction dividers, snooze markers, auth-retry, and rate-limit notices always stay visible whether or not the toggle is on.
Inside an agent's reply, Omniscio also folds each turn's working steps — the tool calls and "let me check that" notes — into a collapsed activity row, leaving the agent's final answer on its own (click the row to see the steps). Omniscio normally works out where that final answer begins on its own. If you'd like it to be exact, turn on Settings → Features → "Show only the final message" (off by default): each session is then taught to mark the start of its final answer, and Omniscio shows you that answer, tucking the working steps before it into the activity row. It never folds a substantive answer away — if the agent marks a bare question or a one-line sign-off, the answer above it stays visible too. It falls back to the automatic behavior whenever a session doesn't mark its answer — so it can only sharpen the split, never break it. A nested option, "Always hide everything before the marker (even without tool activity)", makes that cut absolute: with it on, Omniscio hides everything before the marker even on a plain answer that used no tools, tucking it all into the collapsible activity row (still one click away, never deleted). Off by default; turn it off to restore the standard behavior. A second nested option, "Show every final message when an agent posts more than one", covers a turn where the agent marks more than one final message (say a report and then a sign-off): with it on, Omniscio shows all of them instead of only the last, folding just the work between them into the activity row. Off by default. A third nested option, "Show marker location (debug)", is a diagnostic view: with it on, Omniscio draws a small labelled [[AMC_FINAL]] divider exactly where the agent placed the marker instead of hiding it, so you can see where agents are putting it — it changes nothing about what folds and appears only on turns that actually used the marker. Off by default.
Hovering a link shows its page title
When an agent's reply contains a normal web link (an http:// or https:// URL), hover the link to see a tooltip with that page's actual title — the article headline, the repo name, the video title — instead of just the bare URL. The link's domain appears instantly and upgrades to the real title a moment later, once Omniscio has fetched it; each link is looked up only once. If a page can't be reached or has no title, the tooltip just shows the domain. This is a desktop convenience — on a phone (no hover) the preview never appears and Omniscio makes no web request for it. The fetch runs safely behind the app (only public http(s) pages, never your own machine or private network). The first link of a reply still also shows its Open with Ctrl+Shift+Q keyboard hint.
Re-run from a message (Edit & re-run)
Want a do-over from an earlier point — to reword a message you already sent, or take the conversation a different direction after an AI reply? Hover any message and pick "Edit & re-run from here" (on one of your own messages) or "Re-run from here" (on an AI reply) from its three-dot menu. A small box opens — pre-filled with your message so you can reword it, or empty so you can type the next one — and Ctrl + Enter starts a brand-new session that already knows the conversation up to that point. You land in the new chat with a "Spawned by" link back to the original, which is left completely untouched.
The new session shows the whole earlier conversation with your edited message in place, so it reads like the same chat continued rather than a blank new session. (If the conversation is very long, the assistant only keeps the most recent part in its memory — a small note says so — but you still see all of it above.) It's the way to reword a prompt or explore a different direction without losing your earlier work. The new session runs on the same engine and model the conversation was already using, so you get the same assistant with your correction applied.
Copying a message
Hover any message and open its three-dot menu to copy it. Copy Markdown and Copy Formatted copy the agent's final answer — the same clean reply you see in the bubble, without the tool calls and “let me check that” working notes. On an agent message you also get Copy everything, which opens into As Markdown and As Formatted and copies the whole transcript for that turn instead: every tool call and result, the agent's intermediate narration, and the final answer — the same working steps Omniscio folds into the collapsed activity row. Reach for Copy everything when you want the full trail (to paste into a document, a bug report, or a note); use Copy Markdown / Copy Formatted when you just want the answer. In both, Formatted keeps headings, bold, lists, and code intact for pasting into Word, email, or Google Docs, while Markdown is plain text you can paste anywhere. (One caveat: an agent's private “extended thinking” is never stored, so “everything” means the visible working steps and narration, not the raw hidden reasoning.)
Copying a table. A table inside a message has a three-dot menu at its top-right (hover the table to see it on a computer; on a phone it is always there) with two ways to copy: Copy as Markdown, or Copy table for Excel / Google Sheets. Pick the spreadsheet one when you want the table to land in Google Sheets or Excel as real cells — a markdown paste drops the whole thing into a single cell, because a spreadsheet only splits a paste that carries an actual table. If the rich copy is blocked, it falls back to a tab-separated version that also fills cells.
Code Blocks
When the AI shares code, it appears in nicely formatted code blocks with syntax highlighting. You can copy any code block with one click.
Quick Replies
If you find yourself typing the same responses often (like "yes, go ahead" or "run the tests"), you can save them as Quick Replies. These are reusable snippets you can insert with one click via Alt + S, pin to an Away Mode rule, or fire from an Automation. See Quick Replies.
To manage your library, open the Quick Replies virtual hub in the sidebar.
Each quick reply can optionally be pinned to a specific engine and model — so a canned task always runs on the setup you want instead of the session default. In the reply's editor, open the Behavior tab → Advanced options and flip on Run on a specific engine & model (off by default, so the reply just uses whatever the session is set to). It shows the exact same engine, model, and thinking pickers you use when starting a new session. The pin takes effect when the reply starts a brand-new session; in a chat that's already going it sends on that chat's current engine.
The lightning-bolt (⚡) button in the message toolbar is your Zap — one click (or Alt + Z) instantly sends a single preset reply, the "yes, keep going" button for when the agent just needs a go-ahead (right-click it to change the preset). On a blank session — one you haven't talked to yet — it now asks "Are you sure?" first: the bolt turns amber, and a second click actually sends. That stops an accidental click from firing your canned reply as a brand-new session's opening message, when there's nothing to reply to yet. It only does this on blank sessions — in a conversation that's already going, one click still sends right away. Don't want it? Turn it off at the Quick Replies sidebar entry → its Settings tab → "Confirm on a blank session" (it's on by default).
Not sure what to save? The Eligible phrases tab there lists every phrase you type a lot (skipping ones you can already send in one tap, like your Zap reply) — save any as a quick reply in one click, or dismiss the ones you don't want. It's the browse-all companion to the inbox nudge that offers your most-repeated phrases automatically.
The reverse happens automatically too: when a saved quick reply goes unused for 30+ days, Omniscio drops a card in your Inbox offering to remove it in one tap — with an Undo (a button on the toast, and Ctrl + Z) that restores it exactly. It never touches your built-in replies and never nags about the same one twice. Turn it off at Settings → Features → "Suggest removing quick replies you no longer use".
Markdown Support
Agent responses render full Markdown, including:
- Headers, bold, italic
- Ordered and unordered lists
- Code blocks with syntax highlighting
- Links and images
- Tables
- Mermaid diagrams (flowcharts, sequence diagrams, etc.)
- LaTeX math expressions
Scroll Behavior
While the AI is actively working (green status), the chat automatically scrolls to show the latest output. If you scroll up to read earlier messages, Omniscio respects that and stops auto-scrolling until you scroll back to the bottom.
When you reopen a finished session, Omniscio lands you on the last real reply — it skips past the agent’s automated “waiting on the build…” status notes so you don’t have to scroll down to find the real answer. It also never scrolls above your most recent reply, and counts a reply your auto-reply rules (or Inbox Pilot) sent on your behalf as your reply.
Two small navigation arrows sit at the bottom-right while you’re reading a thread. The down arrow jumps you to the latest message — it shows whenever there’s more conversation below where you’re looking (sized so it still appears on a short phone screen). The up arrow steps back one message per tap, so you can walk up a long thread tap by tap. To jump all the way to the top of the thread, press and hold the up arrow on a phone, or Shift- (or Ctrl-) click it on desktop.
Activity Widget (Loads on Click)
Each agent reply is one bordered card: a header row on top — chevron, bot icon, and a short activity summary like "5 comments · 5 tool calls" — with the agent's actual answer beneath it. The summary counts the work the AI did that turn (files read, commands run, web searches, and the connective notes between them), and it stays visible even while collapsed so you can tell at a glance whether a turn did enough work to be worth opening. The answer itself is always visible — you never have to expand anything to see what the agent said.
Clicking the header expands it and loads that turn's tool detail on demand. Closing it releases the detail from memory. This is what makes long sessions feel instant even when they contain thousands of tool-heavy turns: Omniscio only pays for the activity bytes for the turn you actually want to look at, when you click.
While the agent is actively working on the current turn, the header is auto-expanded so you can watch the tool work as it happens. The instant the turn settles it auto-collapses back to the header row, keeping the activity-summary count on view.
A live timer sits next to the "streaming…" label so you can see how long the agent has been working on the current turn. It counts up once a second — 5s under a minute, 1m 45s up to ten minutes, 12m past ten minutes, 1h 2m past an hour — and keeps ticking even if you expand the bubble. When the turn finishes, the timer freezes into a took 1m 30s badge shown in the turn's expanded view (the collapsed header keeps the activity count, not the duration), so opening any past turn tells you how long that answer took to produce.
Tap an item inside the expanded view (a file read, a search result, etc.) to peek at the full content. Clicking outside or pressing the bubble again collapses it back to the summary.
Opening Long Sessions
Sessions of any size open in a few hundred milliseconds — even threads with thousands of messages. The chat shows the cleaned-up reply text immediately, with each turn's activity collapsed to its header summary; the heavy tool-detail bytes load lazily when you expand a turn (see above). This is true on desktop and on the mobile / phone web view.
Attachments
Send files and images to your AI agent.
You can attach files to your messages so the AI can see and work with them.
Supported File Types
| Type | Formats | How It's Used |
|---|---|---|
| Images | PNG, JPG, GIF, WebP | AI sees the image visually (up to 30 MB) |
| PDFs | AI reads the document content (up to 32 MB) | |
| Text files | .md, .txt, .csv, .json, .html, .xml, .log, .tsv | Saved to project folder; path shared with AI (up to 32 MB) |
Microsoft Office files (.docx, .xlsx, .pptx) are not supported — the AI can't read these formats directly. Convert them to PDF first, or copy-paste the content.
How to Attach
- Click the attachment button (paperclip icon) in the chat input area and select files
- Capture a screenshot of Omniscio (camera icon, next to the paperclip) — snaps a picture of the current Omniscio window and attaches it, so you can show the AI exactly what's on your screen. Off by default — turn the button on at Settings → Sessions → "Screenshot button". Desktop app only.
- Drag and drop files anywhere onto the conversation window — the whole panel becomes the drop target
- Paste images from your clipboard with Ctrl + V
- Paste text — long pasted text (over 5,000 characters) automatically becomes a "chip" attachment
Convert a PDF to Markdown — once a PDF is attached, click the small convert button on its chip to extract its text on-device (free, private, no upload) and swap the PDF for a Markdown text chip that sends inline with your message. It's text-only: a scanned / image-only PDF yields little (there's no OCR).
The File Converter tool
File Converter is a standalone, on-device converter for any supported format — documents (PDF ↔ Word / Markdown and more), images (including HEIC iPhone photos), spreadsheets, audio, and video — free and private, with nothing uploaded. It is in development and off by default: turn it on at Settings → Features, then open it from the toolbar to drag or pick a file, choose a target format, and convert. It works on desktop and on your phone.
It also has an optional Download from web mode — a separate switch you turn on in addition to the converter (Settings → Features, desktop only, off by default). With it off, the File Converter stays conversion-only; with it on, you can paste a link (YouTube, Vimeo, and similar) and save the video or audio to your Downloads. Only download media you have the right to.
Viewing Sent Images
Click any image you've attached to a message to open it. On desktop it opens in a centered viewer card sized to the image — the filename, a position counter, and Copy / Close buttons sit in the card's header, and your workspace stays visible behind a dimmed backdrop. The image opens fitted, never blown up: a small image shows at its actual size, and even a tall full-page screenshot shows whole (capped at about 80% of the window). From there you can scroll to zoom in (or double-click) and drag to pan around it. On a phone the viewer is full-screen with pinch-to-zoom. Use the arrow keys (or the on-screen arrows) to step through several images in the same message, and Esc or a click outside the card to close.
Session Sharing
Share your AI conversations with anyone via a link.
You can turn any AI session into a read-only web page that anyone can open in a browser — no account, no Omniscio install. It's great for showing a colleague what an agent did, sharing an interesting conversation, or keeping a public record of a piece of work.
The shared page shows the AI's written answers in a clean, readable layout — the behind-the-scenes tool steps (files it read, commands it ran) are left out, so the page reads like a finished conversation rather than a work log.
What You Can Share
- A whole conversation — right-click the session and choose Share (the dialog defaults to the full conversation).
- A single message — right-click one message bubble and share just that.
- A highlighted selection — select some text, right-click, and share only what you picked.
How to Share
- Right-click the session (or a message, or a selection) and choose Share.
- Pick how long the link should stay live, plus any options you want (below).
- Omniscio publishes a snapshot and copies the link to your clipboard.
- Anyone with the link can read it in their browser.
Link Options
- Expiration — every public share carries an expiry: 1 hour, 24 hours, 7 days, or 30 days.
- Password — require a password to open the page. It's hashed on your machine before it ever leaves Omniscio — the plaintext is never sent or stored.
- View cap — limit how many times the link can be opened.
- Notify on view — get a desktop notification the first time someone opens it.
Managing Your Shares
Open Shares in the left sidebar to see every link you've published, each with its view count, last-viewed time, and a "Protected" badge for password-gated links. From there you can revoke a link instantly (it starts returning a "revoked" page), edit its label / expiry / password / cap, or delete it.
Smart Share Reaper (optional, off by default) keeps that list from filling up with forgotten "never expires" links: it finds shares and screen recordings that are over a year old and have never been viewed, gives each a 90-day grace expiry rather than deleting anything outright, and drops a single inbox card asking you to Keep it or let it expire — so an old link you still want is one click from permanent again. Turn it on under Settings → Sharing.
Custom share URL name (paid, Pro+) lets you replace the random token in a share link with a memorable name — shares.omniscio.com/s/my-report instead of a long hex id — and optionally mints a short omnisc.io/<code> link for the same page. If the name you pick is already taken, the share simply keeps its random link. Turn it on under Settings → Sharing.
Shared sessions are read-only snapshots — viewers can't interact with your agent, and the link isn't indexed by search engines. But anyone with the URL can view it, so use an expiration (or a password) for anything sensitive, and revoke a link when you're done with it.
Inbox
Everything that needs your attention in one place.
The Inbox is one of Omniscio's most powerful features. It collects every item across all your sessions and integrations that needs your human attention. Think of it like an email inbox, but for AI agent requests.
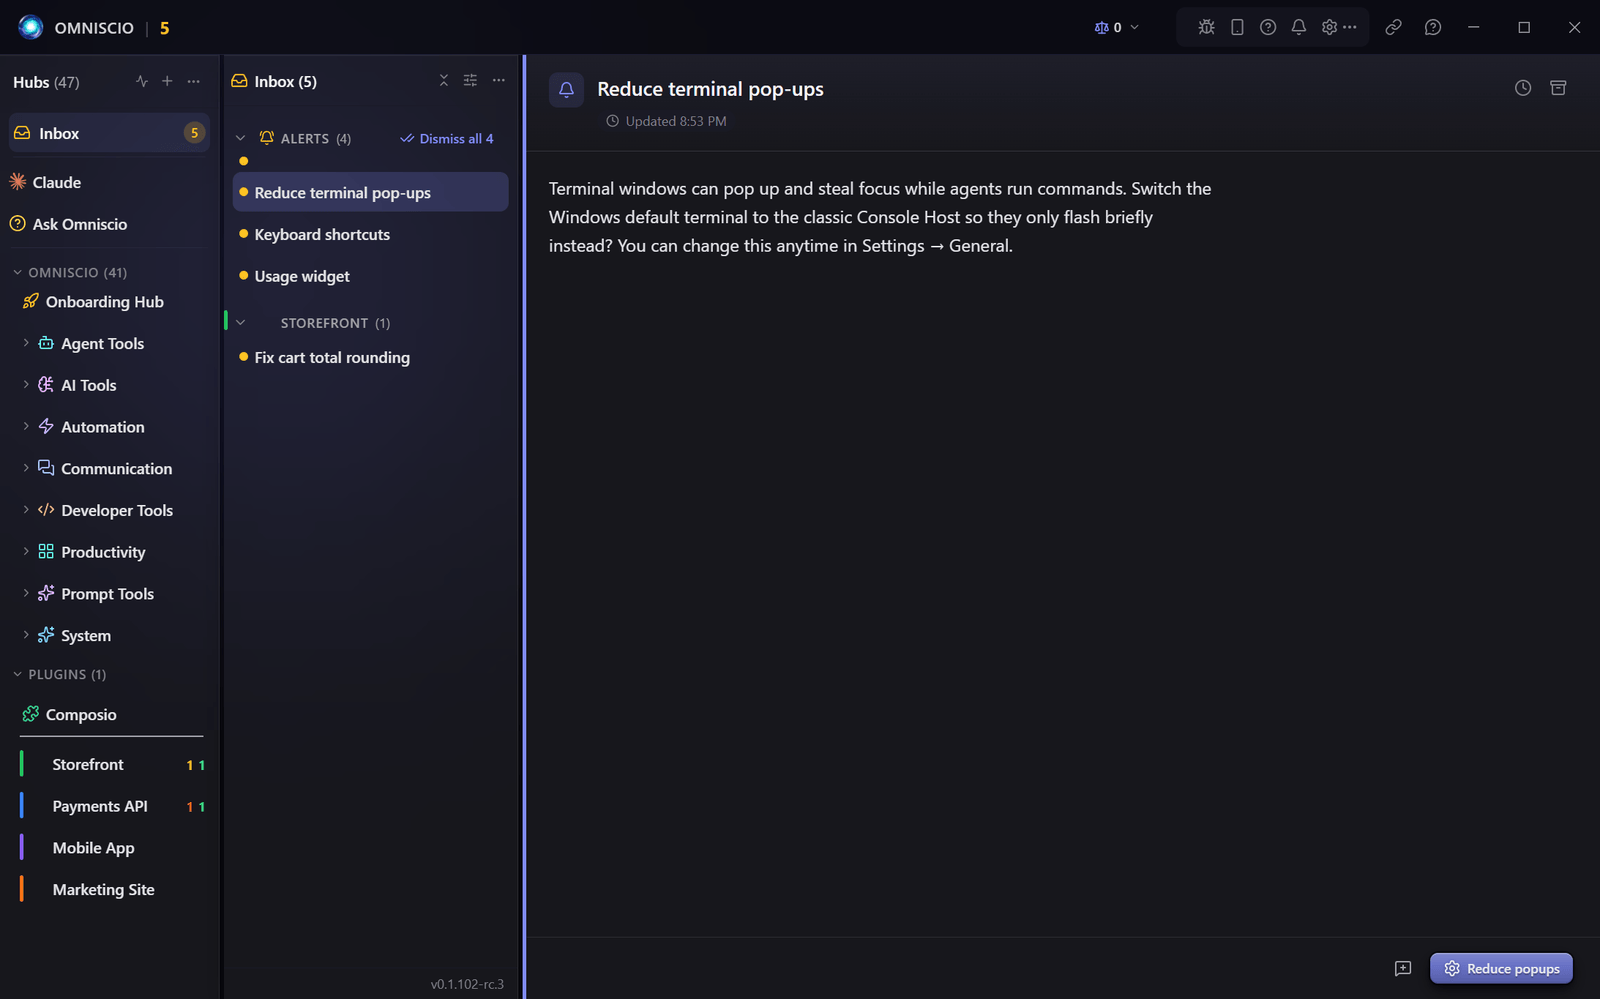
What Appears in the Inbox?
- Sessions needing attention — Any session with status "Needs You" (the AI asked a question or needs approval). (Updated 2026-08-11: sessions that merely errored or stalled no longer appear here — they go quiet in the sidebar's Interrupted group. Only a session that truly couldn't recover shows up, as "Recovery failed.")
- Cron job approvals — Scheduled tasks waiting for your approval before first run
- Automation approvals — Automation rules that need your sign-off
- Recipe approvals — Recipe steps that require human review
- CLI pending requests — Actions requested via the CLI API that need approval
- SMS messages — Incoming text messages (if SMS integration is set up)
- Daily digest — Summary notifications
- Drip items — Queued reading / link / file items released into the inbox on a cadence you control (see Drip)
- Connection requests — Incoming Team Chat connection requests from other people, shown even if you haven't turned Team Chat on yet
- Team Chat messages — A new message that would notify you (a direct message, an @mention, or activity in a channel you haven't muted) also drops a row here — one per conversation — so you can catch up even if you missed the pop-up. Click it to jump into that conversation; it stays until you dismiss it.
Approving several at once: when approval cards pile up, you don't have to approve them one at a time. The Approvals section shows an “Approve all” button that clears the whole group in one click (with a quick confirm), and you can also select several rows and approve just those together. Each one is still checked individually, exactly as if you'd approved them one by one. Two cards are the exception: the one that deletes old branches, and the one that lets a branch through after a safety check refused it. Approving either does something big, so “Approve all” and “Reject all” leave them where they are, and you decide each on its own card.
Approvals in their own window: the Approvals row in the sidebar (under System) lists the same pending agent approvals. Pop it out with Open in new window and clicking an approval opens it right there, ready to approve or deny — handling one moves you to the next. The list keeps itself up to date there too: new requests appear, and ones handled elsewhere drop off.
Approvals inside the conversation: an approval an agent raises also shows up as a card just above that session's message box, so you can answer it without leaving the thread. The card shows at most four lines of the request and two of the agent's reason, so its Approve and Decline buttons always stay on screen, even on a phone; tap Details to read everything. When several cards are waiting at once, they share an area that scrolls, so every button can always be reached. A card asking you to approve a change to outside packages names the branch and how many files it changes; Details lists the files and each package the change adds, removes or updates, with its old and new version, and says when a file also changes other install settings.
Switching to Inbox View
Click the "Inbox" tab at the top of the left sidebar. The badge number shows how many items need attention. Inside the list, each project — and each source like Approvals or SMS — also shows its own count in parentheses next to its name, so you can see at a glance where your attention is needed.
Working Through the Inbox
You don't have to click each item to begin — the Inbox keeps one open for you. Finish the current item and it drops you straight into the next, and if a session starts needing you while you're looking at the empty "All clear" screen, it opens on its own. You're always looking at the thing that needs you, never a stale empty pane. The list scrolls to follow your selection, too — clear an item and the next one is brought into view, even if it sits above where you'd scrolled, so it never ends up hidden off-screen.
And if a session you're reading comes back to life on its own — it was waiting on you, then a background check-in starts it working again — you stay on it and watch it run, instead of being bounced back to "All clear." Anything new that needs you waits in the sidebar with its badge until you're ready for it.
Approving with the Keyboard
When an approval is open — a settings change, a session pause or archive, a cron job, a recipe, and so on — you can act without the mouse: press Enter to approve and X to reject. A faint reminder sits in the corner of the approval. Typing in a text field won't trigger them, and holding a key won't blast through your whole queue — each press counts once. (These two keys are fixed, not rebindable.)
Settings-change approvals read in plain English, too: instead of Set quickLaunchTabHotkeys: {"calendar":"CommandOrControl+Alt+J"}, you'll see "Set Quick Launch shortcuts (Calendar) to Ctrl+Alt+J" — the raw details are still one click away under Show technical details.
Multi-Select
You can select multiple inbox items at once to batch-process them:
- Shift + click to select a range
- Shift + J / Shift + K to extend the selection
- On mobile, long-press to start multi-select mode
- The session or item you already have open is included automatically — tap (mobile) or click (desktop) it to leave it out
Once multiple items are selected, you can act on them all at once. Archive them together, or right-click the selection for the full set of bulk actions — Pause / Unpause, Stop, Restart, Snooze, Pin / Unpin, Move to another project, Set color, and Copy link — each applied to the sessions you selected, with a single Undo where the action supports it.
Archiving Inbox Items
- Desktop: Middle-click (mouse wheel click) an item to archive it
- Mobile: Swipe or use the close button
Snoozing Inbox Items
Every row in the Inbox is snoozable — sessions, SMS conversations, Telegram chats, fired alarms, cron / automation / recipe / recipe-authoring / CLI Pending approvals, RSS articles and digests, drip items, the daily digest, and weekly summaries. Right-click any row to see a Snooze submenu with preset durations (2 hours, this evening, tomorrow morning, etc.) or pick Custom... to type a natural-language time like in 2 hours, friday 9am, or compact shorthand like 805p — the same Snooze Palette and the same smart AM/PM defaulting as session snooze. The row disappears from the Inbox immediately and reappears automatically when the snooze expires (checked every 60 seconds). A fired-alarm row also keeps its inline Snooze 9m button for one-tap dismissal.
Notification History
Toasts — the small pop-up notifications in the corner — disappear after a few seconds, and on a phone they now stack behind each other as a compact deck (newest in front) so a burst never fills the screen. To look back at ones you missed, open Notification History from the System group in the sidebar — it works the same on desktop and mobile. It has two tabs: Toasts, a saved list of recent pop-ups that survives restarting the app, and Alerts, the full history of agent alerts you've dismissed (beyond the Alerts screen's last-7-days view) — each one can be Restored back into your current alerts.
Who Triggered This? (Provenance)
When an AI agent makes a request through Omniscio's CLI control API — creating an approval or spawning a new session — Omniscio records which session caused it, so you can trace it back:
- "Generated by <session>" — shown in an inbox item's detail view (open the approval, or open an agent-raised alert) for agent/CLI-created items. On a pending approval it also shows the exact date and time it was generated. Click the session name to jump straight to the agent that caused it.
- "Spawned by <session>" — when one agent spawns another, the new session opens with a pinned note at the top linking back to its parent. Follow the chain to see who spawned what.
- "via CLI · from <session>" — when an agent sends a turn into a session over the CLI (a message, a nudge, a peer message, or a scheduled reply), that turn's bubble carries a small tag linking back to the sender — so an injected message reads as from that agent instead of an anonymous "You" turn.
- "injected by <sender>": when Omniscio itself sends a note into an agent's session (your Inbox approve or decline, an Auto-lander or Gate watch result, a scheduled wake-up), the transcript shows it as a short card that says what happened in plain words. Click Show the original note to see the exact text the agent received; the agent's own copy is never changed.
Agents that Omniscio launched identify themselves automatically. A request you make by hand (or an external script) simply shows no origin — provenance is a tracing breadcrumb, not a security check.
The Inbox automatically sorts items by urgency. Sessions that have been waiting longest for your attention appear first.
Away Mode
Let Omniscio handle agent questions while you're away from your computer.
Away Mode automatically responds to your AI agents when they ask questions. It's like an out-of-office auto-reply, but for your coding sessions. When enabled, Omniscio will answer common agent questions on your behalf so work keeps moving.
How to Enable
- Open the Automations entry in the sidebar and switch to the Auto-replies view — the Away Mode rule set lives there, not in Settings.
- Toggle "Away Mode" on.
- Set your default auto-response message (e.g., "I'm away. Use your best judgment and continue.").
- Optionally, create specific rules for different scenarios.
Creating Rules
Rules let you customize how Omniscio responds based on what the agent is asking. For example:
- "If the agent asks about testing" → respond with "Yes, run all tests"
- "If the agent asks about deploying" → respond with "Do NOT deploy — wait for me"
- "If the agent asks anything else" → respond with the default message
Each rule has:
- A condition — What triggers this rule (keywords, patterns, or "any question")
- An action — What Omniscio does when the rule matches
- Priority — If multiple rules match, the highest-priority one wins
Beyond a plain reply, a rule's action can also organize the session — in one step, give it a new title, apply a tag, and set a custom inbox color (fill in any combination). It can also rename it, archive it, start a new session, or drop a note in your inbox. "Organize the session" is handy for triage: when an agent reports it's done, a rule can retitle it "Ready for review" and tint it green so it stands out at a glance.
A session's color shows as a thin colored bar on its row in the inbox and sidebar — alongside, never replacing, its status dot. You can also set or clear a color by hand: right-click a session and choose Set color (pick a swatch, or No color to clear it).
Auto-replies are loop-safe: if a rule keeps replying to a session that has nothing left to do, Omniscio stops after a few tries and surfaces the session to you with a short note — so a rule left running overnight can't quietly spend turns in a loop. It picks back up as soon as the agent does real work again.
Silence Until
You can set a "Silence Until" time, which mutes all notifications until that time. This works independently of Away Mode — you can silence notifications without enabling auto-responses, or use both together.
Away Mode is perfect for overnight coding sessions. Set your agents to work on tasks before bed, and configure Away Mode to handle questions. Check the results in the morning!
Dev Pipeline
A guided software-development workflow — plan, red-team, build, polish, document, and get a merge-ready branch — with you approving each step.
The Dev Pipeline turns "build me X" into a disciplined six-phase workflow your agent follows on its own isolated copy of your code. You approve at five checkpoints (called gates), and the run ends with a branch that's verified and marked ready to merge — the pipeline itself never merges or pushes anything — the auto-lander, which the Dev Pipeline arms, is what lands it afterwards.
Dev Pipeline Maintenance — turning the Dev Pipeline on also installs two housekeeping skills that keep your worktrees tidy: worktree-cleanup (reaps git worktrees whose branch has provably merged) and merge-all-ready (lands every local branch marked ready-to-merge, atomically and local-only). Once a day a background check looks over your worktrees and ready branches on the repos you had dev-pipeline activity in — it costs nothing and always leaves a receipt. It only starts those two skills when it finds something it cannot settle on its own, so on a tidy day nothing runs. Controlled from the Dev Pipeline panel's Setup tab (devPipelineDailyMaintenanceEnabled, on by default).
Returned cloud work — when a cloud session ends with changes, its work comes home as an ordinary branch and is registered for landing. With this on, the app lands that branch by itself, so you never have to run ready-to-merge on a returned branch by hand. Which way it does that depends on the project. For this project it tests the branch and marks it ready to merge, and the auto-lander takes it from there. For any other project it runs that project's own test command on the cloud machine — against the very files coming home, on the one machine where that project's dependencies are installed — and merges the result into that project's own main branch here on this computer, once those tests pass. Five things still wait for you: a branch that changes a dependency or that changes a project's own test setup, one whose files could not be checked for secrets, one whose check did not cover its own files, and one that came back with an answer nothing can change — a red check or a merge that will not go cleanly, a test run that could not start or ran out of time, a project with no test command, or a project folder with unsaved changes. The session's own transcript tells you what happened. Controlled from the Dev Pipeline panel's Setup tab (cloudReturnedWorkAutoLand, on by default; it does nothing unless you are using cloud sessions).
Turning It On
- Go to Settings → Features.
- Toggle "Enable Dev Pipeline skill" on. This installs the
/dev-pipelinecommand for every project (and reveals the Dev Pipeline panel in your sidebar). - In any session, type
/dev-pipelinefollowed by your task.
The Six Phases
- Plan — the agent investigates and presents a plan. Questions it genuinely needs you to answer appear right at the top.
- Red team — the plan is stress-tested through ten critical lenses before any code is written (small, low-risk tasks get a fast pass; big ones get full depth).
- Build — the work happens, test-first, with proof it's green.
- Polish — a cleanup pass that only makes safe, behavior-preserving tidy-ups; anything bigger is flagged for your call.
- Docs — documentation is brought in line with what changed.
- Ready to merge — one final full verification, then the branch is stamped ready. Done.
Standards Checks on Every Run
On top of those six phases, every run also does two quick standards checks that approve themselves unless they find a real problem: a pre-build check right after the red team, and a pre-merge audit right after docs. They keep each change lined up with your project's own engineering standards — reuse before building something new, the right shared components, tests, docs, security, and so on. Both appear in the Dev Pipeline panel's gate list, where you can turn either one's auto-approval off to have the run stop for your sign-off instead.
What they check comes from a plain file you can customize per repo: .claude/dev-pipeline/standards.md, with a "Before you build" section and a "Before you merge" section. Commit that file and it travels to everyone on the project. If a repo doesn't have one, the checks fall back to a sensible general standards file that ships with the skill — so they still help in any repo, and a missing file never blocks a run. To switch the two checks off entirely, set DEV_PIPELINE_DISABLE_BUNDLED_STANDARDS=1.
Gates and Auto-Approval
Each of phases 1–5 ends at a gate where you reply approve, give feedback, or stop the run. You decide this per gate: each of the five gates (Plan, Red Team, Build, Elegance, Docs) has its own switch for whether Omniscio approves it for you or always asks, plus a select-all toggle to flip them together (Settings → Features, or the Dev Pipeline panel). By default the Plan gate asks you while the other four approve themselves the moment a phase reports done — so a healthy run flows hands-free from your one plan approval to the finish line, and you can tighten or loosen any single gate.
Every gate report opens with a traffic-light dot that tells you at a glance whether you're needed: 🟢 green means nothing needs you (safe to just approve), 🟡 yellow means there's a question to answer, and 🔴 red means a serious call or a blocker. When the dot isn't green the title says so too (e.g. “Plan Not Ready — One Question”), and the little pipeline track under the report lights up to match.
Safety first: a gate report that asks you a question, or a plan gate at all, is never auto-approved — in any question format. And the final merge-ready stop never needs approval: the pipeline stamps the branch and stops. Nothing is ever pushed or merged by the pipeline itself — landing is the auto-lander's job, and turning the Dev Pipeline on arms it.
Getting Your Finished Work Onto master
A finished run leaves you a branch marked ready to merge — verified, but not yet part of your main branch. “Landing” is the last step that folds it in. Three ways to get there:
- Let the auto-lander do it (the hands-off option, and the default one). The auto-lander is already on: enabling the Dev Pipeline arms it for every hub the pipeline covers, and it merges every ready branch into that repo’s main branch by itself — locally, on your machine, while Omniscio is open. It only ever moves work forward and never writes to a remote. From the Dev Pipeline panel’s Setup tab you can narrow which repositories it watches, set one to observe-only, or turn it off entirely (the master switch also lives at Settings → Performance → Sessions). Watch it work on the Auto-lander tab.
- Ask for it once. In any session, say /merge-all-ready. It lands every local branch currently marked ready, one at a time. A branch that can’t land safely is skipped and reported, never forced.
- Do it yourself. The branch is an ordinary git branch — merge it however you normally would.
You don’t have to choose once and for all: the daily maintenance job described above will start merge-all-ready for you when it spots ready branches piling up in repos you’ve been working in — but it is a backstop, not a schedule. The auto-lander is what keeps the queue short day to day. And when a branch does land, you’ll see it twice — the session that produced it gets a green “Landed … to master” note, and the run is marked “Landed ✓” in the Timing tab.
Approving Changes to the Merge Tooling
While it merges your finished branches, the app runs a few small helper programs that come from your project. Together these are called the merge tooling. They used to run straight from whatever was on disk, so an edit to one of them quietly became code the app ran on the next merge, with nobody checking it first.
Now the app runs that tooling only from a version a person approved. When the tooling changes, the app raises one card in your Inbox asking you to approve the new version. It only appears when the tooling actually changed, so ordinary merges never show it.
The card tells you what you are approving:
- Which project it is, by name.
- How many tooling files changed, and their names.
- Which commits changed them.
It deliberately does not show a long commit id.
Approve and your merges switch to the new version. Decline and your merges keep using the version you last approved, and that exact version is not asked about again. Nothing is lost either way.
While a card is waiting, merges keep using the last version you approved. A waiting card never blocks your work, and it never runs anything new.
The app keeps its own copy of the version you approved, prepared from exactly that version and checked before every merge that uses it. The helper programs are pointed at that copy for that one merge only, so nothing else changes: your own merges, other projects and anything else running at the same time behave exactly as before.
If that copy cannot be prepared, or fails the check that it is still intact, the app does not quietly fall back to running whatever is on disk. The files those helpers would have handled are merged with the app's own built-in merge instead, and if it keeps happening you get a card telling you. There is one switch that puts the old behaviour back, and it is on by default; it is deliberately kept out of Settings, because the thing it turns off is a safety guarantee.
The Dev Pipeline Panel
Enabling the skill also reveals a sidebar panel. Its left rail has six tabs (five always, plus Agent Board when you have the Agent Status Board turned on):
- Live — every running pipeline grouped by project, with the step it's on, an amber "waiting on you" counter when one is parked at a gate (with a one-tap Approve), the run's approximate spend so far, and your git worktrees with guarded one-click cleanup.
- Timing — where recent runs' time and money went: working vs. waiting-on-you vs. stuck, plus an approximate cost per run and per phase, so you can spot bottlenecks and expensive steps.
- Agent Board — every agent Omniscio has launched, each a card with its status, workspace, pipeline step, and live to-do list. A card updates as soon as its agent does something, and the board is back the moment Omniscio restarts. A card also says when an agent started without a to-do tool, or when the to-do rule let it skip keeping a list. Click a card to jump to that session. This tab appears only when Settings → Workflow → "Agent Status Board" is on.
- Auto-lander — the queue and history of work reaching your main branch: what the lander is doing right now, which branches are lined up to land, and every branch it has landed, handed back on a conflict, or set aside as "Couldn't land". You can pause or resume the whole lander, or just one repository, from here.
- QA Fleet — the results of Omniscio's own background QA runs: the open findings it has raised, which you can resolve, dismiss, or reopen (with a one-click undo), per-feature end-to-end pass/fail, the features that have gone longest without being exercised, and a findings trend over time. It refreshes every 30 seconds, and shows an amber count when findings are open.
- Setup — the pipeline's controls in one place: gate auto-approval, the workflow companions, which repos are covered, custom phases, AI code review, Auto-Lander (per-repo config), worktree cleanup, git guardrails, and Repo Foundations. Under AI code review you pick which AIs double-check the work — every step that runs is listed, including any your repo sets for everyone, and you can switch one off for yourself without touching the team's setup. One switch at the top, Run AI code review steps, turns every review step off at once — even in runs already under way — while keeping your choices for when you turn it back on. A scorecard right below keeps score for each AI: how many reviews it did, the serious and minor problems it found that turned out to be real, its false alarms, and what it cost (“not reported” when its company shares no cost, never a made-up $0).
Git guardrails
Git guardrails protect your shared branches from every agent Omniscio runs — not just Dev Pipeline runs. When on, an agent is blocked from committing or pushing to a protected branch (master/main), editing files while a repo sits on one, or running a destructive git stash. It's on by default; you can turn it off, switch it to warn-only, or edit the protected-branch list under Settings → Features → "Git guardrails" or in the Dev Pipeline panel's Setup tab.
Need to do some protected-branch work yourself? From the same controls you can pause the guardrails for a few minutes (with a live countdown) or exclude a specific repo. These controls are yours alone — because pausing or excluding lowers the guardrail, they're deliberately unavailable to agents and to a paired phone, so an agent can never switch off its own guardrail.
Developer guardrails
Developer guardrails are the machine-wide sibling of Git guardrails. Instead of protecting only the sessions Omniscio launches, they install a single safety hook into your global Claude config (~/.claude/settings.json) so that every Claude Code session on this machine — even ones Omniscio never started — is blocked from committing, pushing, or editing on a protected branch (master/main) or running a destructive git stash. They also refuse anything that would put the full-trust CLI key into a session's output — reading or grepping the key file, a shell command that names it, overwriting it, or fetching the same secret from the vault — while the inline form every agent uses, -H "Authorization: Bearer $(cat ~/.amc/cli-token)", keeps working. They reuse the same engine as Git guardrails, including its pause and per-repo exclusion escape hatches. Because turning them on edits your global config, they're off by default (opt-in); enable them under Settings → Features → "Developer guardrails".
When a Run Gets Stuck
Five things can hold a run up. Each looks different, and each has a way out:
- A gate is waiting on you. The run stops at a gate with a 🟡 yellow or 🔴 red dot and an honest title (“Plan Not Ready — One Question”). The Live tab shows an amber waiting counter next to it. Answer the question in the session, or hit the one-tap Approve on the Live tab. Nothing is lost while it waits.
- The build won’t go green. The run opens with a red Build Blocked header and stops rather than faking a pass or looping. Read what it hit, reply with a steer, and it picks up from there.
- The branch conflicts and gets handed back. The auto-lander never force-merges. When a ready branch collides with your main branch it hands the branch back to the session that wrote it — reopening that session even if it was archived or its worktree was cleaned up — to rebase and re-mark it ready. You’ll see it on the Auto-lander tab as a Conflict row, with the exact files it collided on. Usually you do nothing; it comes back around on its own.
- Landing it would drop work someone else already merged. A safety check runs before every land, and when a branch would throw away another change’s work on your main branch, the auto-lander holds it and tells the session that wrote it first, or the session that launched it if that one is still working, and it wakes a session that archived itself when nobody else can take it. That session rebuilds the branch so both sides are kept, which is the usual fix. You only get an inbox card when nobody can take it (you closed or paused the session) or when it still isn’t fixed four hours later. If the session decides the removal really is intended, it signs off on it, and when the branch lands you get one card naming the files and its reason.
- The branch was set aside — “Couldn’t land”. This means the lander tried and stopped on purpose: a safety check flagged something (a possible secret in the diff, or new text that isn’t translated), it ran out of automatic retries, or the work had already reached master another way. The branch and its commits are safe — parked, not lost. Open the row on the Auto-lander tab to see the reason, or start a session from the inbox card and an agent will clear it.
Most of this never reaches your inbox on purpose. Routine churn — a branch simply waiting its turn, or a retry in progress — is recorded on the Auto-lander tab instead of interrupting you. You’re pinged only when something genuinely needs a person: the pile of ready branches grows past its threshold, nothing is landing at all, or a possible secret needs your judgment.
Rescuing a Stranded Run
If a session dies mid-run (a crash, a closed laptop, a deleted session), its work isn't lost — the worktree keeps the run's full saved state. The panel marks it with a grey "Stale run" pill and an Adopt button: one click starts a fresh session in that same worktree that picks the run up exactly where it stopped. Adopting never touches a run whose session is still alive, and it only ever happens when you click.
Hands-Free Mode
Ask for it explicitly — "run autonomously", "leave it overnight" — and the run self-advances through every phase with the same rigor, stopping only for something that genuinely needs you: a real decision, an ambiguous ask, or a build it can't get green. It still ends at a merge-ready branch, never a merge.
Tip: pipeline runs do real engineering work across six phases, so they're not cheap — the Timing tab's cost figures are there to keep the spend visible. Small tasks automatically get lighter treatment.
Worktree Cleanup
Reap the worktrees whose work already shipped — safely, and reversibly.
Every session that uses a git worktree leaves it on disk when the session ends. Over time these pile up — dozens of folders that served their purpose but are still taking space. The /worktree-cleanup skill looks at every worktree in a project, works out which ones hold work that has already landed, and clears those out while leaving everything else alone.
It works out “already landed” by comparing the actual content of your commits against your main branch — not by branch name, and not just by asking whether the branch was merged directly. That means it still recognises work that landed by squash, rebase, or replay, which a simpler check would miss and leave sitting on your disk forever. It is plain git: GitHub is used as one extra hint when it happens to be available, and is never required.
How to use it
- In any Claude Code session, type /worktree-cleanup or say “clean up worktrees.”
- The skill lists every worktree, sets aside the ones that are clearly still in use, and checks the rest against your main branch.
- It presents a plan with three buckets: Landed (safe to reap), Keep (real work that hasn’t landed yet), and Not sure (kept and reported — never removed on a guess).
- Tell the AI which to remove — all the landed ones, specific picks, or none.
- It saves anything unsaved first, notes how to restore each branch it deletes, removes the approved worktrees, and tells you what it did and where the backups are.
What it never touches
- Anything still in use — a worktree that is locked, mid-operation, marked active, or is your main checkout.
- Anything with unsaved work — uncommitted changes are saved to a backup patch first, and nothing real is ever discarded.
- Anything it can’t prove has landed — when it isn’t sure, it keeps the worktree and says so.
- Any branch whose work isn’t in your main branch — the worktree may go, but the branch stays, so the commits are still there.
Before deleting a branch it writes down how to restore it, and before removing a worktree with unsaved changes it saves those changes to a patch file. Both live in a backup folder outside your repo, and the skill tells you where that folder is at the end of every run.
When it runs without asking
The walkthrough above is the interactive run — you say what to remove and nothing goes without your word. The same skill also runs unattended, and it’s worth knowing where:
- Unattended mode (
/worktree-cleanup --auto) removes only the worktrees it can prove have already landed — anything ambiguous is skipped and reported, never guessed at. It never waits for an answer. - The daily maintenance job can run exactly that unattended mode for you — it checks daily in the repos you had Dev Pipeline activity in and starts the skill only when the check finds a branch needing a person’s judgement. It’s on by default whenever the Dev Pipeline is enabled. Turn it off in the Dev Pipeline panel → Setup tab.
So yes — folders can disappear overnight, on purpose. What protects you is that nothing is ever lost: before a worktree goes, the skill records its branch’s recovery commit and saves a patch of any uncommitted changes, so a removal you didn’t want can be restored. A branch marked do not delete is never touched.
There is an unattended mode that reaps only the worktrees it can prove have landed, skips everything else, and does not stop to ask. That is the mode Omniscio’s daily Dev Pipeline maintenance uses. When you run the skill yourself it presents the plan and waits for you. Want it on your own schedule instead? You can also run the skill from a cron job or recipe — whichever way it runs, an interactive run asks you first and an unattended one sticks to the provably-landed worktrees.
Ask it to archive and it will free the disk space of idle worktrees while keeping the branch, so you can restore the worktree later. Ask it to tidy bare branches and it applies the same landed check to old local branches that no longer have a worktree.
Automations
Create rules that automatically take action when conditions are met.
Automations are "if this, then that" rules for your AI sessions. You define a condition (the trigger) and an action (what happens). Omniscio watches your sessions and fires the automation when the condition is met.
In the sidebar, these live as two rows under the Automation group: Automation Rules — the powerful engine described here, with multi-step action chains and AI conditions — and Auto-replies, the lightweight cousin where one simple trigger (a keyword, project, tag, or time) fires a single action. Reach for Auto-replies first; graduate to Automation Rules when you need a full pipeline.
Creating an Automation
- Go to Settings → Automations (or access via the Automations virtual hub).
- Click "New Automation."
- Choose a condition (what triggers it).
- Choose an action (what happens).
- Optionally limit it to specific projects.
- Save — new automations require approval in your Inbox before they become active.
Available Conditions
| Condition | Description |
|---|---|
| Session status change | Fires when a session changes to a specific status (e.g., "Needs You") |
| Keyword in message | Fires when the AI's message contains specific keywords |
| Time-based | Fires after a session has been in a state for a certain duration |
| AI-evaluated condition | Uses AI to evaluate whether a complex condition is met (e.g., "the agent seems stuck") |
Available Actions
| Action | Description |
|---|---|
| Send a message | Automatically send a response to the agent |
| Archive the session | Move the session to archive |
| Pause the session | Pause the session |
| Send a notification | Show a desktop notification |
| Run a command | Execute a shell command |
Automation Runs
Every time an automation fires, Omniscio logs it. You can see the history of all automation runs, including what triggered them and what action was taken.
Saved Credentials
Actions like "send a Slack message" or "post to a Discord webhook" need API tokens and other secrets to call those services. Omniscio stores them centrally in Settings → Automations → Credentials — encrypted on disk using your operating system's keyring (Windows DPAPI, macOS Keychain, or Linux libsecret). Eight kinds ship today: Slack, GitHub, Discord webhook, Notion, Telegram, generic HTTP auth, Google service account, and SMTP. Two of those (Google service account and SMTP) are gated behind an opt-in toggle because a leaked key would expose broad data access or an outbound mail relay; creating or rotating one is blocked until you flip the gate on. Automations reference credentials by id, so you can rotate a secret without editing any rules.
New automations always require your approval in the Inbox before they start running. This prevents accidental automation loops.
Recipes
Multi-step AI workflows that chain tasks together.
Recipes are Omniscio's most powerful automation feature. A recipe is a sequence of steps that run one after another, where each step is a task for an AI agent. Think of it like a cooking recipe — you define the steps, and Omniscio executes them in order.
How Recipes Work
- Define steps — Each step has a prompt telling the AI what to do.
- Run the recipe — Omniscio executes steps in sequence, starting a new AI session for each step.
- Review & approve — Some steps can require your approval before proceeding.
- See results — The Run Dashboard shows the status of each step.
Recipe Concepts
- Steps — Individual tasks in the recipe. Each step runs as its own AI session.
- Approval gates — Points where the recipe pauses and waits for your OK before continuing.
- Context passing — Results from earlier steps can be passed to later steps so the AI has context.
- Memory — Recipes can store and recall information across runs.
- Patterns — Pre-built recipe templates for common workflows (see Recipe Patterns).
Code Review Pipeline: Step 1: Analyze code changes. Step 2: Run tests. Step 3: Generate a review summary. Step 4: Post results.
Audit Pipeline: Step 1: Scan for issues. Step 2: Categorize findings. Step 3: Generate a report. Step 4: Apply fixes with approval.
Recipe Patterns
Pre-built templates for common multi-step workflows.
Omniscio comes with several recipe patterns — ready-to-use templates that define common workflows. You can use them as-is or customize them for your needs.
Available Patterns
Validate, Then Act
A two-phase pattern: first, validate or analyze something, then take action based on the results. The validation step's output is passed to the action step.
Example: Validate that code changes pass linting and tests, then deploy if everything is clean.
Audit Pipeline
A comprehensive review workflow: scan a codebase or document, categorize findings, generate a detailed report, and optionally apply fixes.
Example: Security audit that scans for vulnerabilities, grades their severity, and produces a markdown report.
Fan-Out & Consolidate
Split a task into multiple parallel sub-tasks, then combine the results. Great for large-scale analysis where different aspects can be examined independently.
Example: Review 5 different microservices in parallel, then consolidate findings into one summary.
Red Team Gate
One agent builds or proposes something, then a second "adversarial" agent reviews it for flaws. Only proceeds if the red team approves.
Example: An agent writes an API design, then a red-team agent tries to find security holes before it gets implemented.
Design Overhaul
Transform a web project from a generic AI-generated look into a professionally designed application. The agent audits the project, proposes design directions for your review, builds a full design system, then implements the landing page, auth flows, app shell, every page, and final polish. Its first step can optionally pull real-world design inspiration from Mobbin — a searchable library of screenshots and user flows from thousands of shipped apps — so the redesign is grounded in proven patterns instead of an invented aesthetic.
Example: Turn a plain prototype into a polished product with a cohesive color palette, typography, and a real landing page before a demo.
Quick Music Recommendations
Turn your liked-songs export into genuinely new music you'll like, delivered as no-login YouTube playlists — one per genre. A built-in red-team quality pass refuses to recommend anything already in your library (fuzzy enough to catch spelling variants and remixes) and drops songs that don't actually exist. The recommendation "brain" is your choice: Claude's own music knowledge (the default — no extra key needed), the open ListenBrainz data, or Last.fm.
Example: Export your Spotify Liked Songs to a CSV, run the recipe, and get a phone-friendly page with a "Play all" button for each genre.
Using a Pattern
- Open the Recipe editor.
- Click "Use Pattern" or select a pattern from the template gallery.
- Customize the step prompts for your specific use case.
- Save and run the recipe.
Connecting Mobbin (design research)
The Design Overhaul recipe can ground its work in real shipped designs by searching Mobbin, a library of screenshots and user flows from thousands of apps. This is off by default and only needs to be set up once. It works with both free and Pro Mobbin accounts — whatever your Mobbin account can see, the recipe can use.
- Go to Settings → Sessions and find the Mobbin MCP (design research) card.
- Click "Setup Mobbin MCP". Omniscio registers Mobbin with the Claude Code CLI in the background — no terminal window opens and no session is spawned.
- When prompted, paste your Mobbin browser cookie: log into mobbin.com, open the browser console (F12, then the Console tab), run
copy(document.cookie), then paste it into the box and click Authenticate. - On success the card shows "Mobbin MCP configured and authenticated." and the toggle flips on. Run the Design Overhaul recipe and its first step researches Mobbin automatically; if Mobbin is not connected the overhaul still runs, just without the reference brief.
You only authenticate once. The cookie you paste is parsed for your Mobbin session token and stored locally on your machine — it never enters Omniscio's database. Re-do these steps only if the token expires or you sign out of Mobbin. Turn the feature off any time by flipping the toggle back off.
Running Recipes
How to launch, monitor, and manage recipe runs.
Starting a Run
- Open the recipe you want to run.
- Select the target project (which codebase the AI works on).
- Click "Run Recipe."
- The recipe starts executing its first step.
The Run Dashboard
Click the Recipes button in the toolbar (or navigate to the Recipes section) to see the Run Dashboard. It shows:
- All active and recent recipe runs
- Each step's status (pending, running, completed, failed, needs approval)
- Timing information for each step
- Error details if a step fails
Approval Steps
Some recipe steps are configured to require your approval. When a recipe hits an approval step:
- The recipe pauses.
- An approval request appears in your Inbox.
- You review what the previous step did.
- Click "Approve" to continue or "Reject" to stop the recipe.
Silent Recipes
Recipes can run in silent mode, which hides their sessions from the sidebar and inbox. This is useful for background tasks you don't need to monitor constantly. Silent recipe sessions appear in a dedicated section and have a watchdog that surfaces them if they've been running too long (over 6 hours).
Error Recovery
If a recipe step fails, Omniscio can:
- Retry the step — Run the same step again
- Skip and continue — Move to the next step
- Stop the recipe — Halt execution entirely
Cron Jobs
Schedule tasks to run automatically on a recurring schedule.
Cron Jobs let you schedule tasks to run automatically at specific times. It's like setting an alarm clock for your AI agents — "Every morning at 9am, check the codebase for issues."
My Automations
My Automations is the friendly home for everything you've set to run automatically. Open it from the Automation section of the left sidebar to see one list of all your automations — the rich ones built with the Automation Helper (marked with a badge) alongside the simpler jobs you scheduled yourself. Each row shows what it does, when it runs, and its status. It's the one place the app points you to after you approve an automation; everything here also appears under Cron Jobs for the low-level details.
Creating a Cron Job
- Go to Settings → Features → Enable Cron Jobs.
- Click "New Cron Job."
- Set the schedule (e.g., daily at 9am, every hour, weekly on Mondays).
- Write the prompt — what you want the AI to do each time.
- Select the target project.
- Save — the cron job requires approval in your Inbox before its first run.
Schedule Format
You can set schedules using simple options like "Daily," "Hourly," or "Weekly," or use cron expressions for advanced scheduling:
0 9 * * *     = Every day at 9:00 AM
0 */2 * * *   = Every 2 hours
0 9 * * 1     = Every Monday at 9:00 AM
0 9,17 * * *  = Every day at 9:00 AM and 5:00 PM
Silent Mode
Cron jobs can run in silent mode, which means their sessions won't clutter your sidebar or inbox. The results are logged, but the sessions stay hidden unless something goes wrong.
Run if Missed
A cron job only fires when Omniscio is running at the scheduled time. If Omniscio was closed — your laptop was asleep, or you were away for a few days — that scheduled run is normally skipped. Turn on "Run if missed" in a job's editor and Omniscio will instead run that job once the next time you open it, catching up misses from the last 7 days.
It's off by default, so existing jobs are unchanged. However many runs were missed while Omniscio was closed, the job runs exactly once on next open — not once per missed day — and then resumes its normal schedule. The catch-up run still respects approval (if the job requires it) and still costs the same as one normal run. The toggle only appears on recurring jobs, since a one-time job has no schedule to catch up.
Approval System
For safety, every new cron job and every edit to an existing cron job requires your approval before it runs. This prevents accidental automated spending.
Cron jobs spawn real AI sessions that use API credits. A cron job running every hour could add up quickly. Start with less frequent schedules and monitor your usage.
Alarms
Natural-language scheduled reminders that ring at the right time.
Alarms are phone-style reminders for Omniscio. Type something like "tomorrow at 9am" or "every Tuesday at 2pm stand-up" into a single textarea and Omniscio saves the alarm, schedules the fire, and rings it however you've asked — full-screen modal, toast banner, or silent inbox row. When it fires you get Snooze and Dismiss; recurring alarms re-arm themselves automatically, and one-off alarms vanish from the sidebar the instant they fire (phone-alarm semantics) — only the Inbox row remains so you can still see it happened. Snooze and Dismiss resolve the alarm on every device you have open — clear it on your phone and the ring stops on the desktop too, without you touching it.
Alarms are separate from Cron Jobs even though both are time-triggered. Cron jobs run code (a recipe, a session spawn) and post results to the inbox; alarms only ring at you — no command, no working directory, no agent spawned, no cost.
Creating an Alarm
- Open the Alarms virtual hub in the Omniscio sidebar.
- Type the alarm in plain English into the textarea at the top ("every weekday at 7:30 AM stand-up").
- Press Enter to save. The new alarm appears under Today, This Week, Recurring, or Disabled.
- Refine the label, sound, snooze duration, or per-alarm overrides from the editor on the right.
Quick Add from Header
You don't have to open the Alarms project to schedule a one-off. The toolbar has a bell-plus icon in the header (visible whenever Alarms is enabled) and the keyboard shortcut Ctrl+Shift+A opens a centered modal from anywhere in the app.
The modal has a natural-language textarea at the top — type something like "tomorrow at 9am dentist" and press Enter to parse it into the editable fields below. From there you can adjust the Label, Time, Recurrence, and (when applicable) Date or Days-of-week, then press Ctrl+Enter or click Create alarm to save. New alarms land in Uncategorized; sensible defaults (08:00 daily) apply if you skip the textarea.
Natural-Language Examples That Work
at 8pm— one-off, today (or tomorrow if 8 PM has already passed)805p/8p/1230a— compact shorthand for8:05 PM/8:00 PM/12:30 AM(resolves on the free offline parser, no AI call)tomorrow at 9:30am— one-off on a named dayevery day at 7am— recurring, dailyevery weekday at 7:30 AM stand-up— recurring, Mon–Fri, label "stand-up"Mon Wed Fri at 6:45 PM yoga— recurring on specific weekdaysremind me to take meds at 8pm— label phrase preserved alongside the time
Organizing With Folders
Beneath the time-based sections (Today / This Week / Recurring / Disabled) you can create flat user-defined folders to group related alarms together — "Work", "Meds", "Kids", whatever makes sense for you. Click + New folder, type a name, press Enter. Hover a folder header to rename (pencil) or delete (trash) it.
File an alarm into a folder by dragging the row onto the folder header, or by picking the folder from the dropdown in the alarm editor on the right. Deleting a folder doesn't delete its alarms — they move back to Uncategorized. Folders are purely cosmetic: an alarm rings the same way whether or not it's in a folder.
Per-Alarm Sound & Behaviour
Each alarm carries its own sound configuration plus a few behaviour knobs. Open the alarm in the editor (Pane 3) and click Advanced to see them. Every knob can be set per alarm or left as Use default to inherit the global value from Settings → Notifications → Alarms.
- Play mode — once plays the sound one time; loop keeps playing it. Loop applies to both modal alarms and banner toasts.
- Duration — how long the sound is allowed to ring for. Useful with loop mode (5s / 10s / 30s / 1m / 2m / 5m / Forever).
- Fade-in — ramps the volume from silence up to the resolved level over N seconds (0 = off, 2 = quick crescendo, 60 = gentle wake).
- Volume override — per-alarm volume that ignores the global notification slider. 10% / 25% / 50% / 75% / 100%.
- Speak label aloud — Omniscio speaks the alarm's label via the OS voice on top of whatever sound the alarm plays. Handy for accessibility or for hearing an alarm from another room.
- Max snoozes — cap the number of snoozes per ring chain. Unlimited (default) keeps the Snooze button always. Dismiss-only (0) hides Snooze entirely. Pick a number (1/2/3/5/10) and the Snooze button disappears after that many snoozes.
- Require math to dismiss — a per-alarm anti-snooze gate. With this on, you have to solve a small arithmetic problem (e.g.
7 + 8 = ?) before Dismiss becomes clickable. Snooze is unaffected.
Test Fire — Preview an Alarm Without Scheduling It
The alarm editor's footer has a Test fire button next to Delete. Click it and the alarm fires immediately — the modal opens, the sound plays with your chosen fade-in and volume, the label is spoken if you've enabled that, the Snooze/Dismiss buttons render — but the alarm's schedule is untouched. The fire isn't counted, next_fire_at isn't advanced, and no missed-alarm inbox row is created.
Use it to pick a sound, test loop behaviour, verify a fade-in, or check how hard the math gate is before going to bed. The math gate is forced off in previews so you can always close the test fire.
Mobile Inbox
Missed alarms surface in your Inbox so you can see them on your phone even when Omniscio wasn't open. Pierces Focus Mode by default so a real reminder is never silently batched.
Alarms don't spawn AI sessions, so they're free to fire. The natural-language parser is offline-first (uses chrono-node locally); only ambiguous phrasings call Claude Haiku as a fallback, capped by a small daily budget.
Pomodoro
Built-in focus-timer with presets, schedules, project attribution, and stats.
The Pomodoro feature runs focus blocks (default 25 min) followed by breaks (5 min short, 15 min long every 4th cycle). You pick a preset, click Start, and Omniscio drives the run through focus → short-break → focus → … → long-break → … → complete, chiming at each phase transition. Local-only, no AI, no cost.
Pomodoro is rendered as a tab of the Alarms virtual hub — it shares the sound picker, foregrounding helper, and Focus Mode interplay with Alarms, so opening the Alarms project in the sidebar and clicking the Pomodoro tab at the top of Pane 2 is the way in.
Starting a Run
- Open the Alarms virtual hub in the Omniscio sidebar.
- Click the Pomodoro tab at the top of Pane 2.
- Click the Play button on any preset row (or select the preset and click Start in Pane 3). The countdown begins immediately in the Session view.
If the preset has a Default project set, the run is automatically attributed to that project for stats.
Presets — What You Can Customize
Each preset is a named bundle of durations plus optional alarm overrides. The editor in Pane 3 lets you set:
- Name, focus minutes, short-break minutes, long-break minutes.
- Cycles until long break — after this many focus blocks, the next break is long instead of short.
- Total cycles — or "unlimited" to run until you click End.
- Default project — pre-fills the run's project when you Start from this preset.
- Advanced overrides — per-preset sound, assertiveness (modal / banner / silent banner), bring-to-foreground, pierce-focus-mode. Each defaults to "inherit the global default" so a single Settings change propagates everywhere you didn't customize.
Schedules — Auto-Start at a Wall-Clock Time
Click the calendar-clock icon in the Pomodoro tab's header to open the Schedule editor. Each schedule row is a recurring "every Monday at 09:00, start the Deep Work preset" rule. You can also set a project override and a label per schedule.
30 seconds before a scheduled minute, a pre-start toast appears so you can prepare or dismiss. At the scheduled minute, Omniscio atomically claims the slot and starts the run — provided no other run is already active. (Manually-started runs always win — schedules don't displace.)
Schedules are idempotent across restarts: a "last fired minute" marker prevents a re-launched Omniscio from double-firing the same minute. If Omniscio crashed at 8:59:30, the resolver still fires the 9 AM schedule when it restarts at 9:00:05.
The Master Kill Switch
Settings → Notifications → Alarms → Pomodoro: Enable schedules (on by default) is the toggle to silence the entire scheduler without deleting your schedule rows. Vacation weeks, deadline crunches, "just leave me alone for a few days" — flip it off and no pre-start toasts, no auto-starts. Manual runs continue normally.
Each schedule row also has its own Enabled toggle so you can mute just one without flipping the master.
Foregrounding (an important deliberate split)
Alarms default to bring Omniscio to the foreground when they fire (an alarm exists to interrupt). Pomodoro phase transitions deliberately default to do NOT bring to foreground — a 5-minute focus block ending shouldn't yank you out of your deep-work window. The chime and tray badge are enough.
You can override per-preset in the Advanced section, or flip the global default at Settings → Notifications → Alarms → Pomodoro: Phase changes bring Omniscio to foreground.
Auto-enable Focus Mode during focus blocks
Pomodoro can drive Focus Mode automatically so notifications batch up while you're in a focus block and release during breaks. When you click Start, Omniscio turns Focus Mode on; at the focus → break transition it turns Focus Mode off (delivering any queued notifications); at the break → focus transition it turns Focus Mode back on; and when the run ends it restores Focus Mode to whatever state it had before the run began.
Manual-toggle protection. If you click the bell icon yourself during a Pomodoro run — in either direction — Omniscio stops managing Focus Mode for the rest of the run and leaves your choice intact. The next time you Start a run, automatic management resumes from scratch.
Three places to control it:
- Global default at Settings → Notifications → Alarms → Auto-Enable Focus Mode During Focus Blocks. Off by default — opt in here once and every preset inherits it.
- Per-preset override in the preset editor's Advanced section. Three options: "Use default" (inherit the global setting), "Yes" (force on for this preset), "No" (force off for this preset). Useful when most presets should silence notifications but your "Light Reading" preset shouldn't.
- Mid-run manual toggle — click the bell icon and the rest of this run uses your manual choice, no Pomodoro management.
If Omniscio crashes mid-run, the next boot restores Focus Mode to the pre-run state (the boot-time crash sweep), so a crashed Pomodoro can't leave you permanently in Focus Mode.
Stats — Today, This Week, by Project
Click the history icon in the Pomodoro tab's header to open the History view. Three rollups:
- Today — total focus seconds completed today (local timezone, resets at local midnight).
- This Week — total focus seconds since the most recent Monday 00:00 local.
- By Project — rows for each project that has any focus seconds this week, sorted by weekly total. Runs without a project aggregate under "Unassigned".
Above the rollups, the Today's planned vs actual block shows your day's planned focus minutes (sum of today's enabled schedules × their preset's focus minutes) alongside actual focus seconds completed — a quick "did I stick to the plan?" glance.
Pause and Resume
The Session view has Pause and Resume buttons. Pausing freezes the countdown; resuming extends the phase end time by the pause duration so the remaining time is exactly what you saw when you paused.
Caveat: pause state is in-memory. If you close Omniscio while paused, the run is marked as crashed on the next boot. Use the End button before closing if you want a clean record.
Pomodoro is entirely local. No AI calls, no cost, no network traffic. Stats stay on your machine.
Gmail Integration
Connect your Gmail inbox so AI agents can read and act on your emails.
The Gmail integration lets your AI agents access your email. This enables workflows like "check my emails and summarize what needs attention" or "draft a reply to this email thread."
Setting Up
- Go to Settings → Email & Summaries → Gmail.
- Click "Connect Gmail."
- Sign in with your Google account and grant permissions.
- Omniscio can now read your Gmail when you ask it to.
What You Can Do
- Read your inbox right in the sidebar — opening Gmail drops you on the message you were last reading (or the first one in your inbox) so you start on an email instead of an empty pane
- See every file attached to an email right on its message — each shows its name and size, and one click saves it to your computer (on a phone it downloads or opens your share sheet; a file over 5 MB is best saved from your computer). Omniscio never opens an attachment for you, and pictures already shown inside the email, like a signature logo, aren't listed twice
- Filter your inbox by category using the dropdown above your message list: All, Sent, Primary, Updates, Social, Promos, or Forums; Sent lets you confirm an email actually went out. Sending, replying, or forwarding now shows a quick confirmation toast
- Ask agents to check your recent emails
- Get email summaries
- Have agents draft replies
- Use emoji input in any compose box — type
:then two characters for a quick autocomplete, or click the smiley button for a full picker with search and recents - Use Email Cleanup — an AI-guided walkthrough that scans your inbox, sorts senders into groups (promotions, newsletters, receipts, people…) with a recommended action for each, and clears the clutter one tap at a time (every action confirmed first). Ask it in plain words too — “unsubscribe from all the promos but keep anything from my bank” — and it proposes the batch for you to approve. Reach inbox zero fast; also reachable from the ✨ button inside the Gmail inbox
- Set up the Email Summarizer for automatic email digests
Omniscio also protects anything you're writing: while you're composing, replying, or forwarding, your draft saves automatically as you type — first to your device for instant crash protection, then to your Gmail Drafts folder so it follows you to another device. If you close the compose window or Omniscio itself before sending, a banner in the Gmail inbox lets you pick right back up (or discard the draft) next time you're there, and the compose window shows a quiet “Saving…” / “Saved” note so you always know your work is safe. Each connected account keeps its own draft, and nothing is cleared until you send or choose to discard it.
Your Gmail credentials are stored securely on your local machine. Email content is only sent to Anthropic's API when you explicitly ask an agent to read or work with your emails.
Google Calendar Integration
Let your AI agents know about your schedule.
Connect Google Calendar so your AI agents can see your upcoming events. This enables smart scheduling and time-aware responses.
Setting Up
- Go to Settings → Google Workspace and find the Calendar card.
- Turn on Calendar Integration, then click "Authenticate."
- Sign in to Google and grant access.
The Google sign-in is shared across Calendar, Drive, Sheets, and Gmail — one sign-in covers all of them. For Calendar it grants read and write access: Omniscio reads your events to build agendas and briefings, and agents can create, update, or delete events when you ask them to.
What You Can Do
- See daily agendas in the Calendar virtual hub
- Ask agents about your schedule
- Get automated morning briefings with your day's events
The Calendar View
Click Calendar in the sidebar to open a full calendar panel. Tabs at the top switch between three views: Agenda (a scrolling list of what's coming up, the default), Week, and Month. The panel covers the next 90 days and the header shows an event count plus New Event and Refresh buttons. Click any event to see its details in a small popover, with Edit and Delete buttons (Delete asks for confirmation first). In the Week view you can also drag an event to a new time, or drag its bottom edge to make it longer or shorter.
Creating and Editing Events
New Event (or Edit on an existing one) opens a full event editor, not just a title box:
- Title, start and end times, and an All day switch
- Location and description
- Attendees: invite people by email address
- Repeat: daily, weekly, monthly, yearly, or a custom rule (every N days/weeks/months, specific weekdays, an end date)
- Reminders: keep your calendar's defaults, or add custom ones (notification or email, from 5 minutes to 2 days before)
- Which of your calendars the event is saved to
Calendar AI Chat
The bottom of the calendar panel has a chat bar. Ask it things like "what does my Thursday look like?" or tell it "move my 3pm with Sam to 4pm", and the AI reads and edits your real calendar to answer. Every action it takes shows as a small labeled badge on the reply (Created, Updated, Deleted), so you can see exactly what it did. Press the arrow to expand the conversation, Esc to collapse it. The chat needs an API key account in Settings; it tells you if one is missing.
Today and Tomorrow in the Sidebar
While the Calendar project is selected, the sidebar shows a compact Today and Tomorrow list: start time, title, and location for each event. The event happening right now (or starting within the next two hours) is highlighted, past events are dimmed, and a location that is a link (like a video call URL) is clickable.
PM Due Dates in Calendar
If you have Mission Control enabled, your board items' due dates and sprint timelines can appear as an overlay on the Calendar. They sit alongside your Google Calendar events, color-coded by board, with overdue items highlighted in red. Click a PM event to see the board name and due date, plus an "Open in PM" button that jumps to the Mission Control panel. Toggle it at Settings → Mission Control → "PM due dates in Calendar" (on by default).
If Google Access Stops Working
Google sign-ins can expire or be revoked. If that happens while you're creating an event from Quick Launch, Omniscio explains the problem in plain language and shows a Reconnect Google button: click it, approve the sign-in, and Omniscio retries creating the same event automatically, nothing to retype. The same one-click recovery covers email: if a reply can't send because your Google connection went stale or is missing send permission, Omniscio drops a “can't send email — reconnect Google” card in your inbox with a Reconnect Gmail button, and clears it the moment sending works again — your draft stays safe in the meantime. Supermail tells you too: when it reads your mail through your Omniscio Google connection and that sign-in has expired, its sign-in screen says so and shows a Reconnect Google button — approve the sign-in and your inbox comes back. On your phone it asks you to reconnect Google in Omniscio on your computer instead, because approving the sign-in opens a browser there. Anywhere else, you can reconnect from Settings → Google Workspace, or from the Reconnect button on the Google Account card in Settings, by authenticating again.
GitHub Integration
Connect GitHub to track PRs, issues, and repository activity.
You have to install it before any of this works. Open the Marketplace from the sidebar (the store icon), find GitHub Integration, and install it. You can also get there from Settings → Plugins → Browse Marketplace.
Omniscio does not ship GitHub support turned on. The built-in version described further down this page is off by default and superseded — the marketplace plugin does everything below plus a codebase browser, a unified siderail, and a repo navigator.
Two things to know if the Marketplace isn't visible: it is off by default too, so turn it on at Settings → Features → Enable Marketplace first. And installing the plugin is separate from connecting your account — do the install first, then the Setting Up steps below.
Once the plugin is installed, the GitHub integration enriches your projects with pull request and issue data from your repositories.
You can turn the legacy built-in version back on temporarily in Settings → Lab → Built-in GitHub (legacy), but the plugin is the supported path.
Setting Up
Do this after installing the GitHub Integration plugin from the Marketplace (see the note above).
- Install GitHub CLI and run
gh auth loginonce in a terminal to sign in. - In Omniscio, turn the built-in GitHub integration on at Settings → Lab → Built-in GitHub (legacy), then switch its notifications on there. (The supported path is the GitHub Integration marketplace plugin — see the note at the top of this page.)
- If the status reads "Authenticated but missing notifications scope", click Grant Access. A modal pops up with a one-time
XXXX-XXXXcode and a Copy button. - Your browser auto-opens to
https://github.com/login/device. Paste the code there and authorize the notifications scope. - The modal closes when GitHub confirms. The status flips to "Connected as <your-username>" and PR / issue / CI notifications start showing in the sidebar.
Click Cancel (or close the modal) to abort mid-flow — Omniscio kills the gh child process and silently re-syncs status, no error toast.
Features
- PR tracking — See the open pull requests that involve you
- PR detail panel — View PR title, description, checks status, review comments, and changed files
- Issue tracking — See issues you're involved in (assigned, mentioned, or subscribed)
- GitHub virtual hub — Aggregated view of all GitHub activity across hubs
To actually work through pull requests and issues (review, approve, merge, comment, close), install the GitHub Integration marketplace plugin from Settings → Plugins → Browse Marketplace.
Pull Requests
Read, review, and merge GitHub pull requests across all your repos, right inside Omniscio.
This built-in tab is off by default. The supported version is the GitHub Integration marketplace plugin — install it from the Marketplace in the sidebar, or Settings → Plugins → Browse Marketplace. See GitHub Integration for the full setup. (The legacy built-in tab can be re-enabled at Settings → Lab → Built-in GitHub (legacy).)
The Pull Requests tab in the left sidebar gathers the GitHub pull requests that involve you, from every repository your GitHub account can access, into one place. You can read a pull request, look through its changed code, follow its checks, hold line-by-line review conversations, approve it or ask for changes, and merge it, all without opening github.com.
Getting Started
- Click Pull Requests in the left sidebar.
- If GitHub isn't connected yet, the tab shows a Connect GitHub button that walks you through the one-time GitHub CLI install and sign-in. Already signed in? Your pull requests appear right away.
The List
Filter chips at the top switch between All (every open pull request that involves you, the default), Created (ones you opened), and Review (ones waiting on your review). When the list spans several repositories, a dropdown narrows it to a single repo. Rows are sorted newest first.
Reading a Pull Request
- Description and activity: the write-up, the comments, and past reviews.
- Changed files: every touched file with its added and removed line counts. Expand a file to read its changes line by line.
- Line comments: review conversations appear directly under the line they were left on (older ones whose line has since changed are grouped under an Outdated heading, so nothing is lost). Hover a line and click the + to start a new conversation, reply inside any thread, and mark it resolved once it's handled.
- Checks: under the overall pass/fail badge, a per-check list shows each CI check with its own state and a link to its logs. A finished check that didn't pass has a Re-run button, so you can retry it without leaving Omniscio.
- Browse files: a folder tree of the entire repository as that pull request sees it. Click any file to read its full contents, with word wrap, copy, and an open-on-GitHub link.
Acting on It
The action bar lets you Comment, Approve, Request changes, or Merge. Merging asks you to confirm first, because it is the one step you can't take back; the others apply right away and confirm with a small message.
Reading works with any signed-in GitHub login. The first time you approve, request changes, comment on a line, re-run a check, or merge, Omniscio checks whether your GitHub sign-in carries the repo permission. If it doesn't, a one-time code flow opens (the same style as the GitHub Notifications setup): copy the code, paste it on the GitHub page that opens in your browser, and your action continues from there. You only do this once.
Pull Requests Waiting on You, in Your Inbox
Optionally, pull requests that are waiting on you can show up as rows in your Inbox: ones where your review was requested, and your own ones that got changes requested. Turn it on in Settings → Lab → PRs assigned to me in Inbox. Omniscio then checks GitHub quietly in the background; a row clears itself the moment that pull request stops waiting on you.
GitHub Issues
Browsing and creating GitHub issues inside Omniscio.
Issue browsing and creation come from the GitHub Integration marketplace plugin — install it from the Marketplace in the sidebar, or Settings → Plugins → Browse Marketplace. See GitHub Integration for the full setup.
The built-in GitHub Issues tab and its New issue button — the in-core surface for browsing, commenting on, and creating GitHub issues — have been removed.
PR Merge Queue
See every open pull request, sorted by how safe it is to merge — and tee up a merge with one click.
The PR Merge Queue pulls together every open GitHub pull request across the repositories you connect, sorts each one into a lane that tells you how safe, risky, or batchable it is, and lets you hand the merge prep to an AI agent with a single click. The agent works in an isolated copy of your project: it rebases the branch, resolves conflicts by understanding what each side intended, and runs your tests — then stops with that copy ready for you to merge, or tells you why if it can't get it ready safely. It never touches your main branch and never pushes anything — you do the final merge yourself, with the hard work already done.
Turn it on in Settings → Features → PR Merge Queue. Once it's on, it shows up as a toolbar button and a sidebar entry. You'll need the GitHub CLI signed in (gh auth login) so Omniscio can read your pull requests.
Setting Up
- Enable it under Settings → Features → PR Merge Queue.
- Open Settings → PR Merge Queue and click Add a repo. Pick one of your projects — Omniscio reads its local Git settings and fills in the GitHub repository, the base branch, and a name for you.
- Open the queue from the toolbar button or the sidebar. Each repo's pull requests appear in lanes such as Fast, Standard, Batch, Risky, and Escalate.
- Click Merge on any pull request to spawn an agent that prepares the merge in an isolated copy of your project — rebasing, resolving conflicts, and running tests — then stops, ready for you to do the final merge. The merge session spawns in the background — it appears in your sidebar and a toast gives you an Open button to watch it, but it won't pull you away from whatever you're working on. When it finishes, its message to you opens with a plain-English summary of what the pull request does — a few bullet points, plus anything to watch out for — so you can decide whether to merge without reading any code.
What's New
It explains each pull request in plain language
When a merge agent finishes, its final message now opens with a plain-English summary of what the pull request does — a few bullet points in everyday words, no code or jargon — followed by a short "anything to watch out for" line, with the technical details below. So you can read what a change actually does and decide whether to merge it, without digging through the code. (This is the merge agent's own write-up — separate from the one-line summary shown on each pull-request card.) The same applies when several are merged together (a summary per pull request), and even when a merge can't be finished (it explains what it was trying to do and what stopped it).
It refreshes in the background
You no longer have to click Refresh to see the latest pull requests. Once the feature is on and you have at least one repo set up, Omniscio quietly checks your repositories on a timer (every 10 minutes by default, adjustable in settings) and remembers what it found. So when you open the queue it appears instantly with an "Updated 3m ago" note, and it keeps updating itself while you have it open. The manual Refresh button is still there whenever you want to pull the very latest right now.
Your Inbox tells you which pull requests need you
When a pull request needs a person to look at it — or its merge got stuck — your Inbox shows one line for that pull request: an amber "PR #42 needs review", or a red "PR #42 merge stuck". Dismiss a line to archive that pull request (middle-click it on a computer, or tap the dismiss action on your phone) — it disappears from the queue just like archiving an email, and you can always bring it back with Show archived → Unarchive. Click a line instead to see that pull request's queue right there in your Inbox, without leaving it. Snoozing works per repo (it tucks away all of that repo's lines until the snooze ends), and a line clears itself the moment that pull request is no longer waiting — for example, the instant you start merging it, its “needs review” line drops off right away, no need to wait for the merge to finish.
Add your own merge instructions
You can give the agent extra guidance two ways:
- Standing instructions for a repo — a box in that repo's settings ("Standing merge instructions"). Whatever you write there is included with every merge for that repo. For example: "Always squash-merge."
- Instructions for a single merge — each pull request (and the batch button) has an optional Add instructions link that opens a small box for notes that apply to just that one merge.
Your guidance is treated as advice that helps the agent — it never overrides the built-in safety rules that keep a merge from doing something dangerous.
Edit the merge prompt
Those instructions are advice layered on top of the agent's built-in rules. If you'd rather change the rules themselves, you can edit the whole prompt the merge agent receives. In Settings → PR Merge Queue → Merge prompts there are two editable boxes — one for a normal single pull-request merge, one for a batch. Each starts out showing the built-in default; edit it and it saves when you click away, and a Reset to default button puts the safe built-in version back. Details about the pull request (its number, branch, and so on) drop in wherever you leave a {{placeholder}} — the list under each box shows which ones you can use. Each repo can also have its own override under Override the merge prompt for this repo (advanced) in that repo's settings.
These boxes hold the entire prompt, including the rules that stop the agent from touching your main branch or pushing. The default is the safe version; if you remove those rules, nothing else enforces them. And a prompt you've customized is a frozen copy — it won't pick up future improvements to the built-in default until you press Reset to default.
Merge a group of related pull requests together
When Omniscio spots several pull requests that don't touch the same files, it groups them in the Batch lane and shows a Merge batch together button (it appears when there are two or more). Click it and a single agent merges the whole group in the right order, checks that each one landed cleanly, and runs your tests once at the end — instead of running a separate merge (and a separate test run) for every pull request. You can add notes for the whole batch with the same Add instructions link.
Dismiss pull requests you don't care about — with the keyboard, too
Some open pull requests just aren't yours to deal with — a long-lived draft, someone else's work-in-progress, something you've decided to leave for later. Each card has an Archive button that hides it from the queue (without closing it on GitHub) and stops it counting toward the "needs review" nudge in your Inbox; a Show archived toggle brings them back, each with an Unarchive button. You can now do all of this from the keyboard: the queue highlights a card when you open it, the arrow keys move the highlight between cards, and your archive shortcut (E or Ctrl + W by default) archives the highlighted one and jumps to the next — so you can clear several in a row without touching the mouse.
For repos you mark as fully trusted, Omniscio can automatically merge the lowest-risk (Fast lane) pull requests for you, with a daily spending cap and a preview ("dry run") mode so you can see what it would do before turning it loose. This is a separate switch and is off by default. The background refresh above runs whether or not you use auto-merge.
PR Janitor
A nightly pass that closes pull requests once their work is safely on GitHub, and shows you exactly what it did.
Every night, the PR Janitor looks over your open GitHub pull requests and closes the ones whose changes have already fully reached GitHub's copy of your main branch — leaving a short comment explaining why. Anything it isn't sure about, it leaves open rather than guess. If a pull request is stuck on a merge conflict, it starts a session to fix that too, on its own. It never touches a pull request unless that pull request's own changes are already safely on GitHub.
Open the PR Merge Queue (turn it on first under Settings → Features → PR Merge Queue if you haven't). A PR Janitor section sits at the top of that view, above the list of pull requests.
What the numbers mean
After each run, six counts sum up what happened:
- Closed — pull requests closed tonight because their work was already on GitHub.
- Queued to close — already finished, but so far only on Omniscio's own copy of the branch. These close themselves the moment that work actually reaches GitHub — nothing is ever closed early just because Omniscio thinks it's done.
- Stuck — blocked by a merge conflict. The Janitor kicks off a fix for these by itself.
- Needs you — the one count that's actually asking for your attention: something the automatic fix couldn't resolve, or a decision only you can make.
- Could not determine — the Janitor couldn't tell for sure what happened, so it left the pull request open instead of guessing.
- Skipped — left alone on purpose, usually because someone is actively working on it.
Click any past run in the list to see exactly which pull requests it looked at that night and what it decided about each one.
Dry run and Pause
- Dry run — ask the Janitor what it would do right now, without closing anything. Handy for checking in between its nightly runs. A full pass can take a while (up to about an hour on a large backlog), so this button doesn't sit and wait for it — it lets you know the report is on its way rather than leaving you staring at a spinner.
- Pause / Resume — turn tonight's (and every future) run off, or back on. While paused, nothing runs until you resume it.
The PR Janitor only ever closes a pull request whose work is already on GitHub's copy of your main branch. Any doubt, and it leaves the pull request open. Closing is also reversible — a closed pull request can always be reopened by hand if it ever needs to be.
PR Visual Evidence
Before/after screenshots of a UI change, attached where the change is reviewed — automatically.
When a coding-agent session finishes a change that affects the UI, PR Visual Evidence captures a before/after screenshot of the changed screen and attaches it where the change is reviewed — your private Omniscio session by default, and the public GitHub pull request only when the repo explicitly opts into that a second time. It's the automated version of what a careful engineer does by hand: show the screen before and after, side by side, so a reviewer sees the visual diff at a glance.
The feature is on for everyone, but it does nothing until a repo turns it on. In Edit Hub → More options you'll find three fields: Attach before/after PR screenshots (the per-repo opt-in, off by default), a Preview command (how to launch that repo's dev server so the screen can be captured, e.g. npm run dev), and Also post to the public GitHub PR (a separate second opt-in, off by default). Until you turn that last one on, the before/after stays only in your private session — never on a public link.
How it works
- An agent finishes a UI-affecting change on an opted-in repo and runs the bundled capture step as its last action.
- Omniscio rebuilds the pre-change version of your app in a throwaway copy, launches it with your preview command, and screenshots the changed screen — that's the real "before".
- It screenshots the same screen on the new version (the "after"), confirms the two actually differ (otherwise it skips, so you never get a misleading identical pair), and hands both to Omniscio.
- Omniscio attaches the before/after to your private session. If — and only if — the repo turned on public posting and the branch has an open pull request, it also posts them as one comment on that PR (as short-lived links that expire in about four hours), and never posts a duplicate if you run it again.
What Omniscio enforces for you
- Private always, public only on the second opt-in. The before/after lands in your session first; it reaches a public PR only when you deliberately turned that on.
- It's your repo's PR, or nothing. The pull request is auto-detected from your own branch on your own repository and verified server-side — a session can never post to some other project's PR.
- Test data only. Capture runs against a running app, so it uses seed/test data and skips when it can't be sure — an "after" shot could otherwise reach a public PR.
- Never in the way. The whole thing is best-effort: a missing preview, a build hiccup, or no PR just means the visual is skipped and logged — it never blocks, delays, or fails your actual code change.
Capture uses a headless browser, so it works on apps that serve a web page (native desktop-only apps are out of scope for now). This first version does screenshots; short before/after recordings are a later addition.
AgentMail
Give your AI agents their own email address.
AgentMail provides your AI agents with their own email addresses that can receive mail. This enables scenarios where external systems or people can email your AI agent directly, and the agent can process and respond to those emails.
Setting Up
- Go to Settings → Email & Summaries → Inbound.
- Enter your AgentMail API key.
- Create one or more agent email inboxes.
Use Cases
- Receive automated reports from CI/CD systems
- Let clients email questions that your AI agent processes
- Forward specific emails for AI analysis
- Use with the Email Summarizer for automated processing
SMS / Phone Integration
Interact with your AI agents via text messages.
The SMS integration lets you send and receive text messages to interact with your AI agents from your phone. This is useful when you're away from your computer but need to respond to an agent's question.
Choosing a provider
SMS runs through your own Android phone — there is no Twilio account and no separate SMS number to rent. Pick how the texts travel under Settings → Channels → SMS:
- Pushbullet (the default) — texts are mirrored through the Pushbullet cloud using the Pushbullet app on your phone. Handles pictures and GIFs. Free Pushbullet accounts cap SMS at 100 messages a month.
- Native (my phone) — texts go straight over your phone's real SIM, through a free open-source gateway app you run yourself, so no third-party cloud is in the path and there is no monthly cap. Text-only for now.
You can switch between the two at any time; your conversations and history are shared, so nothing is lost.
Setting Up
Pushbullet (the default)
- Go to Settings → Channels → SMS and leave the provider on Pushbullet. A three-step wizard appears: Token → Device → Connect.
- Install the Pushbullet app on your Android phone and sign in. On a computer, open
pushbullet.com/account, scroll to Access Tokens, click Create Access Token, and copy the string it gives you (it starts witho.). - Paste the token into the wizard and click Save & Verify. Omniscio verifies and encrypts it, then lists your devices — pick the phone marked as SMS capable.
- Wait for Connected. Text yourself from another number and the message should appear in your Inbox within a few seconds.
Native (my phone, no cloud)
- On your Android phone, install the free SMS Gateway for Android app (from F-Droid or the project's GitHub releases — it is not on the Play Store). On Android 15 and newer, open its App info → ⋮ → Allow restricted settings once, so it can keep its local server running in the background.
- Run the app in Local Server mode. It shows an address such as
http://192.168.1.5:8080together with a username and password. - In Omniscio, switch SMS provider to Native (my phone) and fill in that address, username and password, plus a webhook secret of your own choosing.
- Copy the Inbound webhook URL Omniscio shows into the phone app's webhook settings, using the same secret. This needs Mobile Access switched on, so your phone can reach Omniscio.
- Test it — text yourself from another number, then send a reply from Omniscio.
Off Wi-Fi: the local address only works while your phone and computer share a network. To send and receive while you are away, put both on a private tunnel such as Tailscale, or use the phone app's own cloud relay.
How It Works
- When an agent needs your attention, Omniscio can send you a text message
- Reply to the text to respond to the agent
- SMS conversations appear in your Omniscio inbox
- A conversation leaves your inbox once you deal with it: reply, tap Mark as read, or archive it. Simply opening a thread just marks it read (clears the unread dot) but keeps it in your inbox until you dispose of it, so an unread text is never stuck outside your inbox.
- If SMS is on but stops working (a saved key gets reset, or the connection drops for a sustained stretch), Omniscio raises an “SMS is offline” alert in your inbox plus a desktop notification, and clears it automatically once SMS reconnects. Turn it off under Settings → Channels → SMS → “Alert me when SMS goes offline”.
Nothing here is billed to Omniscio or to a messaging provider. Pushbullet deliveries count against your phone plan, and Native sends over your own SIM — so normal carrier text rates apply, nothing more.
Email Cleanup
Clean up your Gmail inbox by chatting — ask in plain English and approve the changes, with an AI walkthrough a tap away.
Email Cleanup scans your Gmail inbox and has AI sort every sender into a category with a recommended action and a reason. The main way to clean up is a chat box — ask in plain English ("unsubscribe from all promos, keep anything from my bank") and it proposes the changes for you to approve. Prefer to do it yourself? Open the collapsed Browse by category section to walk through it one group at a time. Every clean-up is a single confirmed batch — one bulk archive, one toast, one undo — so you can clear hundreds of emails in a few taps without ever losing something you meant to keep.
Email Cleanup appears automatically whenever Gmail is connected, and hides when it isn't — there's no separate toggle. If Gmail isn't connected yet, the panel shows a "Connect Gmail" prompt.
Opening It
Click Email Cleanup (the ✨ sparkle row) in the left sidebar, or hit the ✨ Clean Up button in the Gmail inbox toolbar — both open the same walkthrough.
What You Can Do
- Chat to clean up — the main surface: ask in plain English ("unsubscribe from all promos, but keep anything from my bank") and it proposes an action batch for you to approve. Tappable example requests get you started, and the chat never executes anything on its own (a chip only fills the box, it never sends).
- Auto-scan on open — it reads your inbox and shows a summary ("N emails from M senders").
- Browse by category — open the collapsed section to work through it by hand: Promotions, Newsletters, Receipts, Social, Updates, People, and Likely-spam, each with the AI's recommendation and the reason behind it.
- Clean up a whole category — one confirmed batch (a single bulk archive with one undo). Senders you mark keep are never touched, and nothing happens without a confirm dialog.
- Drill into individual senders when you want finer control than the whole group.
- Classic layout — prefer a flat per-sender list (Archive / Unsubscribe + Archive / Never again)? Turn on Settings → Email & Summaries → Gmail → Classic Email Cleanup Layout.
If AI is unavailable (offline, no key, or a cost cap is hit) the panel falls back to a deterministic grouping so it's never blank. Works on desktop and mobile.
Email Summarizer
Automatically process and summarize incoming emails with AI.
The Email Summarizer watches your AgentMail inboxes for incoming emails and automatically creates AI sessions to analyze and summarize them based on rules you define.
Creating Rules
- Go to Settings → Email & Summaries.
- Click "New Rule."
- Select which AgentMail inbox to watch.
- Define matching criteria (sender, subject keywords, etc.).
- Write a prompt telling the AI how to handle matching emails.
Use Cases
- Summarize long email threads into action items
- Categorize incoming support emails by urgency
- Extract data from structured email reports
- Draft reply suggestions for common email types
RSS Feeds
Pull RSS and Atom feeds straight into your inbox, with an optional once-a-day AI digest.
The RSS integration polls a list of feed URLs and surfaces each new entry as its own row in the unified inbox — alongside Gmail, SMS, Slack, Telegram, and webhooks. It's a read-only channel: triage entries like any other inbox row (read, snooze, archive), or let an automation react to them. Each entry shows the title, source feed name, author, and a sanitized preview — click in for the full HTML.
Setting Up Feeds
- Go to Settings → Channels → RSS and toggle RSS Integration on.
- Paste a feed URL (for example, a blog's
/feed, Hacker News'news.ycombinator.com/rss, or a YouTube channel's/videos.xml). Omniscio validates the URL before adding it — feeds pointing at private/internal addresses are refused for safety. - Pick a refresh interval per feed (5–1440 minutes) and a retention window (30 days up to 2 years — older entries are permanently deleted).
- Rename or delete feeds inline. Use Refresh All to force a poll right now.
Daily Digest
If you subscribe to a lot of feeds, the inbox can get noisy. Enable Daily Digest in the same settings panel and Omniscio will use Claude to produce a single once-a-day briefing that picks out the items most likely to matter to you. Two knobs:
- Delivery Time — when the digest gets generated each day (defaults to 7:00 AM local time).
- Your Interests — free-form keywords or topics (e.g. "AI, startups, privacy, cybersecurity") that the digest uses to prioritise articles.
Each digest lands as its own row in the inbox — a separate source from the raw RSS entries, so you can leave the firehose collapsed and just read the morning summary. Hit Generate Now in settings to produce one on-demand, or expand Recent Digests to see the last 10 with read/unread status.
You can keep just the digest if you only want the curated briefing — or keep both digest and entries if you want to triage the raw feed too. The two source rows in the inbox source dropdown filter independently.
Pair with Automations
RSS entries flow through the standard Automation engine. Match the title or body against keywords to forward via email, route into the Daily Digest section, or trigger a Claude session to react.
Telegram
Bring your real Telegram account into Omniscio's unified inbox — every chat, group, and channel, alongside Gmail and SMS.
The Telegram integration signs you in to your real Telegram account (not a bot) and surfaces every conversation as a row in the unified Inbox, in real time. Replies you send go out as you — your own name and account — so it works exactly like the official apps, just triaged next to your email and texts.
Telegram is powered by the mtcute engine by default — the maintained MTProto client library (the Telegram via mtcute engine option) — with the legacy GramJS engine kept as a reversible opt-out in Settings → Channels → Telegram engine. Switching engines re-signs you in once.
Telegram Bot is a separate thing, and it is worth knowing which one you want. The integration above brings your own account's conversations into the Inbox so you can read and reply to them. Telegram Bot goes the other way: you create a bot with Telegram's BotFather, pair it once, and then message that bot to talk to your agents from your phone. Each chat — or each topic in a forum group — gets its own session, so several conversations stay separate. Only people you have allow-listed can reach it. The two share nothing but the name: setting one up does not set up the other.
Setting Up
- Go to Settings → Channels → Telegram and click Sign in.
- Enter your phone number. Telegram sends a login code to the official Telegram app on another device — type it in.
- If you have two-factor enabled, enter your cloud password. It's verified on your own machine and never leaves it.
Your session is encrypted and stored locally; signing out clears it.
What You Can Do
- Triage every chat as an inbox row; open one for a full conversation panel with scroll-back history.
- Reply inline — messages send from your own account. Edit, delete, forward, archive, mark-read, mute, and snooze like any other channel.
- See media — photos, voice notes, and documents load on click.
- Automate — run Telegram messages through Automations / auto-replies and the Daily Digest, just like Gmail or SMS.
- Search — Telegram messages show up in global search (Ctrl+K) alongside every other channel.
Telegram is set up and triaged in the desktop app. Agents can search synced Telegram messages, but connecting and replying happen in the app — there's no CLI route that sends as your personal account.
Telegram Bot — talk to your agents from Telegram
Telegram Bot is a separate channel from the account integration above, with its own toggle in Settings → Channels → Telegram Bot. The account integration signs in as you and brings your chats into the Inbox; the bot channel never touches your account — it runs a bot you create, and it exists so you can chat with your Omniscio agents from your phone.
- In Telegram, open @BotFather, send
/newbot, and copy the token it gives you. - In Omniscio go to Settings → Channels → Telegram Bot, turn the channel on, and paste the token. Omniscio verifies it with Telegram and shows “Connected as @yourbot”.
- Message your bot. The first time, it replies with a pairing code and the request appears in that same settings card (and as an inbox alert) — click Approve.
- One chat, one session. A direct message, a group, or a forum topic inside a group each map to their own agent session. Follow-ups continue that session; send
/newto start a fresh one. - Replies land back in the same place. When the agent finishes its turn, the answer is posted into that chat (or the exact forum topic), split across messages when it's long. While the agent works, the chat shows “typing…”.
- Survives restarts. The chat-to-session links are stored on disk, so quitting and reopening Omniscio picks up where it left off without replaying old messages.
- Uses your normal agent setup. Sessions spawn through the same path as any other session, so whichever Claude sign-in you already use applies. The bot never reads or copies a Claude credential.
Webhook
A local endpoint that turns incoming webhooks from any service into rows in your unified inbox.
The Webhook integration runs a small local HTTP server that accepts incoming POST requests and drops each one into the unified Inbox — alongside Gmail, SMS, Slack, Telegram, and RSS. Point any service that supports outgoing webhooks at it (GitHub, Stripe, Zapier/Make, CI/CD, uptime monitors, your own scripts) and their events show up as messages you can read, route, or react to. It's receive-only — there's nothing to reply to.
Setting Up
- Go to Settings → Channels → Webhooks, turn on Webhook Integration, and pick the port the local server listens on.
- Click Add a webhook source. Each source gets a unique URL slug and an auto-generated bearer token.
- Copy the resulting URL (
http://<your-host>:<port>/<source>) into the service that will POST to it, and include the bearer token in anAuthorizationheader.
What You Can Do
- Run multiple named sources, each with its own URL and token, grouped separately in the inbox.
- Read each payload in the inbox: request method, headers, pretty-printed JSON body, timestamp, and the sender's IP.
- Route with Automations — keyword-match the body, forward to email, or fold it into the Daily Digest.
- Trigger a session — have an incoming event kick off a Claude session to react to it.
- Search webhook bodies via global search (Ctrl+K).
Bodies are capped at 1 MB with a 10-second read timeout (slow-loris protection). An unknown source returns 404; a missing or wrong bearer token returns 401. It's an inbound receiver only — it never sends anything out.
Zapier
Connect your Claude sessions to 8,000+ apps via Zapier's MCP integration.
The Zapier integration injects your personal Zapier MCP server into every Claude session automatically. Once enabled, agents can trigger Zaps, read data from connected apps, and manage workflows across services like Google Sheets, Slack, Shopify, and thousands more — all without any per-session setup.
Getting Started
- Go to mcp.zapier.app and sign in (or create a free Zapier account).
- Create a new MCP server — Zapier generates a unique server URL for you.
- In Omniscio, open Settings → Channels → Zapier.
- Enable the toggle and paste the server URL.
- On Zapier's configuration page, enable the specific app actions you want your sessions to use.
What Sessions Can Do
With Zapier enabled, Claude sessions get access to tools for discovering available app integrations, enabling or disabling specific actions, reading data from connected apps, and triggering write actions or Zaps. You manage which apps and actions are available from Zapier's web UI.
Auth & Security
Zapier uses URL-based authentication — your unique server URL is the credential. Individual app connections (Gmail, Slack, Shopify, etc.) use OAuth managed entirely by Zapier's web UI. Omniscio never touches those credentials.
Rate Limits
Zapier actions count toward your Zapier plan quota (free: 100 tasks/month). There is no separate MCP-specific rate limit.
Fathom
Give your Claude sessions read-only access to Fathom.ai meeting recordings, transcripts, and summaries.
The Fathom integration runs a local MCP server that wraps the Fathom.ai REST API. Once enabled, every Claude session can search your meetings, read full speaker-labeled transcripts, and view AI-generated summaries — all without leaving the conversation.
Getting Started
- In your Fathom account, go to User Settings → API Access and generate an API key.
- In Omniscio, open Settings → Channels → Fathom.
- Enable the toggle and paste your API key.
- New sessions now have Fathom tools available automatically.
What Sessions Can Do
- List meetings — browse your recent meetings (title, date, duration).
- Search meetings — find meetings by keyword.
- Read transcripts — full speaker-labeled transcript of any meeting.
- View summaries — AI-generated summary from Fathom.
- List teams — see available teams in your account.
Auth & Security
Your API key is encrypted at rest and never sent to the renderer. It is passed to the MCP server process as an environment variable. Fathom is automatically disabled for Search, Ask Omniscio, and Vault sessions to protect your credentials.
Rate Limits
Fathom allows 60 API requests per minute. If you hit the limit, the agent receives a descriptive error and can retry after a brief wait.
Microsoft Teams
Sync your Microsoft Teams meetings, attendees, and join links into Omniscio.
The Microsoft Teams integration connects to Microsoft Graph API via OAuth 2.0 to pull your calendar events that have online meetings attached. Once connected, Omniscio syncs meetings on a configurable interval so your schedule is always up to date.
Getting Started
- Open the Microsoft Teams panel in the sidebar.
- Click Connect Microsoft Account. A browser window opens for Microsoft sign-in.
- Sign in with your work or personal Microsoft account and grant the requested permissions.
- Your meetings sync automatically. Click Sync Now to trigger an immediate refresh.
What You See
- Meeting list — upcoming and recent meetings grouped by date.
- Meeting detail — organizer, time, attendees, body preview, and a direct join link.
- Settings tab — sync interval, sync window, and disconnect controls.
Auth & Security
Your Microsoft credentials are encrypted at rest and never sent to the renderer. The integration uses OAuth 2.0 with PKCE (no client secret stored). Only calendar read permissions are requested.
Sync Behavior
Background sync runs every 15 minutes by default (configurable from 5 min to 24 hours). The sync window is symmetric — one number sets how far back and how far ahead it looks. It defaults to 14 days each way, and you can raise it to 90 days each way (configurable). Delta queries are used for incremental updates after the initial full sync.
Team Chat
Built-in team messaging with channels, direct messages, threads, and mobile access.
Team Chat is Omniscio's built-in messaging system for your team. Unlike external integrations, it runs inside Omniscio with no third-party dependency. Messages, channels, and presence are synced in real time across desktop and mobile.
Getting Started
- Open the Team Chat panel from the sidebar.
- Create or join a workspace. Organization members are added automatically; self-serve workspaces use invite codes.
- A #general channel is created automatically in every new workspace.
- Start messaging. Desktop notifications and mobile push are available out of the box.
Features
- Channels — public and private channels for topic-based conversations.
- Direct messages — private one-on-one conversations with presence indicators.
- Threads — reply to any message in a thread to keep conversations organized.
- Reactions — react to messages with emoji.
- File attachments — share images and files in any channel (desktop).
- Search — find messages by keyword across all your channels (desktop).
- Mentions — @mention teammates to notify them directly.
- Presence — see who is online, away, or offline in real time.
- Saved items — bookmark important messages for later reference.
- Webhooks — send automated messages into channels from CI/CD, monitoring, or other tools.
Mobile Access
Team Chat has a Progressive Web App (PWA) for mobile access. Open the Team Chat URL on your phone and add it to your home screen for an app-like experience with push notifications. On iOS, you must install the PWA to receive push notifications.
Workspaces
- Organization workspaces — linked to your Omniscio organization. All org members have access automatically.
- Self-serve workspaces — standalone workspaces created by any user. Share an invite code or link to add members.
- Cross-org connections — connect with users outside your organization for direct messaging.
Privacy & Data
- Messages are stored in Firestore with encryption in transit and at rest.
- You can export your data or delete your account at any time from the Team Chat sidebar.
- GDPR right-to-erasure is fully supported — account deletion removes all your messages, search index entries, presence data, and device tokens.
AutoHotkey (AHK)
Control Omniscio with custom keyboard shortcuts and macros.
The AHK integration connects Omniscio with AutoHotkey, a popular Windows automation tool. This lets you trigger Omniscio actions from global hotkeys, even when Omniscio isn't the focused window.
Setting Up
- Install AutoHotkey v2 on your system.
- Install the AutoHotkey plugin — open the Marketplace from the sidebar (the store icon), or go to Settings → Plugins → Browse Marketplace. The in-app AutoHotkey editor and Manager were retired, so the plugin is the supported path.
- Configure your AHK scripts to communicate with Omniscio via the CLI API.
Use Cases
- Global hotkey to start a new AI session from anywhere
- Keyboard shortcut to send selected text to an AI agent
- Macro to trigger a recipe run
Canva
Create, search, and export designs through conversation — powered by Canva's MCP integration.
The Canva integration gives your Claude sessions direct access to Canva's design platform. Once enabled, agents can create designs from prompts, search your design library, export to common formats, and manage assets and folders — all without leaving the conversation.
Getting Started
- In Omniscio, open Settings → Channels → Canva.
- Enable the toggle.
- The first time a session uses a Canva tool, your browser will open for OAuth sign-in — no API keys or manual setup needed.
- Once authenticated, all new sessions automatically have Canva tools available.
What Sessions Can Do
- Create designs — generate new designs from text prompts using Canva's AI-powered creation.
- Search designs — find designs in your Canva library by keyword.
- Export designs — download designs as PDF, PNG, or JPG.
- Manage assets & folders — organize your design files and assets.
- Use brand templates — create from your organization's templates (requires Canva Pro or Enterprise).
Auth & Security
Canva uses OAuth authentication — when a session first tries to use a Canva tool, your browser opens automatically for sign-in. The token is managed by the Canva MCP server and refreshed automatically. Omniscio never stores your Canva password.
Limitations
- Paid features — brand templates and some advanced creation features require a Canva Pro or Enterprise plan.
- Rate limits — Canva enforces rate limits: approximately 20 requests/minute for design creation and 100 requests/minute for read operations (search, list, export).
- Individual accounts only — the integration currently supports individual Canva accounts; team/organization-wide setup is not yet available.
Ollert
A full-featured kanban project tool built directly into Omniscio — boards, lists, cards, drag-and-drop, labels, checklists, comments, and more, without leaving the app.
ollertEnabled flag (turned on automatically for existing installs by the data-presence migration). The old “Enable Ollert” control, its Settings nav row, and its search entry were removed (2026-08-14); the Settings section is now reachable only by a direct deep link (?section=ollert).
What you get
Once enabled, a Ollert row appears in the Omniscio sidebar. Clicking it opens Ollert inside Omniscio with its own navigation sidebar on the left — jump between Boards, Templates, Home, and your workspaces — and the board you pick fills the panel beside it, just like Omniscio's other integrations. Your boards, lists, and cards are all there, and you can work on them without switching to a browser tab. There is no separate Ollert sign-in — Ollert uses your Omniscio account. Just sign in to Omniscio and Ollert is ready; if you are signed out, Ollert shows a “Sign in to Omniscio” prompt instead.
Ollert talks to a separate Ollert backend (not run by Omniscio). Because it uses your Omniscio sign-in, you don't have to log in separately or again after a restart.
Sharing boards and cards
You can copy a link to any board or card to share with a teammate who also has Omniscio:
- Copy link to card — open the card's … menu and choose Copy link to card.
- Copy link to board — use the Copy link to board action in the board header.
Both actions copy a deep link to your clipboard. When your teammate opens that link on a machine with Omniscio installed, Omniscio opens straight to that card or board — no searching, no copy-pasting board names.
How to turn it on
Ollert is gated on ollertEnabled (off by default; set for existing installs by the data-presence migration). There is no Settings toggle — the old “Enable Ollert” control was removed, and Settings no longer lists Ollert. While off, nothing Ollert-related loads and the sidebar row is hidden.
Trello
Connect your real Trello account to view and manage boards, lists, and cards inside Omniscio.
AMC_SHOW_TRELLO=1 or enable the toggle in Settings → Lab to show the Trello entry in the sidebar.
What you get
Once enabled, a Trello row appears in the Omniscio sidebar. Clicking it opens a kanban board view of your real Trello boards. The left sidebar lists your open boards; select one to see its lists as columns with cards sorted by position. Click any card to open a detail drawer showing the description, checklists, comments, labels, members, and due dates.
Setup
- Open Settings → Lab and enable Trello.
- Enter your API Key and API Token from trello.com (avatar → Power-Ups → API Key, then generate a token).
- Click Test Connection to verify.
Your credentials are encrypted on your device and never leave it.
Working with cards
- Create, update, and archive cards.
- Move cards between lists.
- Add comments and manage checklists.
- Search cards across your boards.
Inbox
Enable Trello Inbox in settings to see cards assigned to you in the unified inbox. Kill switch: AMC_DISABLE_TRELLO_INBOX_POLL=1.
Workflow triggers
Create an automation with the Trello card trigger to fire when cards are created, updated, or move between lists. Kill switch: AMC_DISABLE_TRELLO_WORKFLOW_TRIGGER=1.
CLI routes (for AI agents)
POST /trello/move-card—{ cardId, listId }moves a card.POST /trello/create-card—{ listId, name, ... }creates a card.
Note
This connects to your real trello.com account. It is separate from Ollert, which is a standalone kanban tool with its own backend.
Asana
Manage your Asana tasks inside Omniscio; move tasks between sections, get inbox notifications for assigned work, and trigger workflows from task events.
Connecting
Asana connects with a Personal Access Token: create one at app.asana.com → My Settings → Apps → Developer apps → Personal access tokens. Enter the token and your workspace GID in Settings. Omniscio talks directly to Asana's REST API; nothing goes through a third-party server.
What you get
- Board — your project's sections with tasks, move-to-section, and reorder.
- Inbox — optionally surface "tasks assigned to me" updates in the Omniscio inbox (poll-based, background refresh).
- Workflows — Asana task events (created, completed, updated) can trigger Omniscio workflow automations.
- CLI — move tasks between sections and reorder from the CLI server.
Automation
Asana tasks can trigger Omniscio Workflows on three events: task created, task completed, and task updated. The trigger polls every 2 minutes and fires only on genuinely new changes.
Jira
Work your real Jira Cloud boards inside Omniscio — columns, backlog and sprint planning, issue detail with transitions and comments, releases, components, and a project summary dashboard.
Connecting
Jira connects with your Atlassian account: enter your site URL (like yourteam.atlassian.net), your Atlassian email, and an API token (created at id.atlassian.com → Security → API tokens) in Settings. Omniscio talks directly to Jira Cloud's REST API — nothing goes through a third-party server.
What you get
- Board — your project's columns with drag-to-transition, quick filters, and epic swimlanes.
- Issue detail — edit fields, transition, comment, log work, watch/vote, link issues, and attach files.
- Planning — backlog + sprint management with estimates.
- Summary — a project landing page with status, priority, and assignee breakdowns plus recent activity.
- Docs — a lightweight page tree for project notes, stored locally in Omniscio (Jira Cloud offers no docs write API).
- Inbox — optionally surface "issues assigned to me" updates in the Omniscio inbox.
Agent access (CLI)
AI agents can work Jira issues headlessly through Omniscio's CLI control server: search issues via JQL, view issue details, create and edit issues, transition statuses, and add comments. Mutations are rate-limited. All routes use the same credentials you configured above.
Default project
Set a default project in your Jira settings to pre-select a project when creating issues.
Automation
Jira issues can trigger Omniscio Workflows, and workflow actions can create, transition, comment on, assign, and search Jira issues — so an issue update can kick off a real agent task.
Arij
Omniscio's own Jira-style issue tracker — boards, backlog, sprints, docs, dashboards, and issues that can launch and track real agent sessions.
arijEnabled flag (turned on automatically for existing installs by the data-presence migration). The old “Enable Arij” control, its Settings nav row, and its search entry were removed (2026-08-14); the Settings section is now reachable only by a direct deep link (?section=arij). Arij is a full multi-user tracker backed by Omniscio's cloud backend.
What you get
- Projects & organizations — create projects in your organization, invite teammates by email (even across organizations), and control access with three simple roles.
- Board, backlog & sprints — drag-and-drop kanban with swimlanes, JQL-scoped saved boards, sprint planning, and bulk editing.
- Issues — types, priorities, story points, labels, components, versions, worklogs, watchers, attachments, links, and @mention comments with notifications.
- Automation — project or organization-wide rules ("when an issue is created, if priority is high, assign and comment").
- Reports & docs — a summary dashboard, velocity and flow reports, and a lightweight per-project docs tree.
Agents work your issues
The headline feature: every issue has a Start agent button. Omniscio spawns a real agent session in the project's working folder (you pick the folder the first time), briefs it with the issue's summary, description, and acceptance criteria, and mirrors the session's live status back onto the issue card — Running, Needs You, or Finished — with system comments on the meaningful transitions. You can also bulk-start agents for a whole sprint.
Mission Control
A project management board built into Omniscio, with boards, items, automations, and sessions that link directly to your PM work items. Full guide →
What you get
- Boards and items — create boards with columns, groups, and items. Kanban and table views with drag-and-drop.
- Automations — board-level automation rules with triggers, conditions, and actions (including AI-powered actions that spawn agent sessions).
- Board templates — save a board's structure as a reusable template, deploy templates to new boards, and share via a gallery.
- Calendar overlay — PM due dates and sprint timelines appear on your Calendar alongside Google Calendar events.
- Inbox source — PM notifications flow into your unified inbox.
- CLI access — agents can read boards, create items, and update columns via the CLI control server.
PM Notification Intelligence
An additive layer that routes board changes to your unified inbox as smart notifications — batched per session so a burst of edits becomes one digest instead of a pile of pings, and tuned per board so you hear about what matters and mute what doesn't.
- Session-scoped batching — changes made during one work session are grouped into a single notification rather than one alert per edit.
- Per-board preferences — set each board to normal, muted, or promoted, choose email delivery (off, instant, or digest), and pick a daily or weekly digest cadence.
- Due-date alerts — a background check scans your boards for overdue and soon-due items (within 24 hours) and raises an inbox alert, so deadlines surface on their own.
Session linking
Sessions can be linked to PM items. A linked session shows a PM item chip in the session header with the item's name. Click the chip to navigate to the board; right-click to unlink.
- Start a session from a PM item — the CLI route
POST /pm/items/:id/start-sessionspawns a new session pre-linked to the item, with PM context (item name, board, column values) automatically injected into the agent's briefing. - Link after creation — any session can be linked or unlinked to a PM item at any time.
- Live status sync — when a linked session's status changes (running, needs you, finished, error), the PM side is notified in real time so the board can reflect agent state.
Cross-entity linking
PM items can also be linked to KMS vault notes, mind maps, flowcharts, and whiteboards. Links are bidirectional:
- From the PM item card — open an item and switch to the Links tab to see all linked entities, grouped by type. Hover over a link to reveal an unlink button.
- From a visual tool — each tool (KMS file tree, mind map toolbar, flowchart toolbar, whiteboard toolbar) has a Link to Board Item action. Click it to search across all boards and items, then select one to create the link.
- Backlink chips — linked items appear as small chips in the header of each visual tool. Click a chip to navigate to the Mission Control board.
AI Intelligence
Three layers work together to give you AI-powered insight across all your boards:
- PM Cross-Board Intelligence — aggregates data across boards into materialized snapshots, tracking lead times, detecting patterns, applying seasonal urgency, and answering natural-language queries. Runs in three computation tiers (hot, warm, cold) with zero LLM cost.
- PM Operations Engine — per-board policies (Auto/Propose/Never) that govern session shepherding, work queue management, shift handoffs, and dashboard health. All algorithmic, zero inference cost. Trusted actions can auto-promote after consecutive approvals.
- PM Intelligence Advisor — the advisory layer that turns raw data into actionable insight: strategic coaching, Monte Carlo completion predictions, policy recommendations, enriched shift handoffs, and a quick-question box for plain-English queries about your projects. Open it from the PM Advisor entry in the sidebar.
PM Import Framework
Import data from external sources (Monday.com, Jira, Linear, Asana, ClickUp, Notion, Airtable, Trello, CSV, Excel, and Google Sheets) into your PM boards.
How it works
The import framework is a 5-stage pipeline that any source adapter plugs into:
- Extract — the adapter reads the source (a file, an API, etc.) and produces a canonical intermediate representation (IR) containing boards, groups, columns, items, and column values.
- Map — columns are mapped to PM column types. Known sources (Monday.com, Jira) have explicit type maps; unknown sources fall back to automatic inference from header names and values.
- Validate — the manifest is checked for non-empty board names, no duplicate source IDs, valid references, and a 5,000 item-per-board limit.
- Execute — the entire import runs inside a single SQLite transaction for atomicity. Entity mappings are recorded for re-import dedup.
- Report — counts of boards, groups, columns, and items created, skipped, or failed, plus warnings and errors.
Conflict strategies
When re-importing data that overlaps with previously imported entities:
- Skip (default) — if the entity was already imported, skip it entirely.
- Overwrite — reuse the existing local ID and replace the data.
CSV import
The built-in CSV adapter reads standard CSV files (RFC 4180), strips UTF-8 BOM markers, deduplicates header names, detects groups from a "Group" or "Section" column, and infers column types from header names and cell values. File size cap: 50 MB.
Monday (PM)
A Monday-style project management board built into Omniscio, with boards, items, automations, and sessions that link directly to your PM work items.
What you get
- Boards and items — create boards with columns, groups, and items. Kanban and table views with drag-and-drop.
- Automations — board-level automation rules with triggers, conditions, and actions (including AI-powered actions that spawn agent sessions).
- Board templates — save a board's structure as a reusable template, deploy templates to new boards, and share via a gallery.
- Calendar overlay — PM due dates and sprint timelines appear on your Calendar alongside Google Calendar events.
- Inbox source — PM notifications flow into your unified inbox.
- CLI access — agents can read boards, create items, and update columns via the CLI control server.
Session linking
Sessions can be linked to PM items. A linked session shows a PM item chip in the session header with the item's name. Click the chip to navigate to the board; right-click to unlink.
- Start a session from a PM item — the CLI route
POST /pm/items/:id/start-sessionspawns a new session pre-linked to the item, with PM context (item name, board, column values) automatically injected into the agent's briefing. - Link after creation — any session can be linked or unlinked to a PM item at any time.
- Live status sync — when a linked session's status changes (running, needs you, finished, error), the PM side is notified in real time so the board can reflect agent state.
ContextDock
Link knowledge bundles and lists from contextdock.web.app into your projects.
ContextDock is a separate web app where you collect markdown notes — research, customer transcripts, product specs — into named bundles (hand-curated collections of docs) and lists (tag-driven views over your docs). The Omniscio integration lets you link any bundle or list into a project so every Claude session in that project automatically sees the contents.
Setting Up
- Mint an API key on contextdock.web.app (workspace settings → API keys → New key with read scope).
- In Omniscio, reveal the section first — the ContextDock Settings row is hidden by default (2026-08-14). Turn on ContextDock under Settings → Lab → Built-in Apps; the row then appears at Settings → Tools & Maintenance → ContextDock. Paste the key into the input.
- Click Validate & Save. Omniscio checks the key against the server and shows a green check + your identity label on success.
The key is encrypted via Windows DPAPI and stored locally. If the network is down during validation, Omniscio offers a Save without validating escape hatch — the draft key is written and you can validate later.
Linking Bundles, Lists & Library Docs
- Open a hub. Click Add Hub Doc (the
+ Docbutton in the docs section). - Pick the ContextDock tab (fourth tab, always present).
- Switch between the Bundles (📦), Lists (🏷️), and Library sub-tabs. Bundles and Lists each have their own search box; the Library tab searches your whole ContextDock doc library and links one doc at a time at a compression level you choose — it works even when you have no bundles or lists.
- Bundles: click Add to link the whole bundle in one shot at the author-set compression level.
- Lists: Add index writes a titles-only table of contents for the list. Browse drills into per-doc selection so you can pick which docs go in and at which compression (Original / Key Points / Summary).
- Library: search your entire doc library, pick a compression level per result, and click Add to link a single doc — the quickest path when you know the doc you want and don't care which bundle or list it lives in.
Each linked item lands as a contextdock-<id>.md file in <project>/.claude/docs/. Every new session in that project automatically sees the contents — folded into the agent's first message, on any engine (Claude, Codex, Gemini, …). A freshly-linked doc reaches the next new session, not one already running.
Background Refresh (hourly)
The picker reads from a local SQLite cache so opening the ContextDock tab is instant. The cache refreshes itself each time you open the picker (whenever it’s more than a few minutes stale) — that on-open refresh is what keeps it current. A light background refresh task also runs hourly (after a 60-second startup delay) as a backstop, re-syncing the bundles, lists, and tags rosters quietly; per-list-detail is fetched on demand when you open a specific list, not on the timer. Docs use a delta-sync watermark once warm so steady-state refresh cost is tiny.
Toggle Background refresh (hourly) at Settings → Tools & Maintenance → ContextDock to turn off even that hourly backstop. The cache still refreshes whenever you open the picker or click the 🔄 icon. The toggle takes effect immediately — no restart needed.
Linked snapshots in your project (the contextdock-<id>.md files) do not auto-refresh — only the picker's roster does. To pull updated content into a project, right-click a linked doc row and pick Refresh.
Pinning Bundles
Pin a bundle to keep it at the top of the Bundles sidebar pane. Two ways to pin:
- Hover-reveal pin icon — hover over any bundle row in the sidebar to reveal a small pin icon. Click it to toggle. Pinned bundles show the icon in accent color; unpinned bundles only show it on hover.
- Edit dialog toggle — open a bundle's edit dialog and flip the Pinned toggle (below Shared). Only available in edit mode, not when creating a new bundle.
Pinned bundles sort before unpinned bundles; within each group, bundles sort alphabetically by name.
Previewing, Refreshing, Unlinking
- Left-click a linked row to preview the snapshot's rendered markdown.
- Long-press a row (~0.4s) and drag to reorder it in the Auto Context list — no grip handle needed, and a quick click still previews.
- Right-click → Refresh to re-fetch a linked snapshot from upstream.
- Change compression (per-doc items only) — click the inline compression chip on the doc's row to cycle Original → Key Points → Summary, or right-click → Change compression to jump straight to a level. Either way the swap is atomic.
- Middle-click a row to unlink instantly with a Ctrl+Z undo toast, or right-click → Unlink for a confirmation-dialog path.
Plugin System
Extend Omniscio with community and first-party plugins.
Omniscio has a plugin system that lets you add new capabilities to the app. Plugins can add new views, services, and integrations without modifying the core app.
Beyond the built-in plugins below, the plugin platform itself ships two always-on capabilities: an installed plugin can register its own actions as CLI endpoints that Omniscio's AI and command-line interface (CLI) can invoke (Plugin AI-native CLI), and a plugin that requests permission can add its own buttons to the header toolbar and session menus, and navigate the app to a session, hub, or view (Plugin UI access).
When a plugin's AI action would change something — posting, publishing, editing, or deleting — it asks you first: the request lands as an approval card in your inbox instead of running right away. Reads and small, easily-undone actions run immediately. Right on that approval card you can choose “Always allow this action for this plugin” so that one action stops asking; manage or remove these anytime at Settings → CLI Control → Always-allowed actions.
Managing Plugins
- Go to Settings → Plugins.
- See installed plugins and their status.
- Toggle plugins on or off.
- Configure plugin-specific settings.
Available Plugins
Omniscio currently ships with two built-in plugins:
- Foundry — AI-powered app builder — from idea to deployed project
- RepoGuard — Repository security scanning and health scoring
Plugin Marketplace
The Plugin Marketplace is Omniscio's built-in catalog for browsing, installing, updating, rating, and uninstalling plugins — no manual file copying, JSON editing, or app restarts required. Once enabled (see below), open it from the sidebar (look for the Store icon); it lives as a virtual hub with its own search box, sort dropdown, and category sidebar.
What you can do
- Browse the grid. Each card shows the plugin icon, name, one-line description, average star rating, download count, version, author, and category. An amber Update chip appears on plugins you have installed when a newer version is available in the registry.
- Filter by category. Seven categories run down the left sidebar: All, Planning, Development, Testing, DevOps, Productivity, Other. The count beneath them tells you how many plugins are in whichever category you picked.
- Search and sort the grid. Both sit in the toolbar directly above the plugins — search on the left, sort on the right. Four sort options: Most Popular (downloads), Highest Rated (average stars), Newest (most recent publish), A–Z. On a phone the categories and the results are separate screens, so tap a category first; search and sort are waiting on the results screen.
- Open a plugin's detail page. Click a plugin's name, icon, description, or star rating to see the full description, changelog, permissions, install button, star-distribution histogram, and the latest 20 reviews (with a Load more button to paginate). The card's Install, Update, and on/off controls still do only their own job. Press Back, Esc, or the Browse breadcrumb to return to the grid.
- Read reviews. A plugin's detail page shows its average score, the star breakdown, and the latest reviews. Leaving your own review needs a marketplace sign-in with GitHub — your Omniscio account alone isn't enough, and the regular release of Omniscio doesn't include that sign-in yet, so the rating box tells you rating isn't available rather than showing stars that could never be sent. Reading reviews is unaffected, and you can't rate a plugin you published yourself.
- Check for updates. Omniscio checks the marketplace for newer versions automatically — on launch, every few hours, and when you return to the window — and flags them with the Update chip. To check on demand, click Check for updates at the bottom of the Marketplace sidebar, under your plugin counts: the answer appears right on that line as up to date, 2 updates, or check failed. If it finds anything, the review list opens straight away showing which plugins have an update, what version each moves to, and any new permissions they ask for — and while updates are pending that 2 updates line stays clickable, so you can reopen the list any time after closing it. There's also Check now under Settings → Plugins, which reports the same thing as a notification. Neither installs anything — applying an update is always your click.
- Update in place. A plugin showing the Update chip can be updated with one click — Omniscio atomically swaps in the newer bundle. Your local plugin data (SQLite tables, key-value storage) is preserved.
- Uninstall. Removes the plugin's files and the virtual sidebar project. Your plugin data is kept in SQLite so reinstalling later restores your work.
For plugin developers
If you're building plugins, enable the Plugin Developer Dashboard in Settings → Plugins. It surfaces as a separate sidebar entry showing the SDK quick-start commands, links to the GitHub repo and full documentation, and your submission history (Pending Review / Published / Rejected, with reviewer notes inline for rejections). See Build Your Own Plugins.
Marketplace Review
Admin-only review queue for plugin submissions.
Browsing Plugins
Open the Marketplace from the sidebar (look for the store icon). You'll see a grid of available plugins with:
- Search — filter plugins by name or keyword
- Categories — filter by plugin category (productivity, development, integration, etc.)
- Sort — sort by newest, most popular, or highest rated
Installing a Plugin
- Click a plugin's name or description to see its details — description, permissions, changelog, and ratings.
- Click Install.
- If the plugin requires permissions (storage, network, etc.), a consent dialog appears listing what the plugin needs. Review and click Install.
- Plugins with zero permissions install immediately without the consent dialog.
Managing Installed Plugins
- Update — when a new version is available, the plugin card shows an update badge. Click to update.
- Uninstall — remove a plugin from your Omniscio installation.
- Settings — some plugins expose configuration in Settings → Plugins.
Ratings & Reviews
Plugin pages show a 1–5 star score and written reviews, which help you judge a plugin before installing it. Leaving your own review needs a marketplace sign-in with GitHub that the regular release of Omniscio does not include yet, so the rating box says so in place of the stars rather than showing a control that could not work. Reading reviews is unaffected.
Security
Every plugin submitted to the marketplace goes through automated security scanning and manual admin review before it's published. The review process checks for:
- Permission abuse or unnecessary access requests
- External URL calls and CDN dependencies
- Obfuscated code or suspicious patterns
- SDK version compatibility
Build Your Own Plugins
Create and publish plugins for the Omniscio marketplace.
Getting Started
The Omniscio Plugin SDK provides everything you need to build plugins. Install the CLI and scaffold a new project:
npm install -g @agent-mc/plugin-cli
amc-plugin create my-plugin
cd my-plugin && npm install
What You Can Build
Plugins have access to 13 sandboxed APIs across 8 categories:
- Storage & Database — persistent key-value and SQLite storage
- Sessions — listen to session events and status changes
- AI — run AI prompts through the host's credentials
- Filesystem & HTTP — read project files and make network requests
- Cron — schedule recurring background tasks
- UI — sidebar panels, toasts, settings, and custom views
- CLI Endpoints — expose REST endpoints on Omniscio's CLI server
- Events & Logging — structured event system and logging
Developer Dashboard
Access the Developer Dashboard from the Marketplace — click the "Build Your Own Plugins" card at the bottom of the marketplace grid. The dashboard shows:
- SDK documentation links — quick access to the full SDK docs
- Quick-start commands — copy-paste CLI commands to scaffold and publish
- My Submissions — track the status of your marketplace submissions (pending, approved, rejected) with reviewer feedback
Publishing
- Build and validate your plugin:
amc-plugin build && amc-plugin validate - Package it:
amc-plugin package - Authenticate with GitHub:
amc-plugin auth - Submit to the marketplace:
amc-plugin publish
Your submission enters the review queue. An admin will review the code, security scan, and permissions before approving it for the marketplace.
Foundry Plugin
Write a product spec as a guided AI interview instead of staring at a blank page.
Foundry turns writing a product requirements document (PRD) into a guided conversation. Instead of a blank page, it walks you through a structured, step-by-step AI interview — asking the right questions, drafting each section with you, and assembling a complete spec you can hand straight to a coding session.
Foundry is a plugin. Install it from Settings → Plugins → Marketplace and a Foundry entry appears in your sidebar. Your in-progress PRDs are stored separately from the plugin, so updates never touch your work.
What You Can Do
- Guided interview — each step has an AI prompt and a draft you can edit; move forward step by step, or scroll back to rework an earlier answer. Progress saves continuously.
- Autopilot — describe the idea once and let the AI drive every step while you watch a live feed; pause, resume, or abort at any time.
- Red-team reviews (optional, on by default) — adversarial User / Developer / Designer passes that pressure-test the spec before you ship it.
- Export the finished PRD as Markdown.
- Build This Now — once you've exported, hand the PRD straight to a real Claude coding session in a project, pre-loaded with a generated kickoff brief.
Autopilot and "Build This Now" spawn real Claude sessions, which cost money. The manual interview is the cheaper, fully hands-on path.
RepoGuard Plugin
Security scanning and repository health scoring.
RepoGuard is a security checkup for your codebase. It scans a repository for vulnerabilities, exposed secrets, risky dependencies, config problems, and code-quality issues, then rolls everything into a single health score with actionable, fixable findings.
RepoGuard is a plugin — install it from Settings → Plugins → Marketplace and a RepoGuard entry appears in your sidebar, opening a dashboard of all your projects and their health scores.
Running a Scan
- Quick Scan — secrets, dependencies, and code quality; fast and low-cost.
- Full Audit — all seven categories: Security/SAST, Secrets, Dependencies, Code Quality, CI/CD & Config, Container Security, and Runtime Health.
- Scan any public repo — paste a GitHub URL into the scan bar to check a repo you don't have locally.
What You Get
- A health score — a weighted 0–100 score and an A–F grade across the seven categories.
- Fleet health — an average across every project you've scanned, plus a table with each project's score, grade, last-scan time, and trend.
- Prioritized findings — drill into a project for category cards and an expandable findings list, each tagged Fix Now / Plan Fix / Improve / Nice to Have (severity × effort).
- One-click fix — the Fix Issues button spawns a fresh Claude session in that project, pre-loaded with the scan report and a prompt to address every finding.
- Export & monitor — copy a Markdown report to your clipboard, and optionally wire up Sentry (free tier) for runtime error trends.
Daily Spend Report Plugin
A once-a-day AI spend card, delivered straight to your inbox.
Daily Spend Report posts a single card to your Inbox once a day summarizing your AI spend, built from your live Omniscio ledger. It tells an honest two-part story so you always know what your AI work is actually costing you.
Value vs. out of pocket
The card splits your spend into two very different numbers:
- Value — your agent coding work priced at normal API rates, but covered by your flat subscription. This is the value of the work your agents did, not money you spent. It is usually the big number.
- Out of pocket 🔑 — the real money billed to an API key, i.e. the slice that is not covered by a subscription. This comes mostly from background AI features (like generating session titles). It is usually small, but it is what actually hits your card.
Each card shows both numbers for yesterday, the last 7 days, and the last 30 days, plus a breakdown of yesterday’s spend by AI engine and by background feature.
Turning it on
Daily Spend Report is a plugin, so you install and enable it from the Plugin System (Settings → Plugins). Once enabled it starts posting automatically — there is nothing else to set up.
Choosing the report time
By default the report is posted at 9:00 AM your local time. To change it, open the plugin’s settings and pick a different hour under Report time. If Omniscio wasn’t running at your chosen time, the plugin catches up and posts the report the next time you open the app (once per day, never twice).
The in-app panel
The plugin also adds a Daily Spend Report panel in the sidebar where you can view the same report on demand, any time, without waiting for the daily card.
System Requirements
What your computer needs to run Omniscio well.
Omniscio runs several AI agents at the same time, so it needs more memory and processing headroom than a typical desktop app. On an underpowered computer, sessions can run slowly, stutter, or fail under heavy load.
Recommended
- 16 GB of RAM or more — the single biggest factor. 8–12 GB works for light use, but several busy sessions will feel slow.
- A modern multi-core CPU (more than 4 cores).
- Windows 10 or 11 (64-bit), macOS (Apple Silicon or Intel), or Linux (AppImage) — the app ships all three; see the Installation table for the download links.
The low-spec warning
If Omniscio detects that your computer is below these recommendations (under about 14 GB of usable RAM, or 4 or fewer CPU cores), it shows a one-time card in your Inbox explaining what’s low and what helps. The card has one button, Turn on Lite mode, which switches on all of Lite mode’s settings in one click; you can switch it off again any time in Settings → Performance. You can dismiss the card any time, and it won’t keep nagging you.
If your computer is below spec
- Turn on Lite mode (the button on the warning card, or Settings → Performance) — one switch that makes Omniscio itself lighter on a computer like this, including its visual effects.
- Close other memory-heavy apps while running sessions.
- Add RAM if you can — 16 GB or more is the single biggest improvement.
Notice what is not on that list: cutting back your own work. Handling many agents at once is Omniscio’s job, not something you should have to shrink around — if the app cannot keep up on your machine, the switches above are how Omniscio does less, and the rest is ours to fix.
Voice Control
Talk to your AI agents using your voice.
Omniscio supports voice input so you can talk to your AI agents hands-free. This includes a wake word system (like "Hey Siri" but for Omniscio) and continuous dictation.

Wake Word
Omniscio can listen for a wake word to start dictation. The wake words are "Computer" and "Hey Omniscio", and both work out of the box. Detection runs fully on your computer, and nothing is recorded or sent anywhere until the wake word fires.
How it works
Wake-word detection uses a built-in free engine: it needs no key and no account, works fully offline, and works out of the box. The two built-in wake words (Computer, Hey Omniscio) come ready to use; their model files are installed automatically the first time you use the engine, with nothing to download and nothing to train. The Settings page shows the exact folder and which wake words have a model installed.
Setting Up
- Go to Settings → Voice Control.
- Enable Voice Input.
- Choose your preferred speech-to-text provider (Deepgram or Groq Whisper).
- Optionally configure the wake word sensitivity.
- Click the microphone icon in the toolbar to start listening.
How It Works
- Say the wake word ("Hey Omniscio").
- Omniscio plays a chime to confirm it's listening.
- Speak your message.
- Omniscio transcribes your speech and types it into the active session's input.
- The message is sent automatically (or you can review and edit first, depending on settings).
Push-to-Talk
If you prefer not to use the wake word, you can use push-to-talk. Hold a key down to record, release to stop. It works anywhere on your computer, even when Mission Control is in the background.
Push-to-talk is off until you set it up. Go to Settings → Voice Control → Push to talk and turn on one or both keys:
- Push to Command: hold, speak a command, release to run it.
- Push to Dictate: hold, speak, release to type it into the session input.
Pick a key from the suggestions (they are chosen to play nicely with your keyboard layout) or use Advanced (bind any key) to record your own. Very short taps are ignored on purpose, so brushing the key by accident does nothing. On a Mac, the first time you set this up you will be asked to grant Accessibility permission so Mission Control can hear the key while other apps are focused.
Dictation Delivery
After Omniscio captures your speech, it can either send it immediately or place it in the message box for review. Change this in Settings → Voice Control → Dictation delivery:
- Send immediately (default): the transcript is sent to the session the moment transcription finishes.
- Review before sending: the transcript appears in the message box so you can read, edit, and send manually.
If no session is open when you dictate, Omniscio shows a prompt to open one first.
FlowVoice (OS-Wide Dictation)
FlowVoice is Omniscio's OS-wide dictation. Hold a hotkey, speak, release, and your words are cleaned up and typed at the cursor in whatever app is focused: your browser, an editor, a chat window, anywhere you can type. It is separate from the in-app voice features above, which only type into Omniscio's own message box. The transcription service is built into Omniscio, so there are no API keys to set up for it.
Turning it on
- Go to Settings → Voice Control and find the Dictation (FlowVoice) card.
- Turn on Enable FlowVoice. The card expands with the full set of controls and three status checks: Server, Microphone, and Accessibility.
- On a Mac, grant Microphone, Accessibility and Automation access. The card shows the status of each and a Grant access button that opens the right System Settings pane. Accessibility lets FlowVoice react to the hotkey and type at your cursor; Automation (System Settings → Privacy & Security → Automation) is what lets it paste into another app. Grant both — with only Accessibility, dictation still records and still works inside Omniscio, so it can look like it is working while nothing ever reaches the app you are typing in. On Windows, no extra permissions are needed.
Two ways to dictate
- Hold to talk (default): press and hold Ctrl + Shift + D (Cmd + Shift + D on Mac), speak, and release to finish. You can rebind it to a single held key, like the right Cmd key.
- Toggle: press once to start, press again to stop. This second hotkey is unbound by default; record a combo for it in the card if you prefer that style.
Both hotkeys are rebindable right in the card (click the field and press your combo), and you can have both bound at once and use whichever fits the moment.
While you speak
A small floating pill shows what FlowVoice is doing: a live waveform while recording (with accept and cancel buttons), a brief sweep while your words are cleaned up, and a quiet idle pill the rest of the time. Hover the idle pill for quick Dictate / History / Settings shortcuts, or hide it with the Show floating pill toggle; dictation keeps working, and the pill still appears while you are actually dictating. A soft chime marks the start and end of each recording (the Sound cues toggle).
Cleanup levels
Before typing anything, FlowVoice can tidy your transcript. Pick a level in the card: Off keeps the raw transcript word for word, Light strips filler words and false starts, and Strong (the default) fully polishes the wording. You can also pick the language (ten supported) and which microphone to record from.
Dictating into Omniscio itself
When Omniscio is the app in focus, the text lands in Omniscio's message box, and the Send automatically toggle (on by default) submits it for you instead of waiting for Enter. The message box also has its own FlowVoice mic button next to the attach icon: click to start, click again to stop; a small red dot pulses while the mic is live. Right-click that button to open the FlowVoice settings in a dialog right there, without leaving the message you were writing.
History
The settings card keeps a history of your recent dictations: which app the text went to, the cleaned text, and the raw transcript when it differs. You can copy or remove any entry, or clear the whole list.
Voice Commands
Voice commands are separate from dictation. Press Alt + V (the dedicated command hotkey) and speak a command. On Mac the Alt + V chord works everywhere except while your cursor is in a text field, so typing can never falsely trigger it; from a text field use the wake word, the microphone button, or rebind Voice command to a Cmd combo. Omniscio uses AI-powered fuzzy matching, so you don't need to say phrases exactly as listed. A few examples:
- Session navigation — "switch to the marketing session" or "go to session API refactor" jumps directly to a named session.
- Approve inbox item — "approve the request", "accept the request", or "approve the cron job" confirms the currently selected inbox approval.
- Reject inbox item — "reject the request", "decline the cron job", or "deny the request" dismisses the currently selected inbox approval.
- PM: Create item — "create a task called deploy API" or "add an item named review PR" creates a new item on your first board.
- PM: Move item — "move deploy API to done" or "put review PR in backlog" moves an item to a named group.
- PM: Update status — "mark deploy API as stuck" or "set review PR to working on it" updates an item's status column.
- PM: Read item — "read deploy API" or "what is review PR" reads back an item's name and column values.
- PM: List items — "show all items" or "list my tasks" reads back up to 20 items from your first board.
You can also use the Test voice commands button in Settings → Voice Control to try commands without the hotkey.
Voice Report Back
When you ask the AI something with a voice command and it answers in plain prose (for example, "what's on my agenda today?"), Omniscio can read that answer back to you out loud. It uses whichever voice you've picked for Omniscio (Fish Audio, Grok, or ElevenLabs). The feature is off by default. Turn it on at Settings → Voice Control → Voice Report Back.
It only speaks proper written answers from the AI. Quick voice commands that just do something (like snoozing a session, opening your inbox, or approving a request) still show their usual toast confirmation and stay silent. You only hear speech when there's something to actually read out.
If the AI's answer is long, Omniscio speaks the first chunk and then shows a Speak more button on the floating result card. Click it to hear the next chunk. By default the first chunk caps out around 600 characters (roughly 30 seconds of speech), so you don't get a 10-minute monologue from one question. You can change the max chunk size, and set a daily cost cap, under the Advanced area of the same settings panel. The daily cap pauses speak-back for the rest of the day once you've spent that much (ElevenLabs is the priciest voice at about $0.00025 per character, so the default $1 cap buys you roughly 4,000 characters of speech, around 3 minutes; Fish Audio and Grok are much cheaper).
This is the first version, so a few things are honest gaps. You can't interrupt the speech by talking back (no "barge-in" yet, that's coming later). There's no in-app way to cancel a long playback partway through; turning the toggle off won't stop the chunk that's already playing. And as noted above, tool-style commands (snooze, open inbox, approve) never speak, only AI prose answers do.
Ask About a Thread (Voice L3)
With this feature you can ask about a specific agent session hands-free, without switching to it or typing anything. Say the wake word (or press Alt+V) and then ask:
- Summary: "tell me about the auth refactor thread" -- Omniscio speaks the Omni briefing for that session.
- Question: "in the auth refactor thread, what is blocking it?" -- Omniscio answers using xAI Grok, reading only that thread's transcript.
After Omniscio speaks the summary or answer, it asks "What would you like to know?" and listens for a spoken follow-up, answers it from the same thread, then asks again -- a real back-and-forth. Each follow-up is answered with memory of the questions and answers already spoken in this exchange, so "what about the second one?" works. The conversation runs until you stay silent, you reach the per-conversation turn limit, or the daily cost cap is hit.
If you do not name a session, or the name does not match any open session, Omniscio falls back to the currently active session.
The feature is off by default. Turn it on at Settings → Voice Control → Ask about a thread (voice). A daily cost cap (default $1) blocks further Grok calls once reached for the day. The operation is strictly read-only -- nothing is queued to the live agent in that session.
There is no way to queue an instruction to the running agent in that thread -- that is what Voice L4 (below) does. You also cannot interrupt a spoken answer by talking over it; the microphone is live only while Omniscio is listening for your next question.
Ask the Live Agent (Voice L4)
Voice L4 sends your spoken question to the actual running agent in a thread and tells you when it has answered. Say the wake word and ask, for example: "ask the auth refactor agent why it picked JWT over sessions."
- Omniscio says "Okay, I will ask the auth refactor agent and let you know," and waits for that agent to reach a natural pause before delivering the question.
- When the agent answers, you hear "I have your answer about auth refactor" and get a desktop notification. Click it to hear the full answer.
The question is sent read-only (the agent is asked to answer without changing files), and it appears as a normal message in that thread. The feature is off by default. Turn it on at Settings → Voice Control → Ask the live agent (voice). It only works on threads that are currently running; it never starts a new agent.
Voice answer queue
Ask several running agents at once. Each question shows in a small "Voice answers" panel with a status: Queued, Working, or Ready. When an answer lands, Omniscio waits for a polite moment (no capture, command, TTS, or voice turn in progress) and then announces it. Several answers at once get a rundown ("I have answers on three threads: A, B, and C. Want the A one?") and are read one at a time at your pace:
- "go ahead" / "yes" / "read it" - hears the current answer, then offers the next.
- "next" / "skip" - moves on without reading.
- "what's ready?" (askable any time) - speaks the rundown again.
- silence or "no" - leaves the rest queued; the panel stays visible so you can click to hear or dismiss any time.
The queue is live only and resets when the app restarts.
Spoken output in your language
When Omniscio reads an agent's reply aloud or speaks a Omni briefing, it speaks in the language of the conversation — not always English. The language is detected automatically from the content, so there is nothing to set up. If a voice that matches that language is available, Omniscio uses it for that message; otherwise it keeps your chosen voice, which still speaks the detected language (the built-in voice engines are multilingual). Today all of Omniscio's preset voices are English, so your voice itself does not change — but it already speaks whatever language the content is in, and the matching-voice behavior turns on automatically if a non-English voice is ever added.
Voice control requires API keys for the speech-to-text provider. Deepgram and Groq both offer free tiers that are sufficient for moderate use.
Voiceprint Studio
Voiceprint Studio is a separate in-development feature (Settings → Lab → “Voiceprint Studio”) that builds an email style guide in your writing voice — not audio, but how you write. Tag a sample of your sent mail, watch the AI re-draft a real email without seeing your guide, judge its accuracy, and approve fixes that sharpen the guide. The finished guide is something you can paste into any AI to make it write more like you. Voiceprint Studio appears as its own sidebar entry when enabled.
Search
Find anything across all your sessions, projects, and settings.
Omniscio's global search lets you find sessions, messages, projects, settings, and more — all from one search bar.
Opening Search
Press Ctrl + K (or Cmd + K on Mac) to open the command palette. You can also click the search bar in the toolbar.
What You Can Search
- Sessions — Find sessions by name, content, or project
- Messages — Search within conversation messages
- Hubs — Jump to a hub
- Settings — Find specific settings by name or keyword
- Actions — Quick actions like "New Session," "Toggle Theme," etc.
Search-as-you-type
You don't have to finish typing a word. The last word of your query auto-matches as a prefix, so Pr finds "Project alpha" and hello wo finds "hello world". Quoted phrases ("hello") and excluded words (-bug) at the end of a query are treated as final — they don't auto-prefix.
Quoted phrases are word-exact
When you wrap text in "…", Omniscio narrows the match to a true word-for-word hit.
- "meeting" finds meeting but not meetings or premeeting.
- Case doesn't matter — "Meeting" and "meeting" give the same results.
- Whitespace inside a phrase is flexible — "project plan" still matches text where the two words are separated by multiple spaces, a tab, or a line break.
- Symbols are literal — "c++ template" finds the exact three-character c++, not "any character."
Search without quotes when you want the broader match: an unquoted meeting still finds meetings and meet via word-stem matching. Use quotes only when you actually want to forbid near-matches.
What gets indexed in a conversation
For Claude conversations the search index is curated so you only land on text that matters:
- Your messages — indexed in full, every word.
- Agent messages — only the final reply after all the tool work. Mid-turn narration, file reads, command runs, and other tool actions are not in the index.
- System rows (the small grey status lines) — not indexed.
So clicking a result always lands you on something a human said or the agent's actual answer — never on Read(file.ts) plumbing or transient mid-turn chatter. Other channels (SMS, Slack, Telegram, RSS, webhooks) are indexed in full because they only carry real message text.
When you don't see results
If a search comes up empty and you have a scope filter applied (the default scope is titles + first message), the empty state shows a "Search all message content for <query>" button. Clicking it widens the search to every word in every message body — useful when your match lives deep in an agent reply rather than a session title.
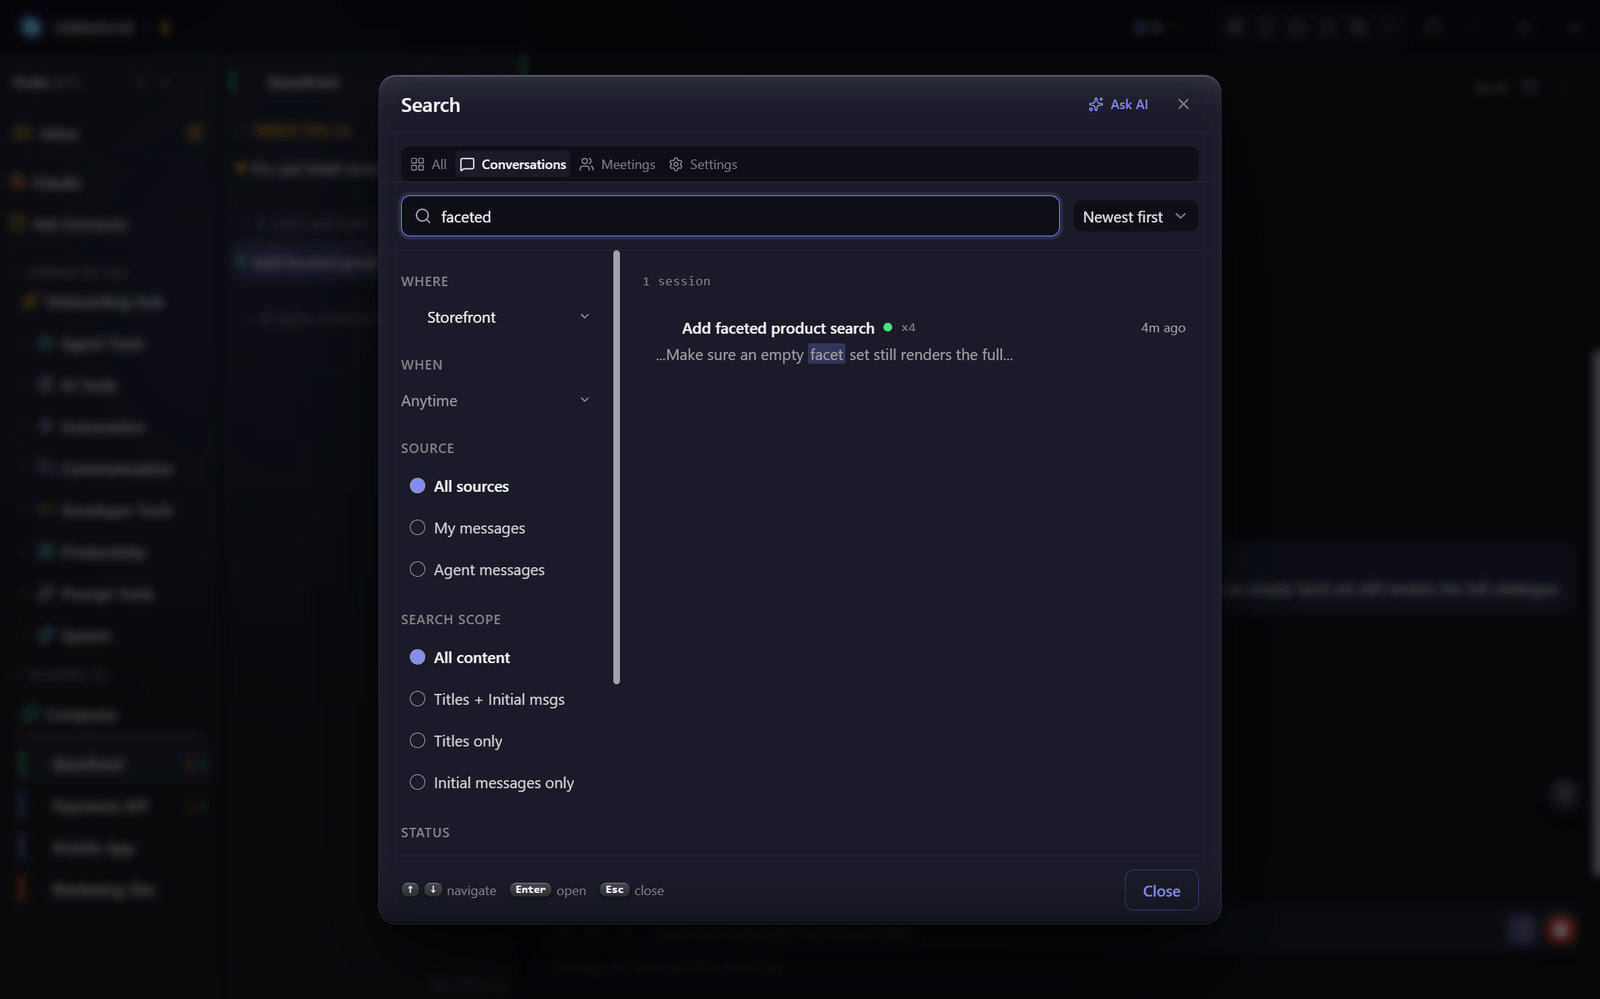
Search is the fastest way to navigate to any setting. Type the setting name (e.g., "voice," "theme," "away mode") and click the result to jump directly to that setting.
Session Tags
Attach short colored labels to sessions, then browse every session by tag from the Tags virtual hub.
Session tags are short colored labels you attach to a session for quick categorisation — things like urgent, bug, client-acme, or followup. Once sessions are tagged, the Tags virtual hub in the sidebar lets you pick a tag and see every session that carries it, grouped by project.
Tagging is opt-in — turn it on at Settings → Sessions → Session Tags. When the toggle is off, the Tags option disappears from the session menu and the chips vanish from the session header; your existing tags stay in storage and reappear when you turn it back on.
Two kinds of tags
- Free-form tags — short strings you type on the spot in the picker. Quick and one-off; no setup required.
- Library tags — curated entries you create once in Settings → Tags with a fixed name, color, optional description, and project scope. Use these when you want the same label to look and behave consistently across many sessions.
Both kinds coexist on every session and share the same picker, the same chip strip, and a combined cap of 10 tags per session. Tag names are up to 30 characters. Each tag's color is consistent everywhere it appears — free-form tags derive their color automatically from the name, so the same word is always the same color.
Tagging a session
- Select a session (make sure the message composer isn't focused) and press T — or open the session overflow menu (
···) and click Tags…. A centered tag picker opens. - Start typing. A list shows matching existing tags (most-used first). Pick one, or — if your text matches nothing — press Enter on the Create "…" row to make a new free-form tag on the spot. Matching is case-insensitive, so typing
Bugreuses an existingbuginstead of duplicating it. - Keep typing to add more tags. Click Browse all… to switch to a checkbox grid of every existing tag with its usage count.
- Remove a tag by clicking the × on its chip, or press Backspace with the input empty to drop the last one. Press Esc to close.
Tags appear as colored chips in the header strip directly under the session title. (Sidebar session rows don't show chips.) On a phone, when a session has more than one tag the header shows just the first chip plus a +N button to stay compact — tap it to reveal the rest in place, and Show less to collapse them again. Trying to add an 11th tag quietly does nothing — a tooltip explains the 10-tag limit.
The Tags virtual hub
To browse sessions by tag, open the Tags entry in the hub sidebar (pink tag icon, in the Omniscio group between Stats and Settings). It uses the standard three-pane layout: the hub sidebar on the far left, a tag list in the middle column, and the matching sessions on the right.
- Tag list (middle column) — a search box plus two collapsible sections: Library (your curated tags) and Free-form (every distinct typed-in string in use). Each row shows a color dot, the tag name, and a count of how many sessions carry it. A + button in the header adds a new library tag without leaving the view.
- Sessions (right pane) — click a tag and the right pane lists every session carrying it, grouped by project, most-recently-active first. Click any session row to jump straight into it.
Right-click a tag for actions: library tags offer Rename, Change color…, and Delete; free-form tags offer Delete only (to rename a free-form tag, delete it and re-tag with the new word). For library tags, each session row in the right pane also has a small × to remove that tag from just that one session, with an Undo toast.
The view refreshes itself live — tag a session in another window or delete a tag in Settings and the panel updates without a manual reload. Your selected tag and search text are remembered between launches.
Free-form is the fast path for one-off labels; promote a tag to the library (Settings → Tags) when you want a consistent color, a description, or to limit it to specific projects. Deleting a library tag never touches a free-form tag of the same name, and vice versa — they're separate storage.
Focus Mode
Batch notifications so you're not interrupted by every alert.
Focus Mode collects notifications and delivers them in batches instead of firing one-by-one. This helps you stay in the zone when you're doing deep work.
How It Works
When Focus Mode is enabled, instead of getting a notification every time an agent needs you, Omniscio collects them and sends a single batch notification when a threshold is reached (e.g., "3 items need your attention") or after a time interval.
Configuration
- Count threshold — How many items to accumulate before sending a batch notification
- Time threshold — Maximum time to wait before sending a batch (even if count isn't reached)
- Whitelist — Sessions or projects that always notify immediately (piercing through Focus Mode)
Enabling Focus Mode
Go to Settings → Notifications → Focus Mode and toggle it on. Configure the thresholds to match your preferred interruption level.
Auto-enable during Pomodoro focus blocks
Pomodoro can drive Focus Mode for you. Turn on Settings → Notifications → Alarms → Auto-Enable Focus Mode During Focus Blocks (or set the per-preset override in a Pomodoro preset's Advanced section) and Omniscio will enable Focus Mode when a focus block starts, disable it during breaks (releasing any queued notifications), and re-enable it at the next focus block. When the run ends, Focus Mode is restored to its pre-run state.
Clicking the bell icon yourself mid-run hands control back to you for the rest of that run — Omniscio will not flip Focus Mode on the next phase change. The next run starts fresh with automatic management.
Not the same as the Shift+F filter
Shift + F switches a different filter with a similar name: it makes a hub’s session list show only the sessions that need you, hiding running, paused and interrupted ones. The batch-alerts Focus Mode above never hides a session. While that filter is on, a banner pinned at the top of the sidebar says focus mode is hiding sessions, with a Show all button that turns the filter off, and the Live Sessions heading still counts your running sessions. Press Shift + F again, or click Show all, to see everything.
This filter used to answer to a bare F — one stray keypress away from emptying a whole hub, with the only hint a quiet line that scrolled away with the list. It takes a deliberate chord now, and the banner above the list keeps saying so for as long as it is on.
Presentation Mode
A recording-safe switch that hides everything private and shows only what you pick.
Presentation Mode makes Omniscio safe to screen-share, record, or stream. Flip it on and it hides your real projects and sessions, your account name and email, live cost and spend figures, and the leaky bits of header chrome — revealing only the items you explicitly pick, plus any session you start yourself while it's on. Nothing is renamed or changed under the hood; it only affects what's drawn on screen, so turning it off restores everything instantly, and it stays on across an app restart.
Turn it on from the Presentation Mode item in the header’s “…” overflow menu (pin it to the header and it lights up with a “LIVE” badge while active), or the command palette. There is also a “hide everything now” panic control that instantly hides everything, including anything you’d revealed — it has no keyboard shortcut out of the box, so give it one in Settings → Keyboard Shortcuts if you want one. (It used to ship on Ctrl + Shift + X and could fire while you were typing, which made it far too easy to trigger by accident.) You choose what shows from the backstage staging panel, where you also pick a hide style for everything else:
- Remove — the item is filtered out of the list entirely (the default, and the safest).
- Blur — the item stays in place but its name is blurred.
- Placeholder — the name is replaced with a neutral label like “Project 1” or one you type in.
If it ends up hiding every project, the sidebar says so in plain words and offers a one-click “Turn off presentation mode” button, so a blank list is never a dead end. It deliberately shows no project names and no counts there — that screen is the one on camera.
While presenting, routine pop-up notifications, the app-icon badge count, and phone push are all held so nothing flashes on camera (real errors still show). You can set a stand-in demo name and avatar in place of your real account, optionally blur the message content inside an open session, and — if you don't want the header account switcher on camera at all — flip “Hide the account widget” to remove that pill (and its account-balancer count) from the header entirely while presenting.
If Remove ends up hiding every project, the sidebar tells you so rather than going blank — it says Presentation Mode is on, confirms nothing has been deleted, and gives you a one-click button to turn the mode back off. Your phone does the same. If only some are hidden you get the ordinary “Showing 3 of 12” strip instead, and its reveal button turns off whichever thing is actually doing the hiding. The empty message deliberately shows no count and no names, because that screen is the one on camera.
Two optional switches: a quiet inbox and paused automatic sessions
Both are off by default, and both only do anything while Presentation Mode is on — so turning the mode off restores everything with no second switch to remember. You’ll find them in the staging panel.
Keep the inbox quiet empties your inbox on camera — every source at once: sessions that need you, agent alerts, email, SMS, Telegram, GitHub pull requests, Jira, approvals, digests and plugin rows. The inbox badge goes to zero with it. Nothing is deleted, archived or delayed: every row still exists the whole time and comes straight back the moment you turn the switch (or the mode) off. While it’s on, every inbox screen says why it’s quiet and offers a one-click “Show my inbox”, so a quiet inbox is never mistaken for “all clear”.
Pause automatic sessions stops Omniscio starting new work while you present — schedules, automations, away-mode, the auto-lander, inbound email, bug intake, and sessions other agents ask for. Two things it deliberately does not do:
- It never blocks you. Anything you launch yourself — “+ New Session”, a quick-launch button — starts normally.
- It doesn’t throw the work away. Sessions requested from the command line or by another agent are genuinely queued and start the moment you exit. Scheduled jobs are skipped rather than failed, so they run on their next tick with nothing recorded against them.
If Omniscio restarts while you’re still presenting, your own interrupted sessions come back as usual — only new automatic work keeps waiting. That way a crash mid-presentation can never leave your real work parked behind a switch you forgot to turn off.
Bookmarks
Save URLs, files, programs, shell commands, and in-app jumps so they're one click away from anywhere in Omniscio.
Bookmarks are a hierarchical, browser-bookmark-bar-style launcher that lives in the Omniscio toolbar. You can save URLs, file or folder paths, programs, shell commands, and shortcuts that jump to a specific session, project, or virtual hub inside Omniscio. Bookmarks are opt-in — flip them on at Settings → Widgets → Bookmarks → Enable bookmarks (the toolbar bookmark icon appears the moment you do).
Everything is local-only. Bookmarks live in Omniscio's SQLite database on your machine and never sync anywhere. The only outbound network call the feature makes is a best-effort favicon lookup so URL rows show a recognisable icon.
Opening the popover
Click the small bookmark icon in the Omniscio toolbar pill. A popover hangs from the toolbar with a search box at the top, a small + button for adding new bookmarks, and your hierarchical tree below. Press Esc, click anywhere outside the popover, or click the toolbar icon again to close it.
The eight kinds
Each bookmark has a kind that controls its icon and what happens when you click it. Five of them launch something external; three of them navigate inside Omniscio.
External launchers (five)
- Folder — a container for other bookmarks. Click the row to expand or collapse it. Folders can nest up to 5 levels deep.
- URL — an
http://orhttps://link. Click opens it in your default browser. The row icon is the site's favicon when Omniscio can fetch one, otherwise a small globe. - Path — a file or folder on disk. Click opens it in your OS file manager (Explorer / Finder) or in the default app for that file type. Environment variables in the
%NAME%form are expanded. - Executable — an absolute path to a program. Click launches it in the background (no console window).
- Command — an arbitrary shell command. Click runs it through
cmd.exe /c. The first time you click a command bookmark, Omniscio pops a confirmation modal showing the literal command and asks you to tick "I understand" — only then will the command fire. After that one confirmation, subsequent clicks run silently. Editing a command's value re-arms the gate.
In-app navigation (three)
These bookmarks don't open anything external — they make Omniscio jump to a target inside the running app.
- Session — pinned to a specific session. Click jumps to that session (activating its parent project first if needed).
- Project — pinned to a specific project. Click activates that project in the sidebar.
- Virtual — pinned to a virtual hub (Inbox, Gmail, Claude, Briefings, Stats, etc.). Click activates that virtual hub.
Nav bookmarks store the target's underlying ID, not its name — so renaming a session or project in the sidebar updates the matching bookmark's label automatically the next time you open the popover. If a target is deleted, the row gets a strike-through and an amber warning icon, and clicking it pops a toast with a one-click Remove bookmark action.
Adding a bookmark
- Open the popover and click the small + button in its header (or, if you have no bookmarks yet, the Add bookmark button in the empty state).
- Pick a kind at the top of the modal: Folder / URL / Path / Executable / Command / Session / Project / Virtual.
- Fill in the rest of the form. For URL / Path / Executable / Command, type the value freehand. For Session / Project / Virtual, the value field is replaced by a target picker — type to filter the list of live sessions, projects, or virtuals in your Omniscio install, then click one to select it.
- Optionally pick a parent folder from the dropdown (or use + New folder… at the top of the dropdown to create one inline without leaving the modal).
- Click Save. The popover's tree refreshes with the new row.
Searching, reordering, and renaming
- Search — type in the box at the top of the popover. The filter matches the bookmark's name or its value (so you can find a URL row by typing part of the URL even if it has no name). Matching rows and their parent folders stay visible; everything else hides.
- Reorder — drag a row up or down. Drop on the upper or lower edge of a row to reorder, or drop on the middle of a folder row to move the row into that folder. Hovering over a collapsed folder for ~0.6s auto-expands it so you can drill in mid-drag.
- Keyboard reorder — focus a row, then Alt+ArrowUp / Alt+ArrowDown swaps it with its sibling.
- Rename a folder inline — double-click the folder name in the tree.
- Edit any row — right-click it to open the same modal you used to create it. You can change the name, value, or parent folder. (Switching a row's kind isn't allowed — delete and recreate instead.)
- Delete — right-click → Delete. Deleting a folder asks for confirmation and removes everything inside it.
- Middle-click a non-folder row to launch it without closing the popover — handy for opening several URLs in a row.
Settings
- Settings → Widgets → Bookmarks → Enable bookmarks — the master on/off toggle. OFF by default. When off, the toolbar icon disappears and the popover is unreachable; your saved rows are not deleted, just hidden.
- Settings → CLI Control → Enable bookmarks CLI — an independent kill switch for the external HTTP control of bookmarks. Most users won't touch this; it only matters if you're scripting Omniscio from outside.
Quick Launch
Spotlight-style floating composer for starting a new session from anywhere.
Quick Launch is a global-hotkey floating composer that pops up over whatever you're doing — think Spotlight on macOS or Alfred on Windows. Type a prompt, hit Send, and a brand-new Claude session starts running it — and if you launched Quick Launch from another app, it leaves you right there instead of pulling you into Omniscio (see below).
Open the modal
Press Ctrl+Space (the default) from anywhere on your computer. A small centered window appears over your current app with a textarea, a project chip, a Send button, and — only when voice input is enabled (off by default) — a microphone button.
If the modal is already up and focused, the second hotkey press is a no-op. If it's up but not focused, the second press refocuses it and selects all the text so you can either keep typing or just start over.
Type and send
- Enter submits; Shift+Enter inserts a newline. This follows your global Submit Key setting (Settings → Sessions) — switch it to Ctrl+Enter to send and Ctrl+Enter (or Cmd+Enter) submits while Enter makes newlines.
- Esc — or Ctrl+W (Cmd+W on mac) — clears the draft and hides the modal.
- Click outside the modal to dismiss it.
On submit, a new Claude session is created in the selected project and your prompt is sent as the first message. If you opened Quick Launch from inside Omniscio, its window comes to the front so you land on the new session; if you opened it from another app, you stay in that app — Quick Launch won't pull you away.
Quick-add tabs
A thin tab strip across the top of the modal lets you swap the body for a different "quick-add" mini-form without leaving Quick Launch. The default pinned tabs are Session · Search · Ask Omniscio · Automation · Alarm · Task · Calendar — Session first, then the three tabs that start a session, so the strip opens on what you actually came to do. The last three are only visible once their feature is on (Alarm needs Alarms, Task needs Tasks, Calendar needs Google Calendar connected), so a brand-new install shows exactly four: Session, Search, Ask Omniscio and Automation. Drip and Bookmark are no longer pinned by default — they are still full tabs, one click away from the strip's + button. If your strip is still the untouched old default, Omniscio moves you onto the new one once, automatically; if you have ever reordered, removed, or added a tab, your strip is left exactly as it is. Email, SMS, Vault Note, Find Note, and Find Email ship in the registry but default to unpinned — pin them from the Available column at Settings → Quick Launch to surface them in the strip (the Email tab additionally needs Quick Email enabled — see Email — send a quick note in two keystrokes below):
- Alarm — text-only single textarea. Type a phrase like "every weekday at 7:30 AM stand-up", "tomorrow at 9am", or "first Monday of the month at 9am", hit Enter, and Omniscio schedules the alarm. The same parser the Calendar tab uses handles both the legacy 5-shape recurrence (once / daily / weekdays / weekends / specific days-of-week) and a richer RRULE escape hatch for things the 5-shape list can't express ("every 3 weeks", "first Monday of the month", "every other Tuesday"). A preview line above the textarea shows the inferred schedule as you type. Most parses are free (offline regex); ambiguous prose falls back to a Claude Haiku call capped at a small daily budget shared with the Calendar tab. The alarm is created locally — no Google account needed; it rings inside Omniscio like any alarm from the Alarms virtual hub. Hidden when Alarms are disabled at Settings → Notifications → Alarms.
- Task — quick-add a to-do without opening the Tasks screen. Type what you need to do, press Enter, and it lands in your Tasks Inbox. Need it at a certain time? Open the small Schedule section for three one-tap presets (This evening, Tomorrow morning, Next week) or an exact date and time, plus a Remind / Hide-until choice: Remind keeps the task in your list and drops a reminder in your Inbox at that time; Hide until tucks it away until then, when it pops back with a reminder. Leave the Schedule closed and it’s just a quick capture, exactly as before. Works the same on your phone’s quick-actions sheet.
- Calendar — type an event in plain English in a single Event field ("Lunch tomorrow at noon", "Standup every weekday 9am", "Birthday tomorrow 10am yearly") and Omniscio creates the event on your Google Calendar. Type a time zone with the time ("9am EST", "2pm PST", "noon eastern time") and it's honored — the event is booked at that clock in that zone (daylight-saving aware, so summer "EST" is Eastern Daylight Time), not silently shifted to your computer's zone; leave the zone off and it uses your local zone as before. By default the event lands on your primary calendar, but if you have more than one calendar you can write to, a calendar picker appears below the preview and remembers your choice for next time. Recurrence is extracted from the same input — including a dangling “…every” typed after the day (“Kathleen Tuesday 10am every” → repeats weekly on Tuesday). When the text alone doesn't imply a repeat, a small Repeat checkbox + Daily/Weekly/Monthly/Yearly picker below the preview lets you force one; it mirrors any repeat the text already implied, so it never disagrees with the preview. Each preview row reads as Title — date and time spelled out in full (e.g. Monday, June 29 at 12:00 PM), with the date/time hugging the title rather than pinned to the right edge; an all-day event shows the date with no time. If you gave an exact time — including compact forms like
805por a range like8-9pthat sets start and end (a range still works with a day-of-week trailing it, e.g. "block 2-4pm thursday") — the preview is a single timed row; if you gave a date only ("Friday birthday"), you get two rows — an all-day interpretation and a 9 AM timed alternative — so you can pick which one you meant. This tab shares its date/time engine with session snooze, so anything the Snooze box understands (business days, ordinal days, holidays, bare months, and more — see Snoozing Sessions) works here too. The offline regex parser handles ~99% of inputs for free; the rare miss falls back to a Claude Haiku call (capped at a small daily budget shared with the Alarm tab) and shows a small "AI is thinking…" sparkle indicator so you know that particular parse took longer because your phrasing was unusual. After a successful create, the composer closes and a small toast appears in the bottom-left of the main Omniscio window — “Added to Google Calendar” — with Open and one-click Undo links. Visible only when Google Calendar is connected at Settings → Google Workspace. - Search — type a query, hit Enter, and Omniscio spawns a new session in the Session Search project that uses Claude (with the bundled
search-sessionsskill) to find matching sessions across your history. Accepts the same attachments as the Session tab — paperclip / paste / drag images, PDFs, or modern Office (.docx/.xlsx/.pptx) and plain text files. Attachment-only submits are allowed: leave the query blank, drop a screenshot of an error, hit Enter, and Claude will mine the image for search terms (error text, code, UI labels, filenames) before running the search. - Ask Omniscio — type a question about Omniscio itself ("how does X work?", "where do I configure Y?", "why is Z happening?"), hit Enter, and Omniscio spawns a new session in the Ask Omniscio project preloaded with the codebase context Claude needs to answer.
- Email — fire off a short email in two keystrokes: add one or more recipients, type a line, press Ctrl+Enter, and it sends through your connected Gmail account after a brief undo window. Off by default — enable it and add recipients at Settings → Email & Summaries → Quick Email. Full walkthrough below under Email — send a quick note in two keystrokes.
- SMS — fire off a text the same way: pick someone you’ve texted (or a saved favorite, or type any number), write a line, press Ctrl+Enter, and it sends through your SMS connection after a brief undo window. Off by default — enable it at Settings → Channels → SMS. Full walkthrough below under SMS — send a quick text.
- Vault Note — jot a quick note straight into your The Vault vault without opening the Vault screen. Type in the single text box, press Enter (Shift+Enter for a new line), and the note is saved and the modal closes. The first line becomes the note’s title plus a timestamp (e.g. Buy milk 2026-06-08 1430); it lands in an auto-created Quick Notes folder in your active vault (the one The Vault is currently pointed at), and the full text is the body. Two notes saved in the same minute never overwrite each other. Visible only when The Vault is turned on at Settings → Features.
- Find Note — a fast "jump to any The Vault note" switcher (Omniscio’s take on the standalone Nothari app’s Find tab). Start typing a note’s title and it fuzzy-matches as you go; an empty box lists your most-recently-edited notes for a one-keystroke jump back. Arrow keys move the highlight, Enter opens the note in the main window’s Vault panel (Omniscio foregrounds itself — even if the Vault screen wasn’t open yet), Esc closes the modal. Unlike the other tabs it only navigates — it never creates anything. It also has its own dedicated global hotkey (default Ctrl+Shift+Space) that opens Quick Launch straight to this tab from anywhere; rebind or disable it at Settings → Keyboard Shortcuts (the "The Vault quick find" row). Visible only when The Vault is turned on at Settings → Features.
- Find Email — a fast search-your-email tab: type a query and Omniscio searches your Gmail, listing matching emails right there with the sender, subject, a snippet, and the date. Arrow keys move the highlight, Enter (or a click) opens the highlighted email — the main window comes forward, switches to your Gmail view, and the email opens in Omniscio’s built-in reader; Esc closes the modal. If you use Supermail, turning it on switches this tab to search Supermail and open the picked email right in Supermail instead — otherwise it searches Gmail exactly as described. Like Find Note it only navigates — it never creates or sends anything. An empty box shows a prompt rather than loading anything, since each search checks Gmail live, so nothing runs until you type. Visible only when Gmail is turned on at Settings → Email & Summaries → Gmail; unpinned by default.
- Automation — describe an automation in plain words in a single text box ("email me a summary of my unread mail every morning at 8"), press Enter (Shift+Enter for a new line), and Omniscio starts an Automation Helper session seeded with your description — the same "describe your own" flow as the Automation Helper page, one keystroke from anywhere. The Helper handles the technical work for you — it asks any follow-up questions it needs, builds and tests the automation, and schedules it — and nothing runs until you approve it. Visible only when the Automation Builder is turned on at Settings → Features → Enable Automation Builder.
- Command Palette — a searchable list of Omniscio’s main actions, so you can start any of them straight from Quick Launch. Type to filter (by name or a synonym — "diagram" finds Flowchart), arrow keys move the highlight, Enter (or a click) runs it — New Mind Map, New Whiteboard, New Flowchart, message a teammate, New Note / Task / Bookmark / Alarm, open the Browser or the Agent Status Board, and more. Actions for features you’ve turned off don’t appear, so the list only shows what you can use. Because Quick Launch is its own window, picking an action brings Omniscio to the front and does it there. Desktop-only; unpinned by default.
- Settings — search your Omniscio settings and change the simple ones right in the pop-up instead of opening the full Settings screen. Type to filter; a toggle, dropdown, number, or short-text setting shows its control inline and saves the moment you change it, while a more complex one (account connections, saved keys, keyboard shortcuts) shows an "Open in Settings →" link that jumps you straight to that setting in the full Settings screen, highlighted. Desktop-only; unpinned by default.
Press Ctrl+Tab to cycle forward, Ctrl+Shift+Tab to cycle back, or Ctrl+1–Ctrl+9 to jump straight to the 1st–9th tab (hover a tab to see its number). Submitting a non-Session tab (press Enter; Shift+Enter makes a newline and Ctrl/Cmd+Enter still works — except the Email tab, whose multi-line body sends on Ctrl/Cmd+Enter so a plain Enter starts a new line) saves the entry through the same backend the main app uses and dismisses the modal.
At the right of the strip, a small + button lets you add a tab on the spot — click it for a short menu of the tabs you have available but haven’t pinned yet (like Search or Ask Omniscio), and pick one to add it instantly. Next to it, the gear icon hides Quick Launch, brings Omniscio to the front, and jumps straight to Settings → Quick Launch — a two-column card where you can pin/unpin tabs or drag-handle to reorder them. You can also drag the tabs right in the strip — grab any tab (Session included) and drop it in a new spot to reorder; the order saves instantly and a quick tap still just switches tabs. When you pin more tabs than the fixed-width window can show, the tab row scrolls sideways instead of pushing anything off the edge — a round ◀ / ▶ arrow fades in on whichever side has more tabs (click it, spin the mouse wheel over the tabs, or press Ctrl+Tab to scroll along), while the + and gear stay pinned at the right and are never clipped. Session is always pinned — you can’t remove it — but you can drag it anywhere. Unpin every other tab and the strip collapses to the single Session pane — unless you still have a tab available to add, in which case the strip stays so the + is one click away.
Pick a project
The chip row in the modal shows the active project with a small down-caret on the right so the chip reads as expandable. Click it (or press Ctrl+P) to open a narrow fuzzy-search picker anchored to the bottom-left of the modal — type to filter, arrow keys to navigate, Enter to pick. Projects without a custom icon show a colored initial-letter glyph so every row stays visually distinct. Long names ellipsize so the picker stays narrow and the rest of the modal remains click-able for dismissal.
Attach files
- Paste an image from the clipboard.
- Drag a file onto the modal.
- Click an image chip to preview it full-screen — zoom, arrow-key between images, copy.
- Right-click an image chip for Copy / Save Image As… / Remove.
- Drag a chip to reorder; middle-click it or click its × to remove.
The attachment travels with the prompt to the new session. Press Esc to close a preview — or any open menu, dropdown or popover — without closing Quick Launch; a second Esc closes the window.
Dictate (voice)
The microphone button appears only when voice input is enabled (Settings → Voice Control) — it's off by default, so out of the box there is no mic here. With voice on, click the microphone button to dictate the prompt by voice. While the Quick Launch modal has focus, Omniscio suppresses its main-window voice command parser — so transcripts get appended to the modal's textarea instead of triggering voice commands. Saying "create a session in the trading project" puts that literal text in the textarea, ready to edit and send.
On your phone
Quick Launch's pop-up window is desktop-only, but the same actions are one tap away on mobile. Tap the ⚡ button in the top bar and a sheet slides up with your pinned quick actions as tiles — tap one (Alarm, Task, Bookmark, Calendar…) to fill in its little form right there, or tap New Session to start a session on the spot. It shows exactly the tabs you've pinned on desktop, so there's nothing separate to set up. On the single-line tabs (Search, Bookmark, Web Clip) your phone keyboard's Enter/Go key submits the form — and on the find-and-pick tabs (Find Note, Find Email, Super Prompts) it opens the highlighted result — so you don't have to reach for the button.
Settings
All four Quick Launch settings live at Settings → Quick Launch:
- Quick Launch Hotkey — the keyboard combination that opens the modal. Default
Ctrl+Space. Click the X to disable. If Ctrl+Space conflicts with your IME or another global tool, rebind it (e.g.Ctrl+Alt+Space). - Enable Quick Launch — on/off toggle (default on). When off, the hotkey is ignored.
- Quick Launch Default Project — which project new sessions start in. Default Last used project remembers your last pick; you can also pin a specific project.
- Quick Launch Tabs — two-column pinned/available card for picking which quick-add tabs show in the modal's tab strip and in what order. Session is always pinned but can be reordered anywhere — you just can’t remove it; the other six default-pinned tabs (Search, Ask Omniscio, Automation, Alarm, Task, Calendar) can be reordered or removed. You can also right-click any tab in the strip for a quick menu — a Global hotkey field to give that tab its own shortcut on the spot, plus (on every tab except Session) a Remove option to unpin it — all without opening Settings. Quick Launch opens on whatever tab you put first. The Calendar tab only shows in the strip when Google Calendar is connected, and the Task tab only once Tasks is on. Drip, Bookmark, and Email sit unpinned in the Available column — check their boxes to add them to the strip. A row whose feature is off is grayed out and can’t be checked until you turn that feature on (the Email tab, for instance, needs Quick Email on first) — enable it, then pin it. A tab you’d already pinned before its feature was turned off stays in the Pinned column with a short note next to it explaining why it isn’t in the strip yet. Reachable directly from the modal's gear icon. A Tab hotkeys sub-section at the bottom lets you give any tab its own global shortcut (e.g.
Ctrl+Alt+C) that opens Quick Launch straight to that tab from anywhere — even a tab you haven't pinned. It needs a modifier (Ctrl/Alt/Shift), is gated by the main Enable Quick Launch toggle, and a combo that clashes with an existing Omniscio shortcut is safely skipped. You can set the very same shortcut right on the tab via its right-click menu, and project tabs can take one too (their shortcut opens a new session straight into that project).
Email — send a quick note in two keystrokes
The Email tab turns Quick Launch into a speed-dial for short emails: add one or more people, type a line, press Ctrl+Enter, and it sends through your connected Gmail account. It’s for the one-liners you fire off constantly (“running 5 late”, “approved, go ahead”) — not a full mail client. You can put several people on one email’s To line (up to 10 — a quick note, not a mailing list; everyone is on To and can see each other), and an Add Cc/Bcc link adds optional Cc and Bcc fields (each also up to 10, all on the same one email; Bcc stays hidden as usual). There’s no thread view (though you can attach files and paste screenshots — see below); the subject line is optional and hidden by default (leave it blank and the email goes out with a single hyphen — - — as the subject line).
Email is off by default. Turn it on at Settings → Email & Summaries → Quick Email, then pin the Email tab from the Available column at Settings → Quick Launch. Once Quick Email is on, a pinned Email tab shows in the strip even before you’ve added a recipient — it opens to an add-a-recipient screen that points you to Quick Email settings. (If a tab you pinned isn’t showing, the Quick Launch tabs editor shows a short note next to it explaining why.) Sending uses the same Gmail account Omniscio already uses for the Gmail integration and Email Summarizer. And once Quick Email is on, pressing Alt+E from anywhere opens Quick Launch straight to the Email tab — a built-in default you can rebind or clear alongside the other Quick Launch tab shortcuts.
The tab has a Recipient chip field (it starts empty — whenever you open the tab without a specific person already chosen, e.g. with Alt+E, the cursor starts right here so you pick who first, dropping the people list open). Add as many people as you like — up to 10, each shown as a removable chip, all on one email’s To line: click a suggestion or press Enter/Tab to add one, and Backspace on the empty field removes the last chip. It suggests your contacts and the people you email with — start typing a name or email and Omniscio surfaces matches from your Google Contacts, the people you email most, and the people who email you (so someone you’ve only received mail from still turns up). As you type it also runs a quick live search of your Google Contacts to catch anyone not already in the list. Automated no-reply senders are filtered out, the people you actually email rank first, and the list keeps up with your sending — email someone new and they show up the next time you open the picker. This needs no extra Google permission beyond what Omniscio already uses. Pick suggestions or type any email addresses to send to anyone. Need to copy people? An Add Cc/Bcc link reveals matching Cc and Bcc chip fields that work exactly the same way (up to 10 each, all on the one email; Cc is visible to everyone, Bcc is hidden); you still need at least one To recipient, and a send with no Cc/Bcc goes out just as before. An optional Add subject link and a Body box (which takes the cursor on open instead when a per-recipient hotkey already chose the person) with emoji input — type : then two characters for autocomplete or click the smiley button for a full picker — complete the composer. The Email composer opens taller than the other Quick Launch tabs so a longer message has room to breathe, and grows a touch more when the subject is showing. Two shortcuts jump you straight to a field from anywhere in the composer: Ctrl + Shift + S for the Subject (revealing it first if it’s hidden) and Ctrl + Shift + M for the Message. Send stays disabled until you’ve added at least one recipient and a subject, a body, or an attachment — a subject-only note, or an attachment with no words, is fine; only a completely blank send is blocked. Press Ctrl+Enter (or click Send email) and the composer closes immediately so you’re back to what you were doing — a plain Enter just starts a new line in the body (and from the subject line jumps the cursor down to the body), so you can write a few lines before you send.
Attach files & screenshots. A quick email can carry attachments three ways: paste a screenshot (Ctrl+V) straight into the message box, click the paperclip in the footer to pick files (images, PDFs, Office docs, text), or drag files onto the composer. Each shows as a small removable chip (a thumbnail for images); unsupported or oversized files are skipped with a short note, and the total is capped around 20 MB (Gmail’s own limit). A screenshot with no words is a valid send. Staged attachments are kept with your draft and clear when you send.
The undo window
Your email doesn’t leave right away. The instant you send, the composer closes and a “Sending to <name>…” toast appears in the main Omniscio window with an Undo button (for several recipients it reads as a short summary, e.g. “Sending to Alice +2…”). The message is held briefly — 10 seconds by default, adjustable anywhere from 1 to 30 seconds at Settings → Email & Summaries → Quick Email. Cancel during that window by clicking Undo or pressing Ctrl+Z. When the window passes with no undo, the email actually sends and the toast becomes a quick “Sent to <name>” confirmation (or an error toast if Gmail rejected it).
Undo brings your email back. When you undo a send, the composer reopens with the whole message restored — recipients, subject, body, and attachments — ready to tweak or resend, just like Gmail’s undo. A failed send keeps your email too, so it’s waiting for you to retry the next time you open the composer. The one exception: if you’d already started a new email during the undo window, that one is kept and the undone message won’t overwrite it.
Ctrl+Z is global while a send is pending. Omniscio grabs Ctrl+Z system-wide for those few seconds so you can undo from any app without clicking back into Omniscio, and it undoes the most recent pending send first. The moment nothing is pending, Omniscio lets go of Ctrl+Z — so it only ever shadows undo in your other apps during a live send window, never permanently.
Send later
Need it to go out later instead of now? Press Ctrl+Shift+L — or click the clock button in the footer — to open a small Send later picker. Choose a preset (“2 hours from now”, “tomorrow morning”, “next week”…) or type a time in plain words (“tomorrow 9am”, “friday 3pm”), and the composer closes with a “Scheduled for <time> · Cancel” toast. A scheduled email is saved and delivered at your chosen time even if you close and reopen Omniscio in between; click Cancel on the toast to call it off before it goes. Scheduling runs inside Omniscio, so a send fires while the app is running — if your computer was off at the exact moment, it goes out as soon as you’re back.
Your draft is saved
If you close the popup without sending — Escape, click away, or Cancel — your half-written email is kept, just like the regular new-session box: reopen the Email tab and your recipients, subject, and message are all still there. It follows the same Settings → Quick Launch → “Remember unsent Quick Launch text” switch (on by default); turn it off and the Email tab starts blank after every close. (Bringing the recipients back is just your own earlier pick returning — Omniscio still never auto-addresses a quick email to a default person; and a recipient whose saved entry you’d deleted meanwhile comes back as its plain email chip — the exact address you chose, never re-pointed at someone else.)
To throw a draft away on purpose, click the small eraser in the top-right corner of the message box (it only shows once there’s something to clear). It wipes the whole email and shows a “Draft cleared · Undo” pill — click Undo (or press Ctrl+Z) to get it back. Sending clears the draft too. The draft is remembered in memory only, so a full app restart starts blank; and undoing a send does not bring its draft back.
Per-recipient hotkeys
Each saved recipient can carry its own global hotkey that opens Quick Launch straight to the Email tab, pre-addressed to that person with the cursor in the message body (the “who” is already settled) — so a hotkey assigned to your manager pops a blank quick-note to them from anywhere, even when Omniscio is in the background. These are off until you flip the Recipient hotkeys switch and assign a hotkey to a recipient. Omniscio’s built-in shortcuts (focus app, Omni briefing, Quick Launch) always win a conflict.
Quick Email settings
Everything is at Settings → Email & Summaries → Quick Email:
- Enable Quick Email — the master on/off (default off). Turning it off hides the Email tab and disables every recipient hotkey.
- Recipients — up to 50 saved people, each with an Email address (required), an optional display Name, and an optional hotkey. Click Add Recipient, fill in the row, and it saves automatically when you click away — these are the rows the composer dropdown shows. Drag a row by its grip handle to reorder; this order is the dropdown order, so put your most-used person on top for the quickest pick (the composer’s To field starts blank, so this sets the list order, not a default recipient). Or use the Search your contacts box at the top to pick from your real people — Omniscio pulls from your Google Contacts address book (for names) and your recent sent mail (for frequency ranking), merged into one list with your most-emailed people first. Existing users whose Google connection predates this feature see a one-time Reconnect Google inbox nudge to grant the read-only Contacts permission; new users get it automatically. If contacts can’t be read, you still get sent-mail suggestions — and you can always add recipients by hand.
- Recipient hotkeys — the master switch for the per-recipient global hotkeys above (default off).
- Undo window — how many seconds a message is held before it sends (default 10, anywhere from 1 to 30).
- Show subject by default — whether the Subject field is visible when the tab opens (default off — body-only is the common case).
- Signature — an optional short sign-off added to the bottom of every quick email you send, after a blank line (default empty). Type it once in the box and it’s saved when you click away. It’s separate from your Gmail signature — quick emails go out through Gmail’s back end, which never adds your Gmail signature, so this is how you get one on them. Leave it blank and your quick emails stay bare, exactly as before.
Forward Email autocomplete
The same contact suggestions also appear when configuring a Forward Email automation action. The recipient field in the Forward Email config offers autocomplete from the same sources — your Google Contacts, the people you email, and the people who email you — so you get the same people suggestions when setting up forwarding rules as you do in the Quick Email composer. As you type (2+ letters) it also runs the same live search of your Google Contacts, merged below the instant matches and skipping anyone you've already added. Type a name or email to search, press Tab or Enter to accept a suggestion, and Backspace to remove a recipient chip.
SMS — send a quick text
The SMS tab is the text-message sibling of the Email tab: pick a recipient, type a line, press Ctrl+Enter, and it sends through your SMS connection. It’s for the quick texts you fire off constantly — not a full messaging app (no pictures, GIFs, or conversation threads; those live in the main SMS view).
SMS is off by default and needs your SMS connection set up. Turn it on at Settings → Channels → SMS (connect Pushbullet or your own phone endpoint), then pin the SMS tab from the Available column at Settings → Quick Launch. If SMS is on but not connected yet, the tab tells you so and points you to Settings instead of showing a form that couldn’t send.
The To box merges your saved favorites with people you’ve recently texted, and — because a phone number is an open set — lets you type any number to text anyone (a “Text <number>” row appears once what you type looks like a number). Type your message and press Ctrl+Enter (or click Send text); a plain Enter just starts a new line. The composer closes and a “Sending to <name>…” toast appears in the main window with an Undo button for a few seconds — click Undo and nothing is sent; let it pass and the text goes out (or you get a plain-language error if it couldn’t).
SMS Favorites
Under Settings → Channels → SMS there’s an SMS Favorites card — pin the people you text most (a name is just a label; only the number is texted) so they’re one pick away. Click Add Favorite, fill in the row, and it saves when you click away once the number looks valid. You don’t have to build this list by hand — everyone you’ve already texted shows up in the tab automatically; favorites just pin the ones you use most.
AI Browser
A real tabbed browser inside Omniscio — you browse it like normal, and your AI sessions can drive their own separate tabs, safely, while you watch.
Click Browser in the Omniscio sidebar (globe icon) and the right pane becomes a full browser: tabs, bookmarks (star a page, manage them from the bar under the toolbar), history, find-in-page (Ctrl+F), zoom, and the usual shortcuts — Ctrl+T new tab, Ctrl+W close, Ctrl+L address bar, Ctrl+R reload. Links that try to open a popup or a new window open as a new in-app tab instead. Downloads land on a shelf at the bottom with progress and “show in folder”; a file type that can run programs asks you before it saves. If Browser isn’t in your sidebar, turn it on at Settings → Features → Enable Browser.
What makes it the AI Browser: an Omniscio session can drive it too — open a page, read it, click, type, take a screenshot — but only in its own separate tabs, on its own profile, walled off from yours. The agent never sees your cookies, your logins, or your saved passwords, and a layered safety model (below) decides what it may do and when.
Tabs and Spaces
- Spaces — named groups of tabs (“Work”, “Research”). Switching spaces swaps which tabs you see. They’re tidy piles, not separate logins — every space shares the same sign-ins.
- Vertical or horizontal tabs — a toolbar button swaps the tab strip from across the top to down the side. Your choice is remembered.
- Pin / Favorite / Today — right-click a tab: Pin keeps it alive indefinitely, Favorite protects it from auto-archiving, and everything else is Today — eligible for Omniscio’s automatic tidy-up of tabs you haven’t touched in a while. The tab you’re on (and the agent’s own tab) is never auto-cleaned.
- Command palette (Ctrl+K) — fuzzy-search every open tab in any space, plus your bookmarks and history, with quick actions like new tab, new space, and “ask about all open tabs” (hands every open tab’s title and address to your chat session as context).
- Ctrl+Tab — hold Ctrl and tap Tab to flip through your tabs most-recently-used first, the same feel as Alt+Tab for windows.
Persistent cookies and storage
The browser uses an Electron partition called persist:browser. Everything you’d expect to survive a browser restart in normal Chrome — cookies, localStorage, IndexedDB, cached resources — survives an Omniscio restart here too, scoped to a directory inside your Omniscio user-data folder.
Practical consequence: sign into a site once and you stay signed in. Open Gmail, sign in, close Omniscio, reopen tomorrow → still signed in. This same persist:browser session is also used by the Gmail email-link viewer — the in-app page that opens when you click a link inside an email — so signing into Google in the Browser pane also lets a Google Sheet/Doc linked from an email open signed-in (and vice-versa). It is separate from the cookies the rest of Omniscio stores (the Gmail inbox itself + Google Auth Gate use their own token-based auth / partitions).
The partition is also isolated from your real Chrome profile. Omniscio has no way to import bookmarks, saved passwords, autofill, or sign-in state from external Chrome — you’ll start fresh and have to sign back into each site the first time you visit.
Google sign-in caveat
Google actively detects embedded browsers (Electron webviews, Chromium Embedded Framework, etc.) and blocks sign-in on many flows with a “This browser or app may not be secure” error. Omniscio mitigates this by presenting a stock Chrome identity: a Chrome User-Agent pinned to the browser engine Omniscio actually ships (currently Chrome 148, kept honest by a build guard so it never goes stale), plus the matching Sec-CH-UA Client-Hint headers for Google. Setting the User-Agent string alone isn’t enough — a mismatch between it and the engine-derived Client Hints is exactly what Google’s newer heuristic flags — so Omniscio aligns both to look like a current, consistent Chrome. This is enough for most sites and most Google sub-products after an initial sign-in.
If the sign-in flow itself fails, sign in once in your real Chrome at accounts.google.com, then come back to Omniscio’s Browser pane. For many Google properties the second-factor cookie won’t carry over (different partition), so this isn’t always a fix — as a last resort, use a service-specific token / app password if the site exposes one, or view that property in your real browser.
Opening a Google doc linked from an email? The Gmail email-link viewer shares this same session, so a sign-in done in the Browser pane carries over. If Google still shows its rejection wall for a private doc, the viewer detects it and replaces the dead-end loop with a one-click “Continue in your browser” button that opens the original document link in your real browser — where Google allows the sign-in — so you’re never stuck.
The History button (six tabs in one)
The History toolbar button opens one modal with six tabs:
- History — pages you’ve visited in your own tabs; click one to reopen it, or clear everything (with a confirmation). The address bar also suggests from your history and bookmarks as you type.
- Memories — what Omniscio has indexed for semantic search; see Memories below.
- Passwords — your autofill vault; see Your saved logins below.
- Journeys — your recent browsing auto-grouped by topic; see Journeys below.
- Permissions — per-site rules for what the agent may do; see The safety model below.
- Skills — your saved browser workflows; see Skills below.
How a session drives it
Any Omniscio session automatically gets browser tools — nothing to configure. The toolkit is broad: open a page, read it as clean text, click, type, fill whole forms, scroll, hover, press keys, take or save screenshots, save a page as a PDF, read a YouTube video’s transcript, list every link on a page, watch a dev site’s console and network activity, and open, switch, and close its own tabs. It perceives the page first (a structured snapshot of what’s there), then acts on what it saw — the same look-then-act loop a careful person uses.
The agent’s tabs are marked in the tab strip and live on a completely separate profile. If a task needs the agent logged into a site, it signs in within its own profile — it can never act as you on a site you’re signed into. Its browsing is never recorded to your history, and it can only open normal web pages — it can’t be pointed at files on your computer.
The safety model, in plain words
- Per-site permissions (History → Permissions) — set any site to control (the default: the agent may read and act), read-only (look but never touch), no-access (can’t even read it), or blocked (no-access, meant for sites the agent should never go near, like your bank). A site’s explicit setting always wins.
- Watch-mode for sensitive sites — well-known banks, brokerages, payment processors, and social networks are on a built-in watch list: the agent may act on them only while you’re actually watching (the Browser panel open and focused). If it tries while you’re away, the action is refused and a “the agent needs you watching” card appears in your Inbox — it waits, it doesn’t fail silently.
- Nothing financial happens unattended, ever. Even a guided shopping task stops at the payment step — the agent never enters card details and never places the order. You review and pay by hand.
- Attended by default — beyond the watch list, agent actions currently require you present at all. A scheduled or background run can read pages (pull numbers off a dashboard, say) but can’t click or submit anything.
- Plan approval — before a multi-step task, the agent posts its plan as a short numbered checklist to your Inbox for approval. No answer means it keeps waiting — a plan is never auto-approved.
- Pause and take over — a Pause button in the toolbar freezes all agent actions instantly so you can take the wheel; Resume hands it back.
Your saved logins (autofill vault)
History → Passwords is a small password manager for your own tabs. Log into a site and Omniscio offers to save the login — you type it into the save dialog yourself; it doesn’t capture what you typed on the page. Come back to that site later and a toast offers to fill it in. Passwords are encrypted through your operating system’s own credential store, and the list only ever shows the site, username, and last-used date — never the password itself.
The agent can never read this vault. No tool and no route reaches it — the same wall that keeps your cookies out of the agent’s tabs keeps your passwords out too. Don’t confuse it with Browser Logins (the sidebar entry under Agent Tools), a separate feature that saves a browser session — never a password — specifically so your agents can reuse it. Short version: the autofill vault is for you only; Browser Logins is for the agents.
Memories (ask about pages you’ve already seen)
Omniscio quietly indexes the pages you visit in your own tabs — never the agent’s — entirely on your machine. A session can then search everything you’ve browsed: “what was that pricing page I looked at last week?” comes back with the page, the matching text, and when you saw it, instead of you digging through history by hand. Manage it from History → Memories: browse what’s indexed, delete individual entries, clear everything, or pause indexing entirely (it’s on by default).
Journeys (your browsing, auto-grouped)
History → Journeys groups your recent browsing into topic clusters automatically — nothing to save by hand. Handy for “what was I looking at when I was researching flights?” It’s a light, on-the-fly grouping, not a precise research tracker.
Design mode & Visual Edit (point at the page, change your code)
Two toolbar tools for when the page you’re looking at is your own project, both working with the session bound in the side chat:
- Visual Edit (cursor-target icon) — click any element on the page and describe the change in plain English: “make this button blue.” Omniscio sends your session everything it needs — the element, its styles, a cropped screenshot — and the session makes the change in your source code. No session bound? The same prompt is copied to your clipboard to paste anywhere.
- Design mode (palette icon) — click an element and a live style panel opens: color, background, font size and weight, spacing, size, corner radius, plus move-up/move-down among its neighbors. Changes preview instantly on the real page so you can see exactly what you’re doing; Apply sends just what you changed to your coding session with an instruction to edit the source. It edits your code — it never hacks the live page.
Cursor chat & Compose (AI writes into any text box)
The pencil icon captures whatever text field you’re focused on. Select some text first and it opens in rewrite mode (“make this friendlier”); focus an empty field and it opens in compose mode (“draft a polite reply declining”). Type the instruction and your bound session writes the result straight back into the field. In plain text boxes, Ctrl+Z undoes it exactly like your own typing; in rich editors like Gmail it’s best-effort — treat undo there as a bonus, not a guarantee. Password fields are never captured.
Record a workflow, run it as a Skill
The Record button captures your clicks, typing, and page moves while it’s on. Hit Stop and a review panel lists every value you typed — you choose which ones become fill-in-later blanks (so “search for October invoices” can become “search for anything”), and anything that looks like a password shows up hidden rather than being saved as-is. The result is a Skill. An agent can record its own workflow the same way, with the same review step.
Skills (History → Skills) is your gallery of saved browser workflows — “Summarize this page”, “Pull the action items off this doc” — each with a name, plain-English steps, and an optional emoji. Running one goes through the same run dialog and the same safety gates as any recipe — a skill is a shortcut to a workflow, never a way around the guardrails. For now it’s your own skills only; there’s no community gallery yet.
Side chat
A collapsible chat panel docks on the right of the Browser view with whichever session you pick — the same chat as the Dashboard, just parked next to the page so you’re not switching views to talk to the agent that’s driving. This is the session Visual Edit, Design mode, and Cursor chat all hand off to. Toggle it from the command palette or its own collapse control.
Staying signed in
Your own tabs keep the same persistent profile the Browser pane has always used: sign into a site once and you stay signed in across Omniscio restarts. It’s isolated from your real Chrome — bookmarks, passwords, and sign-in state don’t carry over, so you’ll sign into each site fresh the first time you visit.
One caveat: Google sometimes blocks sign-in inside embedded browsers with a “This browser or app may not be secure” error. Omniscio works around it well enough for most sites; if a Google sign-in still fails, sign into that Google property in your real browser, or use a service-specific app password if the site offers one.
Browsing data, Memories, Journeys, saved passwords, and Skills all live locally — nothing leaves your computer. The agent’s browsing never lands in your history, Memories only ever index your tabs, and the embedded pages run sandboxed and untrusted, exactly as before.
What’s intentionally missing
- No extensions. Ad blockers and third-party password managers don’t apply here.
- The agent stays on the web. It can only open normal
http/httpspages — it can’t be pointed at files on your computer. - Design mode reordering is step-by-step (move up / move down among neighbors), not drag-and-drop.
- Cursor chat in rich editors is best-effort — plain text boxes are the fully-supported case.
- Recorded Skills replay literally. A recording repeats what happened, generalized only by the blanks you tagged — it doesn’t infer a broader workflow from one run.
It’s still not meant to replace your daily-driver browser — it’s the browser your AI can safely help you in.
Running Apps
A live list of the dev servers Omniscio is running for you, each at a stable .localhost URL.
Running Apps is a built-in sidebar virtual hub (emerald app-window icon). When a Claude session spins up a dev server — a frontend, an API — it shows up here so you have one place to see every live app, open it in-pane, and stop it, without hunting for ports.
It’s a thin UI over portless, a small dev proxy. Instead of each dev server grabbing a random port you have to remember, Omniscio launches it behind portless, which gives it a stable, human-readable hostname like https://my-feature.localhost. The .localhost name always resolves to your own machine, so these URLs only ever reach local dev servers.
Requirements
Two prerequisites: portless installed, and system Node 24 or newer (portless requires it). You don’t have to install portless by hand — if it’s missing, the panel shows a one-click Install portless button (see below). If your Node is older than 24, the panel tells you to update Node first and links to the download, since the install would fail otherwise.
What you see
One row per live app: its short slug, a green port chip, the browsable .localhost URL (click to open it inside Omniscio in an embedded view), and a Stop button. A Refresh button re-reads the list, and the panel also live-updates on its own as apps come and go.
When nothing is running, the empty state adapts to what’s on your machine: portless installed → a plain “No apps running”; portless missing, Node 24+ → an Install portless button (one click, with a spinner, then it’s ready — no restart); Node too old → an “update Node first” message with a download link. Installing portless from here uses Omniscio’s built-in tool installer, so it also appears with an Install button in Settings → Connected Tools and the Tools screen.
Enabling it
Running Apps is off by default. Turn it on at Settings → Features → Running Apps. Toggling it off hides the sidebar row and pauses the live poll; toggling back on restores both.
Chrome Extension Dev (Autopilot)
Build and test Chrome extensions without clicking — the agent drives a real browser for you.
Chrome Extension Dev is a Labs feature — it is hidden by default. Turn it on at Settings → Lab → Chrome extension dev (Autopilot), or launch Omniscio with AMC_SHOW_CHROME_EXTENSION_DEV=1. Once it ships to everyone, the Labs toggle will disappear and it will be on for all users.
When you have a Claude session work on a Chrome extension project, this feature lets the agent build and test the extension itself — loading it into a real Chrome, clicking the popup, taking screenshots, reading the console, and reloading after code changes. No manual clicking required.
It works by giving the agent a built-in extension-dev workflow that teaches it the load → exercise → screenshot → reload → iterate loop — exactly the kind of hands-on verification a developer would do themselves. Unlike web-app testing (which uses the lightweight Obscura browser), Chrome extensions need a real, pixel-rendering Chrome that can load unpacked extensions, and that’s exactly what this feature provides.
What happens automatically
When all the conditions are met (your project has a Chrome extension manifest.json, the feature is enabled, and agent-browser is installed), Omniscio automatically:
- Injects the extension-dev workflow into every session opened on that project.
- Writes a
agent-browser.jsonfile to the project root —{ "headed": true, "extensions": ["."] }— which tells the browser tool to launch in headed mode and load the project as an unpacked extension. This file is added to.gitignoreso it is never committed.
What it is not
- Not Chrome Web Store publishing — this covers building and testing only. Submitting to the Store is a separate step.
- Chrome only — Firefox and Safari extension formats are not supported.
- Not general browser automation — the feature is specifically for the Chrome-extension development loop, not arbitrary web browsing or scraping.
Setting it up
- Open Settings (gear icon in the toolbar).
- Go to the Lab tab.
- Flip the Chrome extension dev (Autopilot) toggle on.
- If
agent-browserand Chrome-for-Testing are not yet installed, Omniscio shows a “Set it up for me” button. Click it — Omniscio downloads both in one step. You do not need a separately installed Chrome.
If you open a Chrome-extension project with the feature enabled but agent-browser not yet installed, Omniscio drops a single dismissible Inbox card offering one-click setup. It appears once per install and never nags.
The “Build a Chrome Extension” mission
A guided coaching mission takes you from idea to working, tested extension in a single session. It scaffolds the extension folder structure and manifest, then hands off to a session that has the Autopilot workflow already active — so the agent builds the popup and any background logic, then verifies each piece by driving Chrome itself. Reach the mission from the project empty-state or the mission picker.
Privacy
agent-browser launches a clean managed Chrome-for-Testing instance — not your real Chrome profile. Omniscio passes no cookies, saved passwords, bookmarks, or sign-in state to the test browser. It is physically isolated from your real Chrome.
Extensions hub
When the feature is enabled, an Extensions tool appears in the sidebar. Clicking it opens the Chrome Extensions Hub — a panel listing all your Chrome-extension projects in one place. Each project shows a status pill (Tested if the agent has already run and saved screenshots, Draft if not) and three quick actions: Open (switch to the project), Test it (confirm, then launch an Autopilot session), and Install in Chrome (reveals the folder and walks you through Chrome’s Load-unpacked steps — only enabled after at least one successful test run). Right-clicking a row lets you Rename or Remove the project; Remove is a soft-delete with a one-click undo. The + New Extension button at the top launches the guided “Build a Chrome Extension” mission. Omniscio never auto-installs an extension into Chrome or opens a chrome:// URL — Chrome requires you to load unpacked extensions yourself, so the hub shows you exactly how.
Tasks
An AI-powered personal task manager with daily planning, adaptive memory, and agent automation.
Tasks is Omniscio's built-in task manager. It combines a keyboard-first outliner with AI planning intelligence: a daily check-in that learns your capacity, automatic follow-up extraction from your AI sessions, and coaching for overwhelm and procrastination. Everything is local-only — your tasks, plans, and AI conversations stay on this machine.
Opening Tasks
Tasks is off by default. Enable it at Settings → Features → Tasks, then click the Tasks entry in the sidebar. Turning the feature off later only hides it — your data stays in the database and reappears when you flip it back on.
Core Concepts
- Today plate — the short list of tasks you plan to work on today, separate from the full backlog
- Hubs — group tasks under a hub with master context that cascades to every child task
- Lists — organize tasks into custom lists (Inbox is the default)
- Importance & urgency — rate each task on a 0–3 scale; the AI uses these to prioritize
- Done / Dropped archive — completed and dropped tasks move to the archive, keeping the active list clean
AI Planning Intelligence
Tasks includes several AI-powered planning features, each running as a bounded Claude session:
- Daily check-in — a conversational morning ritual where the AI reviews your plate, suggests a focus order, and proposes new tasks or splits. One check-in per day; the conversation is saved as a planning journal.
- Plan my day — a deeper planning session that produces a structured plan (focus items, new tasks, splits, profile updates) you can accept or modify
- Right Now — a single-item answer to "what should I do next?", combining local ranking with a cached AI verdict
- Arrange — AI-powered reordering of your Today plate with per-pick rationale
- Plan chat — a free-form ongoing conversation about your day's plan, with full context from your plate, backlog, and learnings
Adaptive Memory
Tasks learns from your behavior over time:
- Learnings — short behavioral insights the AI distills from your planning patterns (e.g., "Plans with more than 4 deep-work items historically fail"). You can edit or dismiss any learning; editing makes it permanent so the AI cannot overwrite it.
- Day log — a daily record of what was planned vs. completed vs. carried over, with counts. The AI uses 14 days of this history to calibrate realistic planning recommendations.
- Reality snapshot — a behavioral profile (median planned, median completed, plan rate, chronic carryovers, catch keep rate) that primes every AI prompt so recommendations reflect your actual capacity.
Caught Items
When an AI session ends, Omniscio scans the transcript and automatically extracts follow-up tasks, detects completed open tasks, and identifies stale suggestions. Caught items appear in a review queue — keep, edit, or dismiss each one. The system calibrates over time based on your keep rate.
Suggestions older than 30 days are automatically hidden from the active list so it stays focused on recent items. They are not deleted — a banner shows how many were hidden and links to Ask Omniscio, where you can search for them and re-add any you still need.
Coaching Sessions
Three coaching personas are available as dedicated AI sessions:
- Overwhelm Coach — a two-act session: emotional regulation first (breathing, brain dump, ruthless triage), then structured planning
- Breakdown / Momentum — breaks a large task into phased steps with calibration
- EAD Analyzer — Eliminate, Automate, Delegate analysis for your task list
The Outliner
- Each row is one task with a checkbox, the task text, and optional chips for due date, snooze, importance, and urgency
- Children indent under their parent to any depth
- A breadcrumb across the top shows where you are when you drill into a sub-tree
- Repeating tasks spawn a successor when completed or archived
Keyboard Shortcuts
| Shortcut | What It Does |
|---|---|
| ↑ / ↓ | Move focus up / down between rows |
| Shift+↑ / Shift+↓ | Extend selection (for bulk actions) |
| Alt+Shift+↑ / Alt+Shift+↓ | Move the focused row up / down |
| Tab | Indent (make the row a child of the row above) |
| Shift+Tab | Outdent (promote the row one level up) |
| Enter | Split the row at the cursor |
| Backspace on empty row | Delete the empty row, focus moves up |
| Cmd/Ctrl+. | Drill into the focused row |
| Cmd/Ctrl+, | Drill out (back to the parent) |
| Cmd/Ctrl+Enter | Toggle the checkbox (mark done / undone) |
| Cmd/Ctrl+; | Set or clear due date |
| Cmd/Ctrl+Z | Undo the last edit |
| Cmd/Ctrl+Shift+Backspace | Delete the focused row |
| Cmd/Ctrl+D | Duplicate the focused row |
| Esc | Drill out, or clear selection |
Agent and CLI Access
Tasks exposes a full CLI API (85+ endpoints) for agents and automation. Agents can create, update, complete, and organize tasks; read the Today plate; trigger AI planning sessions; and poll for fired events. All CLI access requires the local bearer token and is rate-limited.
A read-only Markdown mirror (tasks-v2.md) is written to your user-data folder on every save, so local agents can read your task list as a plain file.
Notifications
When a task's due date or snooze time arrives, Omniscio fires a notification. Focus Mode batches reminders into a single grouped toast when active.
Tasks is opt-in: turn it off at Settings → Features → Tasks if you don't use it. Toggling off only hides the sidebar entry — your existing data stays in the database.
Scratchpads
Chrome-style persistent notes — jot something down before you forget.
Scratchpads is a tiny "quick notes" surface that lives as a virtual hub in the Omniscio sidebar. Two panes: pad list on the left (most-recently-updated first), rich body editor on the right. No folders — it is deliberately the smallest possible "jot it down" tool, not a notebook — but you can paste images inline alongside your text, and a header toggle adds live markdown styling (headings, bold, italic, code, lists, blockquotes, links) while still letting you edit. Local-only: every pad lives in Omniscio's database on this machine, and pasted images are embedded directly in the pad. Nothing leaves your computer.
Opening Scratchpads
Click the Scratchpads entry in the Omniscio virtual-project group in the sidebar. The first time you open it, the panel shows a "No scratchpads yet" card with a Create button.
The Two-Pane View
- Pad list (left) — one row per pad, sorted with the most recently edited at the top. A filter box at the top of the list narrows by title and body text, case-insensitive.
- Editor (right) — the header bar holds an inline-editable title (defaults to the pad's first line), a Saved pill, a Markdown toggle button (paragraph-icon, see below), a Copy all button, and a Delete button. The body accepts plain text and pasted images.
- Stats row — a thin footer under the editor shows chars · lines · ~tokens (and N images when at least one image is pasted in). Tokens are an estimate (
chars ÷ 4, marked with~); image data is excluded from the char count so a screenshot doesn't inflate it. - Auto-save — 500 ms after you stop typing, Omniscio writes the pad to the database. The pill flips to "Saving…" while in flight and back to "Saved" when done.
On a phone (or any narrow window) the two panes stack into one: you see the full-width list of notes, and tapping a note (or +) opens it full-screen with a ← Scratchpads button to return to the list. On a desktop-width window the two panes sit side by side as described above.
Pop Out Into Its Own Window
Click the Pop out button (the small open-in-new-window icon — in the two-pane view's header next to +, and in the Quick Capture overlay's header) to move your scratch pad into its own separate, movable, resizable window. You can also open it by right-clicking the Scratchpads row in the hubs sidebar and picking Open in new window. Park it on a second monitor or beside whatever else you're doing — it stays open while you use the rest of Omniscio.
- Same notes, live — the window shows the full list-and-editor view, and edits sync both ways with the in-app scratch pad instantly (it's the same notes underneath).
- One window — clicking Pop out again just brings the existing window to the front rather than opening another. Close it like any normal window.
- Remembers itself — it reopens at the same size and position, and follows your light/dark theme automatically.
- Popping out from the Quick Capture overlay saves whatever you've jotted first, then opens the window on that note.
(Desktop only — the button isn't shown on a phone.)
Pasting, Copying, and Resizing Images
Take a screenshot (Windows: Win+Shift+S, then Ctrl+V into the pad) and the image lands inline at the cursor. To get an image back out or change its size:
- Single-click an image to surface two small overlays: a Copy image chip at the top-right (click it to copy to the system clipboard) and a tiny resize handle at the bottom-right corner.
- Drag the resize handle (the cursor changes to a diagonal arrow) to scale the image. The aspect ratio is preserved automatically — you only drag horizontally. There is no max height; you can grow the image up to the editor column's width.
- Right-click an image for a small context menu with Copy Image and Remove.
- Scrolling or typing dismisses both the Copy chip and the resize handle.
- Ctrl+Z reverts a resize the same way it reverts a text edit — the resize is captured in the pad's undo history.
The Copy chip and resize handle both use theme-aware colors, so they stay visible whether you're in light or dark mode.
Rich-text paste from a webpage is reduced to plain text — scratchpads are not a rich-text editor.
Markdown Styling
Click the small paragraph-icon button in the editor header to turn live markdown styling on or off. When it's on (the button is filled with the accent color), Omniscio visually styles your text as you type:
- Headings — lines starting with
#,##, or###render bigger and bolder. - Bold — text wrapped in
**double asterisks**. - Italic — text wrapped in
*single asterisks*or_underscores_. - Inline code — text wrapped in
`backticks`. - Code blocks — lines starting with three backticks (
```) open and close a code block. - Lists — lines starting with
-or*. - Blockquotes — lines starting with
>. - Links —
[link text](https://example.com)displays the text styled as a link.
You're still editing the underlying markdown source — turning the toggle off doesn't remove the ** or # characters, it just stops styling them. The toggle preference is saved across app restarts, and the Quick Capture overlay (Ctrl+Shift+S) has the same toggle button in its header — both flip the same setting, so turning it on in one place turns it on everywhere.
List shortcuts (bullets & numbering)
Two shortcuts turn the line your cursor is on into a list — the same keys the Vault editor uses. They work everywhere you edit a scratchpad (the main view, Quick Capture, and the popped-out window), whether or not markdown styling is turned on.
- Bullet list — Ctrl+. (or Ctrl+Shift+8, the Word / Google‑Docs combo).
- Numbered list — Ctrl+/ (or Ctrl+Shift+7).
Press once to add the marker, press the same keys again to remove it. Select several lines first and numbering counts them 1, 2, 3 down the list. Press it on a heading and it cleanly becomes a list instead of stacking. Your place in the text is kept as the marker appears, and it's a single Ctrl+Z to undo.
Quick Capture (Ctrl+Shift+S)
Press Ctrl+Shift+S from anywhere in Omniscio — even while typing in another input — to open a large centered overlay — roughly 80% of the viewport width and 85% of its height, a comfortable near-full-screen note surface, but still a modal with a visible backdrop — for a quick note. The Scratchpad button (NotebookPen icon) is also pinned to the top-right toolbar by default, so you can reach the overlay with a click. The footer hint "Press Ctrl+Enter or close to save. Notes shorter than 3 characters are discarded." is centered under the editor, with the same chars / lines / ~tokens / images stats row above it. Esc, click-outside, the X button, Ctrl+W / Cmd+W, or Ctrl+Enter closes it (Ctrl+W is intercepted by the overlay so it doesn't archive the session behind it).
The overlay opens as a single editor surface — the editor fills the modal, both its full width and its full height (from the toolbar down to the stats row). A pad list is available behind a header toggle so you can swap between recent pads, but it stays out of the way by default:
- The list is collapsed by default, every single time you open the overlay (no persistence). To reveal it, click the "N notes" pill — a pill-shaped toggle in the second row of the header (beneath the title) showing a panel icon and a live count, e.g. 37 notes. Clicking expands the pane, flips the icon, and tints the pill in the accent color; click again to hide. The count lives right in the pill text (no separate badge, no chevron), so it always tells you how many notes you can open. You can also toggle the list with Ctrl+L, or open it with Tab and close it with Shift+Tab. Toggling the list doesn't remount the editor or drop typed content.
- When expanded, the list pane shows every pad sorted most-recently-updated first, with title, relative time, and a snippet of the body. Click any row to swap the editor to that pad in place — the overlay stays open and the list stays open.
- The + New button at the top of the list pane clears the editor to fresh-draft mode (no pad selected). The next save creates a new pad, and clicking + New also clears the 60-second reattach window so a quick "wait, one more pad" never collapses two pads into one.
On close:
- In fresh-draft mode (the default each time you open the overlay), if the visible plain text has fewer than 3 characters (after trimming), nothing is saved — the overlay just closes. A pad consisting only of a pasted image is kept (the image is the visible content). Otherwise, a new pad is created with the first line as the title.
- In existing-pad mode (after clicking a row in the list pane), close flushes any pending autosave against that pad and does NOT create a new one.
- If you re-open the overlay within 60 seconds of a fresh-draft close, Omniscio re-attaches to the last pad instead of creating a new one — so a quick "wait, one more line" doesn't fragment a note across two pads. Switching pads inside the overlay or clicking + New clears this window so intra-overlay flows can never accidentally reattach.
The overlay header is two rows. The top row has the "Quick scratchpad" title on the left and the X close button on the right. The second row has the "N notes" pill (show / hide the pad list, described above) on the left, and on the right a Markdown toggle (the same paragraph-icon button described above) followed by a Copy all button. The markdown toggle flips the same global preference used by the main editor, so live markdown styling lights up immediately in the overlay as you type. The Copy button copies the current overlay body to your OS clipboard as plain text (HTML wrappers from the rich editor are stripped) and is disabled while the body is empty and image-free, so an accidental click on an empty overlay never overwrites the clipboard.
Overlay shortcuts toggle the layout without touching your text: Ctrl+L shows or hides the pad list (same as the "N notes" pill), and Tab toggles the list (press once to show it, again to hide it) while Shift+Tab always closes it. They work even while you're typing in the note, and the setting doesn't stick — the list starts collapsed every time you open it. (Inside this overlay, Tab is dedicated to the pad list, so it no longer hops between the overlay's buttons.)
The keyboard shortcut is rebindable at Settings → Keyboard Shortcuts → Quick scratchpad.
Save and start new (Ctrl+T inside the overlay)
Press Ctrl+T while the Quick Capture overlay is open to save the current note and reset the editor to a blank fresh draft — without closing the overlay. Use this when you want to jot a series of separate notes back-to-back, one after another, without each one closing and re-opening the surface.
- In fresh-draft mode, if the body has at least 3 visible characters (or any pasted image), a new pad is created. Sub-threshold bodies are discarded, the editor still clears. Same "not worth keeping" rule the close-on-Esc path uses.
- In existing-pad mode (after picking a row from the list pane), any pending autosave is flushed against that pad and the editor swaps back to a fresh draft. The just-edited pad stays in the list with your edits saved.
- After every successful Ctrl+T, the overlay stays open, the editor remounts empty, and the 60-second reattach window from the close-and-reopen flow is cleared — so the next save creates a brand-new pad, never silently overwriting the one you just saved.
- If the save fails (e.g. database locked), an error toast appears and your draft is preserved so you can press Ctrl+T again without losing the text.
- Two rapid Ctrl+T presses coalesce silently into one save — the second press is ignored while the first is in flight.
Outside the overlay, Ctrl+T keeps its normal meaning — launching a new Claude session in the active project. The two interpretations never fire together: whenever the overlay (or any other modal) is open, the global new-session shortcut is suppressed.
Delete, Trash & Restore
The trash icon in the editor header opens a confirm dialog. After deleting, the pad moves to Trash and a toast appears with an Undo button — click it to restore the pad immediately.
Trash. The header bar shows a Trash button with a count badge (e.g. “3”) whenever trashed pads exist. Click it to open a popover listing your trashed notes, newest-deleted first. From there you can Restore a pad (moves it back to your active list) or Delete forever (permanent, no recovery).
30-day auto-purge. Trashed pads older than 30 days are automatically and permanently deleted. This is always on — no toggle. The 30-day window gives you time to recover an accidental delete.
Auto-delete (optional). Under Settings → System → Auto-Delete Old Scratchpad Notes you can have notes you haven’t edited in a chosen number of days (1–365, default 30) moved to Trash automatically. It is off by default and asks for confirmation before you turn it on. Auto-deleted notes land in Trash and can be restored within 30 days (after which the auto-purge removes them). Editing a note resets its timer.
Still deferred
The following are deferred to a later release: pinning, right-click "Save message to scratchpad" from a chat, global Ctrl+K search across pads, and a settings toggle to disable the feature.
If you want longer-form, structured per-project notes that Claude can see, use Project Notes (the three-dot menu on any project → Edit Notes) instead. Scratchpads is for the throwaway "remember to call Bob" kind of note, not the durable project context.
Writer Studio
A full-screen writing editor with saved documents and AI-powered editing.
Writer Studio is a Labs feature — it is hidden by default. Turn it on at Settings → Lab → Writer Studio, or launch Omniscio with AMC_SHOW_AI_WRITER=1. Once it ships to everyone, the Labs toggle will disappear and it will be on for all users.
Writer Studio is a standalone writing surface inside Omniscio. It opens as a virtual hub in the sidebar and gives you a clean, full-screen editor for writing documents in markdown — notes, drafts, documentation, anything. Documents are saved locally on your machine (they are not tied to any Claude account) and auto-save as you type.
Turning it on
- Open Settings (gear icon in the toolbar).
- Go to the Lab tab.
- Flip the Writer Studio toggle on.
- A Writer Studio entry appears in the Omniscio virtual-project group in the sidebar. Click it to open the writing surface.
Creating and opening documents
- The document list is on the left. Click + New Document to create one.
- Each document has a title (editable inline) and a body that you edit in the main panel on the right.
- Click any document in the list to open it. The editor loads its content immediately.
Auto-save
Your work is saved automatically — 500 ms after you stop typing, Omniscio writes the document to its local database. You do not need to press Save. Switching to a different document flushes any pending save first, so nothing is lost on quick switches.
Renaming a document
Click the document title at the top of the editor to edit it, or click the … (three-dot) menu on a document in the sidebar list and choose Edit title. Either way, press Enter or click elsewhere to save the new name; press Escape to cancel.
Writing Guidance panel
The Writing Guidance panel lets you write instructions for the AI — things like "keep the tone formal" or "this is for a technical audience." These instructions will be used when AI editing tools are available (coming in a later release). You can fill this in now so it is ready when AI features arrive.
Creativity Dial
The Creativity Dial controls how conservative or inventive AI suggestions will be, on a scale from 0 to 100. Lower values produce suggestions that stick close to your existing text; higher values allow bolder rewrites. Like the Guidance panel, this setting is ready now and will take effect when AI editing features ship.
Deleting a document
Open the document you want to remove, then click the Delete button (trash icon). A confirmation dialog appears — confirm to delete. A toast appears for a few seconds with an Undo button. Click Undo to restore the document before the toast disappears. After that, the document is gone.
What's coming next
The current release covers the core document management loop. AI-powered features are planned for later phases:
- Selection edits — select a passage and ask the AI to rewrite, expand, or condense it.
- Options — generate multiple alternative versions of a section.
- Autocomplete — AI continues your sentence as you type.
- Chat assistant — a side panel for free-form conversation about the document.
Screen Recordings
A built-in Loom-style screen recorder — capture, review, and share, all from inside Omniscio.
Screen Recordings is the built-in screen recorder inside Omniscio. Capture a screen or a single window, review the result in a built-in player, and publish a shareable link — without leaving Omniscio or installing a separate tool. It lives as its own entry in the Omniscio sidebar (a film-frame icon, in the Omniscio built-ins group). Everything is local-first: recordings are written to your own machine and nothing is uploaded unless you explicitly publish.
Opening Screen Recordings
Click the Screen Recordings entry in the Omniscio sidebar. The library view opens — a list of every recording you've made, newest first. The first time, the list is empty and shows a “No recordings yet” message. If you don't see the sidebar entry, enable it at Settings → Features → Screen Recorder (on by default).
Starting a Recording
Open the Record tab (or click New recording in the library header). Starting a recording is a two-step flow, with a live preview of your composed recording always visible at the top — it updates the moment you pick or arrange anything, on both steps:
- Step 1 — Choose what to record. A grid of tiles, one per screen and per open window the OS exposes, a Record my webcam toggle with a camera picker, and your saved presets & templates (loading a preset jumps straight to Step 2 with the saved scene). Select one or more sources; the Next button stays disabled until you do.
- Step 2 — Recording options. Every option: output size, resize mode, layout arrangement, microphone and system audio, and webcam shape. Back returns to Step 1 at any time — your picked sources and arranged options are kept.
- Start recording at the bottom of Step 2 begins the capture with your composed scene.
While the picker looks for available sources it briefly shows “Finding screens and windows…”. This step is bounded to about 8 seconds. On some machines — remote desktop (RDP), a locked screen, or a graphics-starved environment — the operating system's source list can otherwise hang forever, leaving you stuck on the spinner. Omniscio now always settles within ~8 seconds: if no sources came back it shows a “No capture sources available” message instead of hanging. If you hit that, check that a display is connected and that Omniscio has the OS screen-recording permission, then try again. On a normal desktop the list appears almost instantly.
While Recording
Once capture starts it keeps running in the background no matter which Omniscio view you're looking at. A floating control bar appears on the same display as the Omniscio window — and you can drag it anywhere (grab the bar anywhere that isn't a button) if it's covering something you want to record around. The controls:
| Action | What It Does |
|---|---|
| Pause | Stops capturing but keeps the session live — Resume continues into the same file |
| Resume | Continues a paused recording |
| Stop | Finalizes the capture. Omniscio transcodes it to an MP4 and the row appears in the library |
| Discard | Throws the recording away (no file kept). Asked for confirmation because it's permanent |
| Panic mute | Instantly mutes mic and camera without stopping the recording — for when something unexpected happens off-screen |
Review & Publish
Click any finished recording in the library to open the Review Window:
- An inline video player that plays the local MP4
- A title field (defaults to the source label, e.g. “Screen 1” or a window title)
- An optional custom URL slug (lowercase letters, numbers, and hyphens; up to 64 characters)
- Publish — marks the recording published and gives you a shareable link to copy (Ctrl+Enter also submits). After publishing, the footer swaps to Copy link + Done.
- Discard — permanently deletes the recording (after a confirm dialog)
In the current release, Publish mints the share link and marks the recording published, but the actual upload + public viewer page are not live yet. The MP4 stays on your machine. Treat Publish as “mark ready to share” until cloud hosting ships.
Recovered Recordings
If Omniscio closes or crashes mid-recording, the partial capture isn't lost. On the next launch, Omniscio scans for interrupted recordings and surfaces them in the library as “Recovered” entries — click one to finish processing it into a normal MP4, or discard it.
Where Recordings Live
Every recording is stored under a screen-recordings folder in Omniscio's user-data directory on this machine:
| OS | Path |
|---|---|
| Windows | %APPDATA%\omniscio\screen-recordings\ |
| macOS | ~/Library/Application Support/omniscio/screen-recordings/ |
| Linux | ~/.config/omniscio/screen-recordings/ |
Screen Recorder is opt-in: turn it off at Settings → Features → Screen Recorder if you don't use it. Toggling off only hides the sidebar entry — your existing recordings stay on disk.
MemPalace
A persistent memory system for your AI agents.
MemPalace (Memory Palace) gives your AI agents persistent memory across sessions. Normally, each AI session starts fresh with no memory of previous sessions. MemPalace changes that by letting agents store and recall information.
How It Works
When MemPalace is enabled, Omniscio injects a memory server (via MCP) into each session. The AI agent can:
- Store memories — Save important information, decisions, patterns, or preferences
- Recall memories — Search for relevant information from past sessions
- Update memories — Correct or refine stored information
Setting Up
- Go to Settings → Features.
- Toggle "Enable Memory Palace" on.
- New sessions will automatically have access to the memory system.
Viewing Memories
Once enabled, open the toolbar’s “more” (…) menu and click Memory Palace (under Notes & capture) — or pin it to the toolbar — to browse stored memories. You can search, view, edit, and delete individual memories.
MemPalace is especially useful with recipes and cron jobs. The AI can remember what happened in previous runs and improve its approach over time.
The Vault
A full Markdown vault editor inside Omniscio — notes, wiki-links, images, AI image analysis, and unified search.
The Vault is an integration that lets you point Omniscio at a folder of Markdown notes (a "vault") and use it like a built-in editor. You browse notes in a file tree, open them in a TipTap-based rich editor, drop images straight into the body, search across every note's title + content + images in one place, and let Omniscio's AI describe / OCR / tag your images automatically. It is gated by a setting, off by default, and writes only inside the vault folder you pick.
If you already use the Vault desktop app (or Obsidian, or VS Code, or any other Markdown editor), The Vault-in-Omniscio reads and writes the exact same `.md` files on disk — it is not a separate "Omniscio notes" silo. You can edit a note in Omniscio, switch to another editor, edit it there, and Omniscio will pick up the change live via its file watcher.
Quick Reference Wizard
The first time you enable The Vault, a Quick Reference Wizard opens automatically to walk you through the basics: what The Vault is, how notes and search work, what agent tools are available, how to ask your vault questions, and power features like the pop-out window and AI summaries. The final step lets you pick your vault folder right inside the wizard.
The wizard is purely educational; closing it early is fine. You can replay it any time from two places:
- Settings → Setup Wizards — a "Vault Quick Reference" card with a Take/Retake button (shows a green checkmark if you have completed it before).
- Settings → Features → The Vault — a "Quick Reference Guide" card near the top.
If you already had The Vault enabled before this feature was added, you will see a one-time inbox alert letting you know the guide is available.
Turning The Vault on
- Open Settings → Features and flip Enable The Vault.
- In the Vault card on that same Settings → Features page, click Choose folder… and pick the folder that holds your
.mdnotes (e.g.C:/MyNotes). Omniscio checks the folder is usable first — it must already exist and be a normal folder, not a system folder or a shortcut — and tells you plainly if it isn’t, so nothing is saved until you pick a good one. Changing the folder takes effect right away — the Vault panel switches to the new folder’s notes, no restart needed. (You can also turn Watch vault for changes off here if you’d rather Omniscio only re-scan on restart.) - Omniscio's indexer scans every `.md` file under the vault root and parses YAML frontmatter,
#hashtags, and[[wiki-links]]. The first scan takes a moment; subsequent launches are incremental. - A new The Vault entry appears in the Omniscio sidebar group with a book icon. Click it to open the panel.
The Vault panel
The panel has a sidebar, an editor, and an on-demand side drawer:
- File tree (Omniscio sidebar, Pane 2) — lives in Omniscio's native sub-sidebar (same slot as Tools, Skills, Alarms, AI Coaching), so it gets the standard resize handle and mobile drill-down. The sidebar has a Files / Sessions toggle at the top; the Files tab shows every folder and `.md` file under the vault root, each note labelled by its name with the `.md` extension hidden (it's implied — every note is a Markdown file). Click a note to open it in a tab. Right-click a note for Rename / Move / Hide / Delete. Right-click a folder for New note / New folder. Add a note with the header's + button (or a folder's New note) — the new note opens, and the tree scrolls to it and highlights it so you can see where it landed, even when your sort order would otherwise place it off-screen.
- Sessions (Omniscio sidebar, Pane 2 — the Sessions tab) — switch the toggle to Sessions to list the AI sessions running in this vault, and start a new one with + New. Each session row behaves exactly like a session in Omniscio's main sidebar: middle-click to archive it, right-click for the full menu (archive, snooze, pause, move), a hover ··· actions button, a coloured status dot, and Ctrl+Z (or the toast's Undo) to undo an archive. Available on the phone layout too — see On a phone or narrow window below.
- Editor (main panel) — a tabs strip on top (one tab per open note, persisted across relaunches), the TipTap rich editor in the middle, and a status bar at the bottom showing word count + character count.
- Side panel drawer (closed by default) — click the Toggle side panel button in the editor toolbar's View group (the rightmost icon, shows a panel-on-the-right glyph) to slide out a stack of collapsible panels: Outline, Backlinks (every note that wiki-links to the active note), Smart Connections (notes semantically related to the one you're reading but not yet linked — requires Semantic Search; see below), Tags, Bookmarks, Hidden (notes you've hidden from the tree), and Gallery (every image in your vault — see the Images section below). The drawer slides in smoothly from the right, over the editor only — the tabs and toolbar stay put above it, so the toggle (and your formatting buttons) stay visible and usable while it's open. Click the X in the drawer header (or the Toggle side panel button again) to slide it away without leaving the editor; your last open/closed choice is remembered across relaunches.
On a phone or narrow window
On a small touch screen the panel switches to a layout built for one-handed use. A compact top bar shows ☰ Notes, the current note's title, and a ⋯ More button. Tap ☰ to slide your note list (the file tree) in over the editor; tap a note and it opens and the list slides away. The open-note tabs become a single row you swipe sideways. Tap ⋯ (or Aa More on the slim bar that appears while you type) to open a sheet holding every formatting control — bold, italic, headings, lists, links, images, and the rest — plus the side-panel, find, source-view, and bookmark actions. The desktop toolbar and status bar are tucked away to keep the writing surface calm. The sidebar's Files / Sessions toggle is here too — tap Sessions to reach the AI sessions running in this vault and tap one to open its chat full-screen, the same sessions you'd see on the desktop.
Vault Overview — every note at a glance
The Vault Overview is a bird’s-eye table of every note in your vault on one screen — title, tags, its AI summary, an estimated size (tokens and bytes), and when it was last edited. It’s the companion to the note-by-note editor: handy for auditing a big vault, finding a note by tag or summary text, and seeing at a glance which notes are large.
- Open it — the Vault Overview button in the editor toolbar, or Ctrl+Shift+P → “Vault Overview”. It also has its own rebindable shortcut at Settings → Keyboard Shortcuts.
- Search — the filter box narrows the list by title, tags, or summary text as you type.
- Sort — click a column header to sort by title, size, or last-edited; click again to reverse.
- Open a note — click any row to open it in the editor, just like clicking it in the file tree.
- On a phone — the table becomes a stacked card list so it stays readable on a narrow screen.
The Overview only shows summaries you already have — it never generates AI summaries — and the token figure is a quick local estimate, so opening it costs nothing. It is on by default once The Vault is enabled; if you’d rather hide the toolbar button, turn Vault Overview off at Settings → Features → The Vault.
Give the Vault its own theme
The Vault can wear a different look from the rest of Omniscio — handy if you want your notes to feel like a calm reading room while the app keeps your usual theme. Open Settings → Features → The Vault and find the Vault appearance block. Everything there defaults to follow the app, so nothing changes until you pick something.
- Visual theme — choose any of Omniscio's built-in themes or one of your own imported custom themes for the Vault only. The editor, its file tree, and the pop-out window all adopt it; the rest of Omniscio stays on your global theme.
- Light / dark — give the Vault its own light or dark mode (or leave it following the app), so you can keep a light reading vault inside a dark app.
- Editor font — Default, Serif, or Monospace for the note text.
- Editor text size — Small, Medium (default), Large, or Extra Large. Independent of the app-wide font size, so you can keep tiny UI chrome but large reading text, or vice versa.
- Editor width — Narrow, Normal, Wide, or Full. Full (the default) keeps today's edge-to-edge editor; the others center a comfortable reading column.
- Page background — Follow theme, Paper, or Sepia. Paper and Sepia give the writing area a warm, easy-on-the-eyes page even when your theme is dark.
- Cross off completed checklist items — when on (the default), checking a task-list checkbox dims the text and draws a line through it. Unchecking restores the original look.
You can also change the text size and light/dark mode without leaving the editor: click the gear icon in the editor toolbar (between Ask AI and Bookmark) to open a quick-access appearance popover. Changes apply immediately and persist across sessions.
Editing a note
- Open — single-click any note in the file tree.
- Type — the editor is a TipTap-based rich Markdown surface. Bold / italic / headings / lists / code blocks / tables / blockquotes / highlight all work via toolbar buttons or markdown shortcuts (e.g. `# ` for H1, `- ` for bullets, `==text==` for highlight).
- Autosave — 500 ms after you stop typing, Omniscio writes the note back to disk. It runs quietly in the background — there's no save/“Unsaved” status indicator to watch, and only a failed write raises a notification. If Omniscio crashes before the save completes, a heartbeat draft is recovered on the next launch (see Privacy & safety below).
- Find / Replace — Ctrl+F opens the find bar, Ctrl+H opens it with replace. The bar has three tabs — This Note, All Documents, and Images — over one search box; press Tab to cycle them, and each shows a live result count. This Note searches the open note in both the rich and source/Markdown views, with a match counter, Enter / Shift+Enter to step through hits, case / whole-word / regex toggles, and replace / replace-all. All Documents and Images search your whole vault — Enter on a result opens it (a note opens with your term still highlighted; an image opens in the lightbox). Esc closes.
- Source view — Shift+Ctrl+M toggles between the rich editor and a raw Markdown textarea (useful for hand-editing YAML frontmatter or pasting in pre-formatted content).
- Tables — insert a table from the ⋯ More toolbar menu → Insert table, or type
/tablein the editor. Tables use standard GitHub-Flavored Markdown pipe syntax with column alignment (left / center / right). Press Tab to jump to the next cell and Shift+Tab for the previous cell. Add or remove rows and columns from the table controls that appear on hover.
Footnotes
The editor supports standard Markdown footnotes — the same [^1] syntax used by GitHub, Obsidian, and other Markdown tools. Type [^label] inline to create a reference (it renders as a clickable superscript), and type [^label]: text at the start of a line to create the matching definition. Click a reference to jump to its definition; click the definition’s label to jump back.
- Multi-line definitions — indent continuation lines with 4 spaces or a tab. Blank lines within are preserved for multi-paragraph footnotes.
- Labels — any combination of letters, numbers, hyphens, and underscores (e.g.
[^1],[^my-note],[^ref_2]). - Editing — definitions appear as styled read-only blocks in the rich editor. To edit a definition’s text, switch to source view (Shift+Ctrl+M) and edit the raw Markdown directly.
- Round-trip safe — footnote syntax survives save and reload without any changes.
Callout blocks
Callouts are styled admonition boxes — note, tip, warning, danger, and more — that use the same syntax as Obsidian, so notes with callouts transfer freely between Omniscio and Obsidian.
Insert a callout in three ways:
- Toolbar — click ⋯ More formatting in the editor toolbar and pick Insert callout.
- Slash command — type
/and pick any type (e.g. Warning callout, Tip callout). - Command palette — Ctrl+Shift+P → search “callout” → pick a type.
Callouts support 12 types, each with a distinct color and icon: note (blue), info (blue), tip (teal), warning (amber), danger (red), todo (blue), bug (red), example (violet), quote (gray), success (green), question (amber), abstract (cyan). Obsidian alias names (like hint, caution, error) are also recognized.
Foldable callouts — in source view, add - after the type to start collapsed, or + to start open but foldable:
> [!tip]- Click to expand
> Hidden content here.
The content area inside a callout supports all the same formatting as the rest of the editor — bold, italic, links, lists, code blocks, and more.
Wiki-links and the [[ popover
Type [[ anywhere in a note and a small popover appears below the caret listing matching note titles. Keep typing to filter; press Up / Down to move the highlight, Enter or Tab to pick the highlighted row, Esc to dismiss. The picker inserts [[Title]] at the caret. If no existing note matches your typed text, the popover offers a Create new: "<Query>" row at the bottom — picking it creates the note for you in one keystroke and inserts the wiki-link into the source note.
When you rename a note (right-click → Rename), Omniscio rewrites every [[wiki-link]] reference to that note across the whole vault in a single pass — links never dangle.
Hide vs Delete
- Hide — right-click a note → Hide. The file stays on disk untouched, but disappears from the file tree, search, and link suggestions. Hidden notes are reachable through the Hidden panel in the right rail. Unhide from there to bring them back.
- Delete — right-click a note → Delete. The file is moved to
<vaultRoot>/.trash/<timestamp>__<basename>rather than unlinked. Recoverable by hand if you change your mind.
Smart Connections
The Smart Connections panel in the right-pane drawer shows notes that are semantically related to the one you’re reading but not yet linked. It uses note embeddings from Semantic Search to rank results by similarity.
- Up to 20 related notes ranked by similarity, each showing the title, folder path, and a body preview snippet.
- Notes you’ve already linked via
[[wiki-link]]and hidden notes are excluded — you only see connections you haven’t made yet. - Hover a row to reveal a Link button that inserts
[[Title]]at your cursor position in one click. - Requires Semantic Search to be enabled (the embeddings it relies on come from that feature). Without it, the panel shows a helpful message instead of an error.
Images (paste, drop, picker)
Three ways to put an image into a note:
- Paste — Ctrl+V while the editor is focused. Works for screenshots, copied-from-browser images, anything in the clipboard.
- Drag & drop — drag image files from File Explorer or another window straight into the editor.
- Picker — click the image button in the editor toolbar and pick a file from disk.
However the image arrives, Omniscio hashes its bytes (SHA-256), stores it under <vaultRoot>/assets/<hash>.<ext>, and references it from the note. The same image is stored only once — pasting the same screenshot into ten different notes leaves you with one file on disk and ten lightweight references. Pasting the same screenshot a second time reuses the existing file.
Gallery panel
The right rail carries a Gallery panel that lists every image in your vault as a thumbnail grid, sorted most-recently-added first. Click a thumbnail to open the full-resolution Lightbox. The Gallery also gives you:
- A badge on each thumbnail showing whether the image has been analyzed by Omniscio's image analyzer (see below).
- An Analyze all button at the top to kick off bulk AI analysis on every un-analyzed image in one pass.
- A Clean up orphans affordance for images on disk that no note references — one-click move to
.trash/assets/. - Per-row hover: a delete button. If the image is still referenced by any note, Omniscio refuses and lists the referencing notes; once unreferenced, the file moves to
.trash/assets/<timestamp>__<hash>.<ext>.
Lightbox
Open the Lightbox by clicking any thumbnail in the Gallery, or by clicking an image hit in the Unified Search modal. Inside:
- Full-resolution image, fit-to-viewport.
- Esc closes; Left / Right Arrow step between images; Z toggles native-pixel-size view.
- Side rail showing Omniscio's AI analysis (if present): a short title, a 1–3 sentence description, every legible character of OCR'd text, a strip of single-word tags, and a high-level category.
- Footer: the image's SHA-256 hash (with a Copy button), pixel dimensions, file size, modification date, and on-disk path.
AI image analysis
Omniscio can describe your images for you. Trigger it per-image from the Lightbox, or in bulk from the Gallery's Analyze all button. For each image, the analyzer asks Claude (via your configured API-key account) to extract:
- Title — a 3–7 word noun-phrase summary.
- Description — 1–3 sentences of prose describing what's visible.
- OCR text — every legible character the model can extract (great for screenshots of dashboards, error messages, hand-written notes, slide decks).
- Tags — single-word tags (e.g.
["screenshot", "diagram", "ui"]). - Category — high-level bucket (e.g.
"screenshot","photo","diagram").
Results are stored once per image. Re-analyzing the same image overwrites in place. The per-call spend lands in Omniscio's cost dashboard under the kms-image-analyzer source. Bulk-analyze skips already-analyzed images automatically, so an interrupted run can resume without re-billing.
Image analysis calls the Anthropic Messages API, which only accepts API-key accounts (not OAuth / Claude.ai-logged-in accounts). If you only have an OAuth account, the analyzer will surface a clear error message and ask you to add an API key under Settings → Accounts. CLI session spawning is unaffected.
Ask AI about your notes
With a note open, the editor's toolbar shows an Ask AI button (a ✨ sparkle). Click it for three one-click actions:
- Summarize this note — get a quick summary of the note you're looking at.
- Find related notes — Omniscio searches your vault for other notes on the same topic.
- Ask a question — ask anything about your whole vault.
Whichever you pick, Omniscio starts an AI chat (it opens in the Vault Sessions view) that can read and cite your actual notes to answer — so the reply points you at real pages in your vault rather than guessing. The same three actions are also in the command palette. You need a vault set for this to work; with no vault, the button is greyed out.
Agent tools — let your AI sessions read and write your notes
The Vault can give every Claude Code session Omniscio spawns direct access to your vault through MCP tools. There are two tiers, each behind its own toggle:
- Read tools (Settings → Features → "Expose Vault to spawned agents") — five tools that let agents search, read, list tags, list recent notes, and follow backlinks. Read-only, zero API cost (they hit local SQLite, not the Anthropic API).
- Write tools (same panel, "Allow agents to write to Vault" — only visible once read tools are on) — four tools that let agents create new notes, append content, update frontmatter properties, and insert content at specific positions.
Safety controls for write tools
Write tools have three layers of protection against runaway agents:
- Rate limiting — each session is limited to 10 writes per minute and 200 writes per session (both configurable). When the limit is hit, the tool tells the agent to slow down and how long to wait.
- Folder allowlist — you can restrict which vault folders agents are allowed to write into. Leave it empty to allow all folders, or list specific folders (e.g.
drafts/,agent-notes/) to keep agents out of your personal notes. Updating frontmatter properties is always allowed regardless of folder restrictions. - No destructive operations — agents cannot delete, rename, or move notes. The write tools only add content; they never replace or remove existing text.
Provenance tracking
Every write an agent makes is recorded in an audit log: which tool was called, which session called it, which note was affected, what was written, and whether it succeeded. These records are searchable through the unified Vault search. Read access is also tracked (aggregated by note and session, with 90-day retention).
Unified Search (Ctrl+P inside The Vault)
The right rail's Search panel opens a Command-Palette-style modal that searches three things at once:
- Notes — Files: top 8 matches against note titles + file paths.
- Notes — Content: top 12 matches against note bodies (FTS5 bm25-ranked) with snippet previews wrapping the matched terms.
- Images: top 8 matches against AI-derived image metadata (title + description + OCR text + tags + category). Click an image hit to open it in the Lightbox.
You can narrow with filter chips in the query bar:
tag:foo— restrict to notes tagged#foo.file:segment— restrict by path substring.hidden:true/hidden:false— include / exclude hidden notes (default excludes).since:2026-05-01— only notes edited on or after the date.kind:note— show only Notes (skip Images).kind:image— show only Images (skip Notes).
Chips combine: kind:image tag:diagram pcb finds analyzed images whose AI metadata mentions "pcb" and whose note context is tagged #diagram.
Watching the vault from other apps
Omniscio's file watcher picks up external changes live. If you edit a note in Obsidian, VS Code, or Notepad while Omniscio is open, the file tree refreshes and (if the file is the active tab) the editor reloads — but only if you don't have unsaved local changes. Omniscio will never clobber an in-progress edit.
Conversely, Omniscio writes plain `.md` files that any other Markdown app can open. The Vault does not "own" the format — it round-trips your text through a standard Markdown serializer.
The Vault in its own window
You can open The Vault in a separate floating window — useful for keeping your notes visible on a second monitor while Omniscio's main window stays on its primary view. Four ways to open it:
- Pop-out button — click the ExternalLink icon in the Vault toolbar's View group (tooltip: "Open The Vault in a separate window").
- Sidebar right-click — right-click The Vault row in the hubs sidebar and pick Open in new window.
- Global hotkey — press Ctrl+Alt+N from anywhere on your desktop, even when Omniscio is in the background. Customizable and toggleable under Settings → Keyboard Shortcuts ("Vault window" row).
- Tray menu — right-click the Omniscio tray icon and pick Open The Vault.
The standalone window shows the same file tree and editor as the Vault panel inside Omniscio — both surfaces read and write the same vault files and stay in sync live. Opening the window a second time brings the existing window to the front rather than opening a duplicate. Omniscio remembers the window's size and position between opens, and the window follows your light/dark theme automatically. To save vertical space, your open note tabs sit right in the window's title bar — there is no separate “The Vault” bar above them. Press Ctrl+W / Cmd+W to close the window; your last typing is saved first.
Session Seeds (briefing + project context)
Two ways to give a Claude session a head start with your notes:
- Multi-note briefing — select 2–5 notes in the file tree (Ctrl+Click or Shift+Click), right-click, and pick Start briefing. A small dialog lets you optionally type a question, then Start Briefing launches a vault-scoped session with every selected note’s full body loaded as context. The AI can read and reference all of them from the first message.
- Project context notes — right-click a single note and pick Pin to <project> (one row per real project you have in Omniscio). That note becomes standing context for the project: every new session spawned in that project automatically receives the pinned note’s current body, no manual selection needed. You can pin up to 5 notes per project.
Living context — because note bodies are read fresh at session-launch time, an updated note automatically appears in the next session. No re-pinning or re-selecting needed.
Privacy & safety
- Omniscio only writes inside your vault root. Every save / rename / move / delete is path-validated server-side — absolute paths,
..traversal, system paths, and symlinks are rejected before any file touches disk. - Soft-delete is non-destructive. Deleted notes go to
.trash/with a timestamp prefix; deleted images go to.trash/assets/. Recover by hand. - Images load through a sandboxed protocol. The custom
nothari-asset://scheme is the only way vault images reach the editor — path traversal, symlinks, and non-image file types are all rejected at the protocol handler. SVGs get extra Content-Security-Policy hardening. - External edits don't clobber your typing. The watcher only reloads the editor when your local copy is clean.
- No LLM calls unless you trigger one. The Vault surfaces that spend money — image analysis (Analyze / Analyze all), note summaries, and the Ask AI vault chat — each run only when you invoke them. Agent tools (read and write) hit local SQLite only — zero API cost.
Knowledge Aggregation
Knowledge Aggregation is an opt-in background worker that periodically reviews your completed AI sessions and writes summary notes into your Vault. It produces daily and/or weekly "Agent Insights" notes that capture decisions made, patterns discovered, bugs found, lessons learned, and open questions across all your sessions.
How it works
- Collect — the worker queries sessions that ended during the period. This stage is free (database queries only).
- Deep-dive — the most notable sessions (scored by turn count, engagement, cost, and keyword matches) are sent to a lightweight AI model for structured extraction. A configurable cost cap stops extraction early if spending exceeds the limit.
- Synthesize — one AI call merges all extractions into a single Markdown note, written into your vault under an
aggregation/folder organized by period and project.
Turning it on
- Make sure The Vault is enabled and a vault folder is configured (see above).
- Open Settings → Features and flip Enable Knowledge Aggregation.
- Choose whether to generate daily notes, weekly notes, or both, and set the preferred hour/day.
- Optionally adjust the cost cap (the maximum spend per aggregation run) and the deep-dive limit (how many sessions get the full AI extraction).
Run Now
You can trigger a one-off aggregation run at any time via the CLI (POST /kms/aggregation/run) or the IPC channel. "Run Now" bypasses the cost cap so every notable session gets deep-dived regardless of spend.
Alerts
The worker raises an inbox alert if it hits the cost cap (so you know some sessions were skipped) or if a run fails entirely. Each alert links to Vault settings so you can adjust the cap or check your API key.
Update Vault (/update-vault)
A built-in skill that scans your sessions and logs what they did into your vault. Type /update-vault in any session to run it.
Two modes
- This session (default) — extracts findings from the current session and updates the matching vault note before you archive it.
- Batch scan (say “scan all” or “daily scan”) — scans every session from the last 24 hours across all projects in one pass. The lookback is configurable (24h, 72h, or 1 week).
What it captures
PRs shipped, bugs found and fixed, features built, test results, UX improvements, session costs, and blockers. Each session’s findings go into the matching feature note (QA Tracker) or a project note (Projects/ folder). The cross-feature Bug Log and the QA Dashboard are updated too.
During onboarding
The onboarding cascade introduces the skill after the daily-briefing mission: “Your agents’ work adds up fast. /update-vault is how you stay on top of it.”
Web Clipper
Clip any web page by URL — or a screenshot by OCR — into your vault as a clean Markdown note. Notes land in a dedicated Web Clips/ folder with YAML frontmatter (source URL, timestamp, tags).
From Quick Launch
Open Quick Launch (Ctrl+Space) and switch to the Web Clip tab (scissors icon). The URL field auto-detects if your clipboard contains an http:// or https:// URL and pre-fills it. Optionally add comma-separated tags. Press Enter or click Clip page. The modal closes instantly; clipping happens in the background. If it fails, a toast appears in the main window.
From a screenshot
Capture a screenshot with the snip tool (Ctrl+Alt+S). In the annotation editor, click Save to vault (only visible when KMS is enabled). The AI reads the screenshot, extracts all visible text, generates a title, and saves it as a vault note tagged screenshot and ocr. This uses one Anthropic API call.
From the CLI
Agents and scripts can clip pages programmatically: POST /kms/clip with a JSON body containing url (required), plus optional tags, title, and vaultId. Returns the created note.
Limits
- Only
http://andhttps://URLs; private/local addresses are rejected. - Only HTML pages (not PDFs, images, or other content types).
- 10 MB response limit, 15-second fetch timeout.
- If article extraction fails (e.g. JavaScript-heavy pages), falls back to plain text.
What's still missing
- Embedding / semantic search. Both note and image search are bag-of-words FTS5 today.
- Multiple vault roots. Omniscio supports exactly one vault at a time.
- Live updates on web / mobile. The Vault panel now has a dedicated phone layout (a slide-over Notes list, swipeable tabs, and a Format sheet with every control), but the web companion does not yet receive live cross-device updates — it shows your latest edits on the next load or note reopen.
- Migration UI for importing notes from the Vault desktop database.
Super Prompts
Pre-written prompt templates for common tasks.
Super Prompts are curated, high-quality prompt templates that you can use to kick off AI sessions. Instead of writing prompts from scratch, pick a Super Prompt and let the template do the work.
Using Super Prompts
- Open the ⋮ menu at the top of the sessions sidebar (available in every project) and click Super Prompts — or click the Super Prompts icon in the toolbar, or press Ctrl+Shift+K anywhere.
- Browse the available prompts by category, or search by title, tags, or description.
- Select a prompt and click Launch (or press Enter) — Omniscio starts a new session pre-populated with the prompt body. By default the session launches into the project you are currently viewing; use the "Launch into" dropdown in the picker header to choose a different project, including the Claude virtual workspace.
- The first agent turn begins immediately with your prompt already sent.
Remote Super Prompts
Omniscio can fetch Super Prompts from a remote server, so new prompts are available without updating the app. These are synced periodically in the background.
Weekly Summary
Monday-morning AI-written recap of your week + personalized coaching suggestions.
The Weekly Summary is the once-a-week sibling of the Daily Digest. Every Monday at 7 AM local (or whatever hour you pick), Omniscio recaps the just-completed ISO week (Monday through Sunday) and surfaces it as two cards in your Briefings inbox: a slim recap card (a scannable highlight of your week plus the by-the-numbers stats) and a separate “N suggestions from last week” card that lists that week's personalized coaching tips. Splitting them out means the suggestions get their own labelled row instead of sitting at the bottom of a long recap where they were easy to miss. As of May 2026 the Weekly Summary ships as a briefing inside the Daily Digest "Briefings" surface — same sidebar entry, same inbox section, same triage shortcuts. There is no separate Weekly Summary sidebar entry anymore; daily digests and weekly summaries appear side-by-side in the merged Briefings list, sorted by date.
Weekly Summary replaces the Workflow Coach. The same six privacy-preserving detectors that powered Workflow Coach are now inputs to the Weekly Summary prompt, so you still get the personalized "you sent five near-duplicate replies this week, consider saving a quick reply" guidance — you just get it once a week in one place instead of in a separate panel.
What you see
The recap card
- A scannable recap — a short bold headline plus 3-5 highlight bullets written by Claude Haiku, each calling out one real number or project (your most active project, sessions run, total spend, a notable week-over-week change). It leads with the highlights instead of dense paragraphs, so you can read your week at a glance.
- Stats card — sessions total / active, agent vs. operator message counts, top 5 projects by session count, top 8 features by usage count, weekly AI spend in USD, and total tokens for the week (combined input + output, with an in/out breakdown). Large figures are shown rounded — e.g.
25.4Kmessages,$237.6Kspend,62.2Btokens — so the card stays scannable; small counts (like active sessions) stay exact.
The suggestions card
- A counted row — its inbox row shows how many tips are waiting (e.g. “3 suggestions from last week”), so you can see there's something to act on without opening it.
- Suggestion cards — 3-5 personalized tips. Each has a title, a short why + how, and (when applicable) an action button: create-automation, archive-idle-sessions, or explore-feature. (Saving a phrase you repeat as a quick reply is now its own always-on inbox nudge, separate from the weekly digest.)
- Dismissing a suggestion — tap the X on a tip to open a five-chip why-picker: already doing it, not useful, not relevant, wrong, or other. Your reason is remembered and fed back into the next Monday's generation for 90 days, so the same kind of suggestion stops reappearing. Each dismissed tip collapses into a strip with an Undo link, and once you've handled them all the whole suggestions card clears itself from the inbox.
First-launch backfill
Weekly Summary is on by default, so the first time it runs Omniscio generates up to four weeks of backfill summaries in one shot (oldest first) so you don't open the feature to an empty list. Each week is fully gated by the same cost cap as the live path; if the cap is hit mid-backfill, the loop halts and resumes the next day. The backfill runs exactly once — even if it crashes partway, the "I already tried" flag is set so a transient error doesn't loop on every relaunch.
Inbox cards, snooze, archive
Each week lands as two rows in the unified Inbox under the Briefings section (the same section that hosts daily digests — both cadences share one inbox home as of May 2026): the recap card and the suggestions card. The recap also shows in the Briefings sidebar's Active bucket. The two are independent — dealing with one never removes the other. Archive or snooze the recap with the usual paths: middle-click the row (desktop), right-click → Archive, press E while the row is selected, or tap the X button shown only at mobile widths; Snooze and Unsnooze are in the right-click menu and the S hotkey opens the Snooze palette. The suggestions card is dismissed the same way (its Dismiss button, middle-click, or Snooze), and it also clears itself once every tip in it has been handled. Older recaps (>12 weeks) automatically fold into the Archived bucket.
Privacy
Weekly Summary never reads the raw text of your messages. The behavioral detectors emit anonymized hashes and counts only — the same canary test that pinned Workflow Coach's privacy guarantee continues to enforce this contract. The stats card is aggregate counts and totals from your database; the LLM prompt is built from those plus the detector hashes. Your conversation content stays private.
Cost control
Weekly Summary is on by default and uses a small amount of AI credits each Monday morning — but only once your active account is an API-key account. An account signed in with a Claude login (OAuth) can't call the underlying API, so the Monday run simply does nothing until an API key is available — you're never charged for a run that can't happen. There's a daily spending cap (default $0.10) that you can adjust in Settings → Email & Summaries → Daily digest → Weekly Summary, range $0.05 to $5.00. Once the cap is hit on any given day, generation pauses until the next day — including the manual Run now button.
Settings
Settings → Email & Summaries → Daily digest → scroll to the Weekly Summary sub-section at the bottom. Weekly Summary is on by default; use the master switch here to turn it off (or back on), pick a generation hour (0-23, default 7), and tune the daily cost cap. The Weekly Summary toggle is independent of the Daily Digest toggle — you can enable one without the other. Existing Workflow Coach users keep their toggle state and cap value — Omniscio migrates them automatically on first launch after the upgrade.
Daily Journal
Daily Journal Check-In — a daily inbox nudge to run a short journaling check-in — and a weekly review — with your AI coach.
Daily Journal adds a gentle daily nudge to your inbox: run a short journaling check-in with your AI coach (a weekly review runs on the longer cadence too). It's a lightweight way to keep a writing habit without remembering to open a journal yourself.
How It Works
- Daily nudge — a short check-in row appears in your inbox, inviting you to journal for a minute or two.
- Weekly review — on the weekly cadence the coach prompts a slightly longer reflection over how your week went.
- Private to coaching — what you write stays inside the coaching feature and never leaks into your other sessions.
Daily Journal builds on AI Coaching — it needs coaching to be enabled, and the journaling check-ins run through the same coach. You can turn Daily Journal on or off under Settings → Features → Daily Journal.
Tools & Toolchain
Manage development tools that Omniscio and your agents depend on.
The Toolchain Manager helps you install and manage the development tools that Omniscio and your AI agents need to work effectively.
What It Does
- Detects installed tools — Checks which tools are available on your system
- Installs missing tools — Can automatically install tools you need
- Checks versions — Verifies tools are up to date
- Update alerts for Claude Code and Codex — Puts a card in your inbox with a one-click Update now when either falls behind; the update runs in a terminal on your computer, never in the background
Accessing the Toolchain
The Tools virtual hub in the sidebar shows all detected and available tools. You can also access it from Settings → Connected Tools.
Skills
Extend your AI agents with specialized capabilities.
Skills are specialized instructions and workflows that enhance what your AI agents can do. They're like training modules — install a skill, and your agents gain new abilities.
User Skills
User skills are stored in your ~/.claude/skills/ directory. You can:
- Browse installed skills
- Enable or disable individual skills
- Install new skills from the marketplace
Beautify Site
Beautify Site is a bundled skill that takes a web page or app screen that looks bland, generic, or obviously machine-made, and turns it into something deliberate. It is off by default — switch it on under Settings → Features → Enable Beautify Site skill and it installs at the next launch. After that there is no panel and no button — you just ask for what you want in plain language, and it starts.
Say something like "make this landing page look expensive", "this page looks AI-generated", or "redesign this UI", and the skill runs four steps in order: it picks one design direction and writes it down so the rest of the work follows it, chooses or builds components that fit that direction, adds motion that helps you understand the page rather than motion for its own sake, and finally audits the finished page and strips out the tell-tale signs of AI-generated design.
That last step is the point of the skill. Left alone, an AI reaches for the same handful of moves every time — a colour gradient poured into the headline letters, a small letterspaced label stapled above every heading, a fake terminal window in the hero typing itself out. Each is individually defensible and collectively a fingerprint. The skill treats those as banned and rebuilds the element instead of just recolouring it.
It designs boldly by default, and varies the look every time, because settling into one recognisable style is its own giveaway. It only holds back if you ask for something quiet or the project's own design notes say so — and when those two conflict, it tells you and lets you pick rather than quietly playing safe. What it never trades away for boldness: reduced-motion support, keyboard focus outlines, tap-target size, colour contrast, and no sideways scrolling on a phone.
Dev Pipeline
Dev Pipeline is an opt-in bundled skill that runs a full software-development workflow end to end on a single task — and stops to ask you at five checkpoints along the way, so a long autonomous run never gets ahead of your judgment. You describe the task once; it sets up an isolated workspace, investigates, plans, red-teams its own plan, builds with tests, tidies the code, updates the docs, and gets a branch ready to merge — pausing at each gate for your call.
Turning it on
It ships with Omniscio but is off by default. Enable it under Settings → Features → "Enable Dev Pipeline skill". Flipping it on installs the skill into ~/.claude/skills/dev-pipeline/; flipping it off removes it again. The change takes effect immediately — no restart needed.
Optional companions
Once the skill is on, five optional switches appear right under that same toggle. Each is independent — turn on only what you want:
- Gate auto-approval, per phase — a switch for each of the five gates (Plan, Red Team, Build, Elegance, Docs) for whether Omniscio approves it for you or always asks, plus a select-all toggle to flip them together. By default the Plan gate asks you and the other four approve themselves when a phase reports done; a gate that asks a question or hits a blocker is never auto-approved.
- Remind every session to use the pipeline — adds a short note to every session telling it to follow the pipeline when it's doing software development, and to ignore it otherwise. Skips the in-app helper bots. Off by default.
- Add the pipeline quick replies — adds the "Full Local Git", "Open a Pull Request", "Package My Work Into PRs", and "Worktree Cleanup Analysis" quick replies if they're missing, tucked into a "Dev Pipeline" folder at the top of your list. They follow the order you actually work in: "Full Local Git" (a one-tap local land-all-ready plus worktree/branch cleanup), "Open a Pull Request" (finish one worktree and open its pull request), "Package My Work Into PRs" (take everything your checkout has that the shared copy doesn't and split it into the fewest clean, easy-to-review pull requests — it shows you the plan and waits for your go-ahead before opening any), and "Worktree Cleanup Analysis" (tidy up the leftover working copies the first three leave behind). Turning it off never deletes ones you already have, and a reply you already keep is left where it is. Off by default.
- Add the workflow auto-replies — adds a small set of preset auto-reply rules for the pipeline's common handoffs (for example, answering a finished red team with "proceed"). Two-way: turning it off removes exactly the presets it added, never rules you wrote yourself. Off by default.
- Write a durable note into the repo — keeps a short, clearly-marked block in the repository's own
CLAUDE.md(orAGENTS.md, or it createsCLAUDE.md) telling sessions to route development work through the pipeline. Unlike the reminder above, this one is written into a file you can see and commit, so it also reaches sessions Omniscio didn't start. Two-way: turning it off strips the block out again. Off by default.
The pipeline is fully self-contained. Each phase applies its own build discipline — planning, test-driven development, systematic debugging, code review — from its own instructions, with no external plugin to install or manage. The one helper it uses is Omniscio’s own systematic-debugging skill, and that ships with the app. /dev-pipeline works as soon as the skill is enabled.
Running it
In any Claude Code session, start a run with the task you want done:
/dev-pipeline "the task you want done"(or just say "run the dev pipeline on X"). If a run is interrupted — you close the session, or it compacts — invoke it again and it resumes from where it left off rather than starting over.
The six phases and five gates
The work runs in six phases. Phases 1–5 each end at a hard stop — a gate where you reply approve, give feedback to revise, or abort. Phase 6 finishes on its own.
| Phase | What happens | Gate |
|---|---|---|
| 1 — Investigate & plan | Sets up an isolated worktree, gets oriented, and writes a plan in plain English. | Plan Ready |
| 2 — Red team | Tears the approved plan apart across ten lenses, then presents a revised plan. | Red Team Complete |
| 3 — Build & verify | Builds the plan test-first, locks the behavior in a contract, and proves the checks pass. | Build Complete |
| 4 — Code elegance | Mechanical cleanup only (unused code, dead branches); anything structural is flagged for you, never applied on its own. | Elegance Pass Complete |
| 5 — Docs | Brings the documentation in line with what the change touched. | Docs Complete |
| 6 — Git prep | Gets the branch ready to merge. No gate — the run finishes here. | Ready to Merge |
What you do at each gate
- Approve — the pipeline advances and works autonomously until the next gate.
- Feedback — it stays on the current phase, applies your changes, and re-presents at the same gate.
- Abort — it stops and leaves the worktree and its notes intact for you to inspect.
Running it hands-free (autonomous mode)
If you'd rather not sit at every checkpoint, ask for it to run autonomously — say "run autonomously", "no check-ins", or "leave it overnight" (or start with /dev-pipeline --auto "the task"). It then drives itself through every phase, doing the full work of each, and only stops to ask when something genuinely needs you: a real decision (scope, a trade-off, anything hard to undo), a task too ambiguous to plan, a risky rewrite, or a build it can't get green. Everything else it approves itself and keeps going. The default is still the five-checkpoint flow above; autonomous mode is per-run, and because it's recorded in the run's notes, a resumed run keeps going hands-free.
When you run the pipeline in an Omniscio session, completing a gate auto-advances to the next phase and the run shows up on the Agent Status Board with its current phase and gate. Outside Omniscio the workflow is identical — you just approve each gate yourself.
The pipeline prepares a branch that's ready to merge; it never pushes, merges, or opens a pull request on its own — not even when it's running autonomously. Landing it is a separate step, and it is already handled by default: turning the Dev Pipeline on also arms the auto-lander, which merges ready branches into the main branch locally for every hub the pipeline covers. See Getting Your Finished Work Onto master for how to narrow that, set a hub to observe-only, or turn it off.
QA Testing
QA Testing is an always-on bundled skill that automates QA handoff — composing a structured email from a customizable template and sending it to the VA team through Omniscio's approval-gated Gmail API. It's installed automatically into ~/.claude/skills/qa-testing/ on every app launch, so any session can use it.
Using it
In any Claude Code session, invoke it with:
/qa-testing(or say “send this to QA”, “hand off to the VA team”, or “request QA testing”). The skill walks you through an 8-step interview:
- Auto-detect PR info from the current branch
- Confirm the feature name, PR number, and URL
- Ask what to test — areas and flows the QA team should focus on
- Ask for setup instructions — anything the team needs before testing
- Compose the email from your customizable template
- Show the draft and wait for your approval
- Send via the CLI endpoint — queued for inbox approval
- Report the result
Customizing the email
Edit ~/.claude/skills/qa-testing/email-template.md to change the default recipient, subject format, SOP link, or email body. The skill reads it fresh each time. Omniscio updates the skill instructions (SKILL.md) on launch but never overwrites a template you've customized.
Approval gating
The send is approval-gated through the same system as Gmail sends — it lands in your Omniscio inbox for one final confirm before the email goes out. Controlled by Settings → CLI Control → Require approval for Gmail sends (on by default).
Mind Map Generator
Mind Map Generator is a bundled skill that creates well-structured mind maps from your source material — vault notes, local files, or Google Docs. Instead of dumping raw data into the Mind Map feature (which can produce a flat, unusable list), the skill interviews you about scope, angle, and depth, then synthesizes a properly structured map within node and depth budgets.
Using it
In any Claude Code session, invoke it with:
/mind-map(or say “make a mind map from my vault notes about X”, “mind map from this file”, or “visualize as mind map”). The skill walks through these steps:
- Feature gate — checks whether Mind Map is enabled; if not, turns it on automatically (or directs you to approve it in your inbox)
- Source resolution — reads vault notes, local files, or Google Docs
- Interview — asks up to 4 questions (source, angle, depth, preview), skipping any you already answered
- Synthesis — builds a structured outline with proper branching, short labels, and rolled-up counts
- Validation — six checks: node count, depth, label length, single-child branches, fat branches, root format
- Preview — shows you the outline if you opted in; you can approve, request changes, or start over
- Creation — imports the map and gives you a link to open it
Depth tiers
When the skill asks how detailed your map should be, choose one of three tiers:
- Overview — major themes only (15–25 nodes, 3 levels). Good for presentations.
- Standard — key detail with some rollup (25–40 nodes, 4 levels). The default.
- Detailed — full depth when you need it (40–100 nodes, up to 10 levels). You must request this one.
Hard ceilings: 100 nodes and 10 levels. These are never exceeded unless you explicitly ask for more.
The Mind Map feature must be enabled in Settings → Features. The skill tries to enable it automatically if it's off — if your settings are approval-gated, you'll see an approval in your inbox to tap first.
Skills Marketplace
Discover and install community-created skills. Skills cover areas like:
- Code review workflows
- Testing strategies
- Documentation generation
- Debugging approaches
- And many more
Stored Keys
A searchable inventory of every API key and secret Omniscio can see, grouped by where it lives — names and metadata only, never the actual values.
Stored Keys is one place to see every API key and secret Omniscio is aware of, grouped by where it's kept. It shows names and metadata only — never the secret values. Nothing is decrypted to build the list, and nothing is decrypted when you manage a key. From here you can search, remove, and replace keys without ever exposing them.
Where it is
Open Agent Tools → Stored Keys in the sidebar — alongside CLI Tools, Skills, and MCP Servers.
What it shows
A search box at the top filters live by name and type. Entries are grouped into four sources:
| Source | What it lists |
|---|---|
| Windows vault | Each encrypted secret in your machine's local vault (~/.claude/secrets), by name. This vault is shared by every tool on your machine, so removing one affects more than just Omniscio. |
| Omniscio provider API keys | Provider keys you've set in Omniscio's config (xAI, Groq, Deepgram, ElevenLabs, OpenAI, and others). |
| Claude accounts | Each signed-in Claude account (login or API-key). |
| Automation credentials | Each stored automation credential (Slack, etc.). |
Each row shows the name, a type label, and a last-updated date where one is recorded. A Refresh button re-reads the inventory. Empty sources are omitted; an empty inventory reads "No stored keys found".
Managing keys
Every row can be removed behind a confirmation. What "change the value" does depends on the source:
- Windows vault — remove inline (the encrypted file moves to a hidden trash so you can Undo for a few seconds); add or replace a value inline (re-encrypted on your machine). The Add secret button (top-right) creates a new vault secret — names are lowercase letters, numbers, and hyphens.
- Provider keys / Claude accounts / Automation credentials — remove inline; Manage → jumps to the relevant Settings editor to change the value. (You can't remove your only Claude account.)
Deleting a secret Omniscio itself relies on (such as its own command-server key) makes you type its name to confirm, so you can't break Omniscio by accident.
This panel can never show you a stored secret value — the guarantee is built into how it works, not just a policy. The list is built from filenames and value-free metadata; deleting a vault secret moves the encrypted file without ever opening it; and editing only ever sends a new value you type in — a stored value is never read back to the screen.
Secret Paste Guard
Paste an API key into the composer and Omniscio keeps it out of your AI conversation history — storing it locally and injecting the real value only when the agent uses it.
Secret Paste Guard is off by default. Turn it on at Settings → Features → "Secret Paste Guard" (the secretHandleEnabled setting), and toggle it off again any time. Nothing about it runs until you enable it.
When you paste a secret into the session composer and the feature is on, Omniscio saves it in an encrypted per-session store on your machine. On Claude-based engines it puts a short placeholder — like AMCSECRET-a3f9b2… — in its place; that placeholder is all the AI ever sees, and when the agent writes a shell command, creates a file, or fills in a web form containing it, Omniscio swaps the real value back in privately, at the moment of execution, so the secret reaches its destination without entering the conversation. On other engines the value still reaches the engine (so its tools keep working), but Omniscio keeps it out of your saved history and tells you so plainly.
How to use it
- Enable the feature at Settings → Features → "Secret Paste Guard" (
secretHandleEnabled). - Paste your API key or secret into the session composer as you normally would. Omniscio detects that it looks like a secret and replaces it with a handle automatically.
- Give the agent its task. The agent reads the handle, uses it in whatever commands or files it needs, and Omniscio substitutes the real value at execution time.
- Disable it any time by toggling
secretHandleEnabledoff. After that, pasted text is treated as plain text again.
What it protects
Omniscio’s own saved history is scrubbed of the value on every engine — the raw secret is never written to:
- Your Omniscio conversation history or database
- The full-text search index
- Session exports
- The Claude CLI’s own local transcript (on Claude-based engines — a log-scrub cleans the value back to its placeholder once the session ends)
- The live chat window (even if the agent tries to echo it back — a scrub step removes it before the output is saved or displayed)
On Claude-based engines the model never sees the value at all. On other engines the value still reaches the engine and its own logs — only Omniscio’s saved history is protected (see Scope below).
For the secret to be usable, it must be reachable at the moment the agent runs a command. A prompt-injected or compromised agent in the same session could still cause the value to be sent somewhere. The guarantee is “never passively persisted in history” — not “immune to an actively-hijacked agent.” Treat Secret Paste Guard as a history-scrub, not an isolation sandbox.
Scope
- Fully hidden (Claude-based engines): the native Claude engine and the vendors that reuse it — the model never sees the value, and the local transcript is cleaned. SSH/remote is out of scope.
- codex / gemini / cursor: server-side secret tools are a planned fast-follow; until they land, these run with partial protection.
- Every other engine (partial): Omniscio’s saved history is scrubbed, but the engine still receives the key — the offer says so honestly.
- Web-form fill via the AI Browser resolves the value privately, server-side.
- Desktop only. The feature is not reachable from the mobile or web interface — blocked by design so a headless endpoint can’t be used to inject secrets remotely.
Where secrets are stored
Each secret is encrypted using your operating system’s own keyring (Windows DPAPI / macOS Keychain / Linux libsecret) and saved in a per-session file on your machine at <userData>/session-secrets/. If the OS keyring is unavailable, the value is kept in memory only — nothing is written to disk as plaintext. The store is wiped when the session is deleted or reaches its retention limit.
See Stored Keys for a read-only inventory of every key and secret Omniscio can see. See Authentication for how Omniscio handles your Claude account credentials.
Agent Instructions Sync
Maintain one rules file. Omniscio keeps copies in sync for every other AI agent in your project.
Every AI coding agent reads its instructions from a slightly different file. Claude Code reads CLAUDE.md. Codex, Cursor (modern), Gemini, and Factory have settled on AGENTS.md. Gemini CLI reads GEMINI.md. Cursor's legacy file is .cursorrules. Cline reads .clinerules/base.md. GitHub Copilot reads .github/copilot-instructions.md. Windsurf reads .windsurfrules.
If you work in a project with more than one agent — even just Claude Code plus your editor's Copilot — you either have multiple copies of the same rules to maintain by hand, or one of them is stale.
Agent Instructions Sync collapses that into a single source of truth. You pick one file as your canonical (default: CLAUDE.md), check off which other filenames you want to keep in sync, and Omniscio automatically copies the canonical's contents — and, for a project that has one, the rule files under .claude/rules/ — to every mirror, whenever you edit the canonical, when an agent edits it during a session, or before any new Claude CLI session starts.
If your only agent is Claude Code, you'll never notice this feature exists. No new files appear in your projects, nothing is written, the sidebar looks the same. You opt in once in Settings.
The Seven Recognized Files
| Filename | Used by |
|---|---|
AGENTS.md | Codex, Gemini, Cursor (modern), Factory, and most other agent-aware tools |
CLAUDE.md | Claude Code (also a valid canonical — pick one) |
GEMINI.md | Gemini CLI |
.cursorrules | Cursor (legacy) |
.clinerules/base.md | Cline |
.github/copilot-instructions.md | GitHub Copilot |
.windsurfrules | Windsurf |
Turning It On
- Open Settings → Features → Agent Instructions Sync.
- Flip the Enabled toggle on.
- Pick your canonical file:
CLAUDE.md(default) orAGENTS.md. Whichever you pick becomes the source of truth; the other becomes a mirror you can opt into. - In the Mirrors list, check off the other filenames you want kept in sync.
- Click Sync now to run the first sync immediately. The selected mirror files appear in your project's root directory, each starting with a small Omniscio banner comment.
Projects that don't have a canonical file present are silently skipped — nothing is created from nothing.
The Banner: Why It's Safe
Every mirror file Omniscio writes gets a small HTML-style comment at the top:
<!-- AMC-SYNC: synced from CLAUDE.md at 2026-05-14T03:35:08Z — do not edit, edits will be overwritten -->Omniscio will only ever re-touch a file that has this banner. A .cursorrules you wrote by hand before turning sync on is never silently overwritten — Omniscio sees no banner, marks the row "manual file" in the sidebar, and leaves it alone. Same for any future external edit: the body hash changes, Omniscio notices, and asks you what to do instead of writing over it.
What Triggers a Sync
Three ways:
- Manual — click Sync now in Settings, or click the manual sync button in the sidebar.
- File watcher — Omniscio watches your canonical file, and the project's
.claude/rules/directory if it has one (those rule files are loaded on every turn just likeCLAUDE.md, and the other agents never read them, so a mirror has to carry them). Edit either one (in Omniscio, in VS Code, an agent edits it during a session) and a sync runs about half a second later. An echo guard makes sure Omniscio's own writes don't loop back as new edits. - Pre-spawn hook — every time you launch a Claude CLI session, Omniscio re-syncs first. Fire-and-forget — never blocks the spawn.
The Sidebar Surface
Open any project. In the right-hand Dashboard sidebar, expand the Auto Context (N) panel and find the System Instructions sub-group (the rows that list project CLAUDE.md, project MEMORY.md, etc.). Below those rows, if you've enabled sync and the project has any synced mirrors, you'll see a small Synced mirrors subheader with one row per mirror:
- Green dot — "in sync": file matches the canonical. Click the row to peek at the contents.
- Blue dot — "out of sync": the canonical has moved on, but the mirror still holds exactly what Omniscio last wrote into it. Auto-refreshes on the next sync pass — nothing for you to do. Informational only; not clickable.
- Amber dot — "edited externally": Omniscio has a recorded baseline for the mirror and something has changed it since Omniscio last wrote it (a real edit, not just a stale copy). Click the chip to open the conflict resolver (see below).
- Muted gray dot — "still tracked in git": in the default "keep copies out of git" mode, the copy looked edited but is really just still tracked in git — a branch merge keeps restoring the old committed version over Omniscio's fresh one. You didn't edit it; git did. Click the chip to fix it in one step (see below). This replaces the alarming "edited externally" flag for this specific, common case.
- Muted gray dot — "needs first sync": the mirror's body differs from the canonical, but Omniscio has no recorded baseline for it yet — the day-zero state on a fresh install, after the sidecar state file was cleared, or for mirrors written before Omniscio started tracking baselines. Omniscio can't tell "I wrote this long ago" from "you edited it," so it refuses to overwrite and asks you to pick once. You haven't done anything wrong; it's a one-time setup step. Click the chip to open the same resolver — only the wording is neutral instead of accusatory.
- Gray dot — "manual file": a file with the right name exists, but it has no Omniscio banner. Omniscio won't touch it.
Resolving an "Edited Externally", "Needs First Sync", or "Still Tracked in Git" Conflict
When Omniscio won't auto-overwrite a mirror — either because some other tool changed it since the last sync ("edited externally"), or because Omniscio has no recorded baseline for it yet ("needs first sync") — clicking the chip opens a dialog with the same three options below. Only the title and explanatory copy differ between those two cases; the accusatory wording is dropped for "needs first sync" because you haven't done anything wrong. Default focus is Cancel, so pressing Enter never overwrites a file by accident.
The third case, "still tracked in git", is different: the copy isn't really edited — git keeps reverting Omniscio's writes because the file is still tracked. So that dialog shows a single button, "Stop tracking in git", which runs git rm --cached (the file stays on your disk) and ends the problem for good. Discarding or promoting wouldn't help — the next merge would just revert it again.
- Discard edits (red) — force-overwrites the mirror with the current canonical's body. The external edits are gone. Use this when the external edit was a mistake.
- Promote to canonical (amber) — reads the mirror's body, strips the banner, atomic-writes the result over the canonical file. The external edit becomes the new source of truth for everything going forward. Use this when the external edit was actually the improvement you want everywhere.
- Stop syncing this mirror (ghost) — removes the mirror from your sync list. The file on disk stays exactly where it is; Omniscio just won't write it again.
If mirror A is promoted and mirrors B/C were in sync with the old canonical, B/C become their own "edited externally" conflicts on the next sync pass. Each one needs its own explicit decision. This is conservative on purpose — silent N-way overwrite from one click is exactly the footgun this feature is designed to avoid.
Turning It Off Without Losing Files
Flip the Enabled toggle off. The watcher stops; no new writes happen; no existing files are deleted. Every mirror file already on disk stays exactly where it is, banner and all. If you turn the toggle back on later, Omniscio re-probes — files that haven't changed go straight back to "in sync"; files that have changed during the off-period show up as "edited externally" and wait for your decision.
How Copies Are Handled in Git
The mirror files are generated from your canonical file, so committing them to git is awkward — a file Omniscio keeps rewriting churns on every merge and can leave a stale committed copy that trips a false "edited externally" flag. Omniscio gives you an explicit choice under Settings → Features → Agent Instructions Sync → "How copies are handled in git":
- Keep copies out of git (recommended, the default). Omniscio adds the mirror filenames to your project's
.gitignore(in a clearly-marked block) so git never tracks them. They're rebuilt on each machine from the canonical, so a merge can never clobber them. If you already committed some copies, the panel shows a one-click "Stop tracking copies in git" button that runsgit rm --cachedon each — it removes them from git's index but keeps the files on your disk. If you never open that Settings panel, the same one-click fix now also appears right on the sidebar: a still-tracked copy shows a calm "still tracked in git" chip that opens the fix directly. - Keep copies in git. For repositories you share with teammates who use Codex/Gemini without Omniscio — they need the files physically present. Omniscio installs a small
post-merge/post-rewritegit hook that rebuilds the copies from the canonical after a merge or rebase, so they never go stale. Omniscio won't touch a repo that manages its own hooks (e.g. Husky); there the copies stay merge-safe thanks to the stable banner.
Generated files don't really belong in version control — committing one that's constantly rewritten is what creates the merge headaches in the first place. Keeping the copies local fixes the whole problem with the least fuss. Only switch to "keep in git" if someone genuinely needs the files without running Omniscio.
If you only want to cover the common cases, just check AGENTS.md. That one file is read by Codex, Gemini, Cursor (modern), Factory, and most other modern agent-aware tools — the lowest-effort way to cover an entire stack of tools with a single mirror.
Plain Speak
Rewrite long agent messages into a five-section summary you can scan in seconds.
Long agent replies are exhausting. Plain Speak takes the agent's wall of text and rewrites it as a small, predictable structure: a one-line summary at the top, a clear recommended action, the original response below, the latest progress, and any open questions. You see the same five sections on every reply, so your eyes land on the part you care about without re-reading.
As of 2026-05-23, Plain Speak is off by default — flip the Enable Plain Speak master toggle in Settings → Plain Speak to turn it on. On 2026-05-25 it became strictly opt-in for everyone: a one-time reset switched Plain Speak back off on any install where an earlier migration had turned it on, and those installs see a one-time banner explaining the change. If you want Plain Speak, just turn it back on — your choice sticks from then on.
The Five Sections
Every Plain Speak message gets rewritten into the same five sections, in the same order:
- TLDR — one line summarizing the whole message.
- Recommended Action — what Omniscio thinks you should do next.
- Response — the agent's actual reply, lightly tidied.
- Latest — the most recent progress or status line.
- Questions — any open questions the agent asked you, rendered as Question Widget pills you can answer with one click.
If a section has nothing to put in it — no recommended action, no open questions — that section is hidden entirely, so you never see an empty "(none)" placeholder row. And if a whole message has nothing worth summarizing, Plain Speak hides the card and shows the agent's original reply instead.
Turning It On
- Open Settings → Plain Speak.
- Flip the master Enabled toggle on.
With the master toggle on, Omniscio processes every new agent message through Plain Speak as it arrives — on every session, no per-session opt-in. (The per-session opt-out checkbox in the session three-dot menu was removed on 2026-05-14 to reduce menu clutter; as of 2026-05-26 the master toggle is the single on/off control — the separate pause flag was retired so the toggle can never say "on" while nothing fires. The only control now is the global master enable — the agent-written card is free, so the old daily cost cap was removed from the panel.) Older messages in the transcript are left alone unless you explicitly re-trigger them.
Whenever Plain Speak is on, each agent writes its own five-section summary as part of its reply — the same capable model that wrote the message, with the full picture, writes the card. That makes the summaries higher quality and free (no separate paid step, no extra model call). There's no separate toggle for this — it's simply how Plain Speak works whenever the master toggle is on. If a message never gets a card — an older session from before the feature, or a reply with nothing worth summarizing — that message just shows its original reply with no card.
By default, agent messages open on the original reply with the Plain Speak card one click away — so you always see what the agent actually said first. Prefer the card? Turn on Settings → Plain Speak → "Show Plain Speak first" and messages open on the Plain Speak card instead (the header pill then reads Switch to Original). It's off by default and it's a personal preference — it changes only your view, not anyone else's. Either way, the header pill and the V key still flip any single message the other way.
The V Hotkey
Press V while focused on a session to toggle between the Plain Speak version and the original message body. The toggle is per-message and remembers your choice for that message until the session is closed. If you want to read what the model actually said, V is the fastest way.
Overlay Pending
Plain Speak runs as a background task after the agent's message has already appeared. While it's running, Omniscio shows the original message immediately and stamps a small Plain Speak pending overlay. As soon as the rewrite completes, a Plain Speak pill appears in the message header; by default the body stays on the original reply with the card one click away (unless you turned on Show Plain Speak first). Either way you never wait on Plain Speak to read your agent's reply.
The session row in the sidebar shows a green dot during the overlay-pending state so you know an agent message arrived and is being rewritten. Once Plain Speak finishes, the dot clears and the session returns to whatever attention state it was in before.
You won't get yanked to the card mid-read. Because messages open on the original reply by default, the rewrite arriving never interrupts your reading — the body stays put and the Plain Speak pill simply appears. The same protection covers the Show Plain Speak first case: if you've turned that on, Omniscio checks whether you're actively looking at the bubble when the rewrite lands (the session is active, the window is in the foreground, and the bubble is in view), and if you are, it leaves the message on the original markdown you were reading instead of flipping to the card mid-paragraph — common when you have a green (running) session open and the rewrite drifts in 30–60 seconds later. You can press V or click the pill any time to flip it yourself.
Quick Replies can pin a custom Latest line onto the agent's reply to a snippet send — useful for "I asked it to fix the bug, the Latest line should say 'Bug fix applied'" patterns. See Quick Replies.
When Plain Speak Doesn't Run
A few cases short-circuit the rewrite and leave the original message untouched:
- The master toggle is off.
- The message is very short — no point summarizing two sentences.
- The agent didn't include a card — an older session from before the feature, or a reply with nothing worth summarizing.
- The session is paused, archived, or otherwise terminal.
- The reply is a dev-pipeline status card — one of the 🔍/⚔️/🔨/💎/📝/🚀 gate cards (Plan Ready, Red Team, Build, Elegance, Docs, Ready to Merge). These are already laid out for you with their emojis and structure, so Plain Speak leaves them in that native format instead of flattening them into the five-section summary. They still alert you right away.
In any of these cases Omniscio renders the original message exactly as the model wrote it, and the V hotkey is a no-op (nothing to toggle to).
Inbox Pilot
Let a small AI model triage your sessions so only the ones that really need you show up in Needs You.
When an agent finishes a turn and flags itself as needing your input, sometimes that flag is right ("I'm blocked, please confirm the database name") and sometimes it's wrong ("here's the answer to your question, hope this helps" — not actually a question). Inbox Pilot reads each newly-arrived agent message with a fast small model and decides what to do with the session.
Inbox Pilot is opt-in. With it off, Omniscio follows the agent's self-reported status flag exactly.
The Five Outcomes
For each newly-arrived agent message, Inbox Pilot picks one of five outcomes:
- Keep Needs You — the session really does need your input. Leaves the session in Needs You so you'll see it.
- Hide — the session is informational. Returns it to the regular section so it doesn't fight for your attention.
- Archive — the session is done. Archives it outright.
- Snooze — the session will be relevant later. Snoozes it for a model-chosen interval, then resurfaces it.
- Respond — the session needs a quick acknowledgement Inbox Pilot can send on your behalf (e.g. "yes, continue"). Posts the response and the session flows from there.
Turning It On
- Click the Inbox Pilot tile in the left sidebar. If you don't see it, it is off on a default install — turn it on from the Projects sidebar's ⋮ menu → Sidebar Items, then flip Inbox Pilot on. The tile appears as soon as you do.
- Flip the master Enabled toggle on.
- Pick a model. Haiku is the default — fast and cheap.
- Optional: set per-session rules. Pin a single outcome for a chatty session ("always Keep Needs You", "always Archive") if you want to override the model's classification.
Per-Session Rule
Sometimes you know a particular session should always take a specific outcome — a long-running scraper that should always snooze for an hour, a noisy notifier that should always be hidden. Right-click any session and pick an Inbox Pilot rule. From then on, every classification for that session uses your pinned outcome instead of running the model.
Pinned rules are per-session, persist across restarts, and survive session-end / re-open cycles. Clear a rule by selecting Use AI classification from the same context menu.
Test on Latest Message (Dry-Run)
Want to see what Inbox Pilot would do on a particular session before relying on it? Open the session's three-dot menu and pick Test on latest message…. Omniscio re-classifies the session's most recent agent message using both your global Inbox Pilot rule and any per-session pin, and shows you the outcome (Keep Needs You / Hide / Archive / Snooze / Respond) along with the model's reason.
- No action fires — the session is not archived, hidden, snoozed, or responded to. It's purely a "what would you do?" check.
- The run is logged in the Inbox Pilot activity history flagged as a dry-run, and is not counted toward your daily cost cap.
- Greyed-out with a tooltip when Inbox Pilot is off for this session — turn it on (master toggle or per-session toggle) to enable.
Use this when you're tuning your global rule or a session pin and want to confirm "are we on the same page?" before letting Pilot act automatically.
Inbox Pilot pairs well with Plain Speak: Plain Speak summarizes the message body, Inbox Pilot decides where the session goes next. Together they collapse a noisy session list into just the rows that actually need you.
Snippet Replies (Pre-Approved Auto-Sends)
When Inbox Pilot picks Respond, it normally writes a short freeform reply ("yes, continue"). You can do better: hand it a list of your own Quick Reply snippets and let it pick one that matches the conversation. That keeps auto-replies on-brand, predictable, and cheaper — the classifier emits a short code instead of generating prose.
Which Snippets Are Eligible
For a snippet to show up in Inbox Pilot's options, it must:
- Be a regular snippet (not a folder, not a divider).
- Have Auto-submit on click turned on — edit-then-send snippets are excluded because they expect a human to tweak the text before sending.
- Contain no
{variable}placeholders — Inbox Pilot has no way to fill them in. - Have the per-snippet Allow Inbox Pilot to auto-send this reply toggle on in the editor's Behavior tab (it's on by default for new snippets).
Per-Snippet Opt-Out
Each snippet has its own Allow Inbox Pilot to auto-send this reply toggle on the editor's Behavior tab. Turn it off for snippets you only want fired by a hotkey or click — for example, a "Send my home address" snippet you don't want an AI choosing on your behalf. The toggle is a per-snippet kill-switch; the rest of the snippet keeps working everywhere else.
Helping the Classifier Pick Well
When the per-snippet toggle is on, an optional Hint for the classifier field appears underneath — one short sentence telling the classifier when to use this snippet ("confirm a yes/no question", "acknowledge a finished task"). When set, the classifier sees the hint instead of the snippet's body, which keeps the prompt compact and makes its choice much more accurate. If you leave the hint blank, Omniscio falls back to the first ~80 characters of the snippet text.
Inbox Pilot only sees your first 25 eligible snippets (ordered by sidebar display order). If you have more than 25, reorder the ones you most want auto-fired to the top of your snippet list.
Audit Trail
Every snippet-fired Respond logs both the snippet's id and a frozen copy of its text at dispatch time. If you later edit or delete the saved snippet, the audit log still shows exactly what was sent. The snippet's usage counter is intentionally not bumped by auto-fires — that count is reserved for your own clicks and hotkeys, so it stays a meaningful "snippets I personally reach for" metric.
Cost
Inbox Pilot runs Haiku (or your chosen model) once per inbound agent message, with the message body as the prompt. That's a tiny request per turn, but it does add up across a busy day of many sessions. The Stats virtual hub's Feature Usage tab shows your total Inbox Pilot spend, and you can set a daily cap in the Inbox Pilot tile if you want a hard ceiling.
Daily Digest
A morning briefing that pulls together your overnight Gmail, calendar, and sessions into one short read.
Daily Digest is an AI-generated briefing Omniscio produces once per day. It pulls together what changed overnight — new important emails, today's calendar events, sessions that finished or got stuck, anything an automation flagged — and writes a short summary you can read in under a minute over coffee.
Daily Digest is opt-in. Turn it on in Settings.
The Briefings Sidebar
Daily Digests live in their own Briefings virtual hub in the sidebar, similar to Bookmarks or Automations. The Briefings panel has three tabs:
- Active — today's briefing and any from the last few days you haven't dismissed.
- Snoozed — briefings you snoozed for later. They resurface at the chosen time.
- Archived — everything you've dismissed. Kept for reference; the archive doesn't expire.
Hotkeys
- X — archive the focused briefing.
- Shift + X — snooze the focused briefing. Pick an interval from the snooze menu.
- Shift + D — jump straight to the Daily Digest panel from anywhere in the app.
In your Inbox
Unread briefings also show up in your main Inbox — one row per briefing, newest first, each labeled with its date. Open or archive a briefing right there like anything else in the inbox (archiving one clears just that briefing), or jump to the full Briefings panel above for the complete history.
What Goes Into a Briefing
Daily Digest pulls from every integration you've connected. If you haven't connected something, that section is just omitted — the briefing has whatever's available, never empty filler:
- Gmail — important new emails from the last 24 hours.
- Google Calendar — today's events.
- Sessions — anything that needs you, finished overnight, or errored.
- Automations & Recipes — anything an automation or cron-scheduled recipe flagged for review.
Turning It On
- Open Settings → Email & Summaries → Digest & Summaries.
- Flip the Enabled toggle on.
- Pick a delivery time. Default is 7:00 AM in your local time zone.
- Optional: choose which integrations to include. By default everything you've connected is in.
Drip
Queue mixed content into named “drips” that trickle items into your inbox on a cadence you choose — instead of dumping a 60-link reading list on yourself all at once.
Drip is a queue-and-trickle inbox feeder. You stash short notes, links, files, or watched folders into a named drip, set a cadence, and Drip releases items into your inbox a few at a time. The metaphor is a slow drip rather than a firehose — perfect for “weekend reading,” “papers to read,” or a folder of resources you want walked through over a few weeks.
Drip is enabled out of the box under Settings → Features → Enable Drip. Turning it off hides the sidebar row and silences the scheduler — pending items are preserved.
What a Drip Looks Like
Each drip is one named queue plus one cadence (e.g. “Weekend reading — Saturdays at 9am”), plus the pile of pending items waiting to be released. A drip has three statuses:
- Active — the schedule fires on cadence, releasing the configured number of items per tick from the head of the queue.
- Paused — you stopped it. Pending items are preserved, so resuming picks up where you left off.
- Archived — the queue drained naturally. A one-shot “queue empty” card lands in your inbox so the drip doesn’t just go silent on you. (A Repeat forever drip never reaches this state — see Per-Drip Knobs below.)
What You Can Queue
- Text — freeform prose or Markdown. Renders as rich text in the inbox viewer.
- Links — paste a URL and Omniscio fetches an Open Graph preview (title, description, hero image) so the inbox card looks like a clickable bookmark, not a bare URL.
- Files — attach any file. Omniscio keeps its own copy under the app’s data folder, so the original can move or be deleted later without breaking the drip.
- Folder sources — point a drip at a directory on disk. Omniscio walks the folder on a slow cadence and queues new files automatically. Useful for “trickle my Downloads/research folder back to me over the next few weeks.”
- Books — attach a PDF or EPUB and Drip releases it a unit at a time instead of as one file: a single PDF page, one EPUB chapter, or a fixed-size run of words for an EPUB whose chapters are too coarse. Good for trickling a whole book into your inbox over weeks.
Setting the Cadence
The cadence picker works like the Snooze palette — one input box with a list of presets beneath it that filters live as you type. No separate “Raw cron” tab, no red error on your first keystroke.
- Leave the input empty and pick from the seeded presets: Every day at 9am, Every weekday at 9am, Every Monday at 9am, Every weekend at 10am, Every hour.
- Type e to highlight every preset starting with “Every…”; type every fri to narrow to Friday entries.
- Type a full plain-English cadence the parser understands — “every weekday at 9am”, “every Saturday at noon”, “Monday and Thursday at 7pm” — and a Custom row appears at the bottom of the list with the resolved cron beside it.
- Paste a 5-field cron expression like
0 9 * * 1-5and Omniscio detects it automatically — no mode switch needed. - Use ↑ / ↓ to move through the list and Enter to pick. Omniscio previews the next few fire times beneath the input so you can confirm before saving.
How Items Reach the Inbox
When a drip fires, it releases items from the head of the queue (1 per tick by default; adjustable per drip). Each released item appears in your unified inbox as a Drip integration row with the drip’s name as the source label. Clicking the row opens the item in the Drip inbox viewer on the right:
- Text items render as Markdown.
- Link items show a clickable preview card — hero image, title, description, domain — that opens in your default browser when clicked.
- File items show a name / type / size pill.
- Queue-drained items show a one-line “all items released” confirmation.
The standard inbox actions work: snooze (push the item back into the queue or just delay it), archive (press E, or middle-click the sidebar row on desktop), or undo the archive from the toast that appears.
You can also right-click the content in the viewer, just like anywhere else on your computer: right-click a picture for Copy Image / Save Image As…, a link for Open Link / Copy Link Address, or text for Copy (no need to highlight it first). (Desktop only.)
Each item’s viewer also carries a Start session button (a message-plus icon beside Archive). Click it to spin up a Claude Code session that opens already focused on that item: Omniscio pre-fills the opening prompt from the item’s content — led by this drip’s saved preset, if you set one — and picks a target repo, both of which you can edit before confirming. By default the session opens in your Claude repo; pick any other project from the dropdown — now showing each repo’s icon — to launch there instead. The prompt box follows your usual send-key setting (Enter, or Ctrl+Enter, to send). (The button is hidden on the “queue drained” card and disabled if you have no repo to launch into.)
Made a typo, or want to reword a reminder after it arrived? Text notes are editable in place. In the inbox viewer, click the pencil (beside Snooze / Archive, shown for text notes only) to turn the note into an editable box — Ctrl+Enter saves, Esc cancels. You can also edit from the Drip management view: each text row has an Edit button, so you can fix a note even before it’s released. The change shows up everywhere the item appears — the inbox, the management view, and your phone. (This edits the note’s words; to change the drip’s schedule, click the drip’s name at the top of the inbox viewer.)
Archived items — how to find them, how to restore
Archiving a drip item just removes it from the inbox — it’s not deleted. To see archived items, open Drip in the sidebar, pick the drip the item belonged to, and switch to the Archived tab. Each archived row has a Restore button that puts the item back into the inbox (it’ll be there next time you open the inbox).
The four tabs in a drip’s management view are: Pending (waiting to be released), Released (already trickled to the inbox), Archived (released and then dismissed from the inbox), and All (everything regardless of state).
Deleting a drip — and what the cleanup removes on its own
Deleting a drip is permanent. The confirm dialog says so, and there is no undo. Behind the scenes the deleted drip sits for 7 days before an hourly cleanup job removes it for good — every database row and its whole on-disk folder, including any file copied in from a watched folder and any imported PDF or EPUB. There is no trash folder for a drip, so copy out anything you want to keep before you delete.
There is a second cleanup you never ask for. Inside every drip you still have, that same hourly job removes any file in the drip’s workspace that no live item points at and that has not been touched in 24 hours. You did not delete that file — the cleanup did. Two things are safe from it: a file still referenced by an item you archived (archiving is not a delete, so the item — and its file — stays), and the original file in a folder you asked Drip to watch. Drip always copies a file into its own workspace rather than moving it, so neither deleting a drip nor this cleanup can reach the folder you pointed at.
Per-Drip Knobs
- Repeat forever — when on, the drip never stops. Instead of trickling its queue once and archiving when empty, it re-delivers its item(s) into your inbox as a fresh card on every scheduled tick, indefinitely. Perfect for a recurring reminder — e.g. a photo or a note you want to see every day at 9am. Leave it off for the classic trickle-then-stop behavior. (For a multi-item repeating drip the items rotate one per tick; to pin a specific item to a specific time, use one repeating drip per time slot.)
- Items per release — how many items the scheduler releases each tick. Default is 1.
- Skip next on snooze — when on, snoozing a released drip item also skips the next scheduled release. Useful for buying breathing room without pausing the whole drip.
- Default session prompt — an optional preset that leads the opening prompt when you Start session from one of this drip’s inbox items. Leave it blank for no preset.
- Default repo — which repo a started session opens in. Leave it at Claude (default) to decide at launch, or pick a project to make that the saved default.
Turning It On / Off
- Open Settings → Features.
- Toggle Enable Drip. When on, the “Drip” row appears in the Omniscio group in the sidebar.
- Click Drip in the sidebar to open the management view. Use + New drip to create your first one.
Inbox Alerts
Let any Claude Code session or agent drop a persistent row into your inbox on demand — a heads-up, a link, or a file that waits for you instead of scrolling past in a chat.
Inbox Alerts let an agent raise a standing item in your unified inbox whenever it has something worth your attention. The alert is persistent — it survives an app restart and lives until you archive or snooze it — so a long-running job can flag “the build is green” or “I need a decision here” and trust that you’ll see it the next time you open Omniscio, even if the session that raised it has long since finished.
Inbox Alerts is on by default. The cards Omniscio raises for you — a backup that failed, an account to sign in to again, low disk space — always reach your inbox. Settings → Features → Allow agents to raise inbox alerts (agentAlertsEnabled) decides only whether your agents and plugins may post cards: turning it off stops new ones and keeps everything already in your inbox. The Alerts row in the sidebar has its own switch, Show Alerts in sidebar, under Settings → Notifications → Active alerts.
What an Alert Can Carry
- Text — a short note or Markdown body that becomes the inbox row. Every alert’s text reads exactly like a chat message — headings, lists, links and code blocks included — whether an agent or Omniscio itself raised it, and whether you open it fresh or look it up later.
- A link — a URL that opens in your default browser when you click through.
- A file — Omniscio keeps its own copy, so the original can move or be deleted later without breaking the alert. If the file is an HTML page, it opens as a fully-styled page right inside the alert (see below) instead of a download chip.
- A “Start session” action — an optional button on the row that spins up a Claude Code session already focused on the alert, so you can act on it in one click.
- A project group — an alert can be filed under a project so related alerts cluster together in the inbox.
When one of Omniscio’s own alerts recommends an action — “finish setting up Backup Mirror”, “reconnect Telegram”, “your mobile access is acting up” — it shows a one-click button that takes you straight there: Open Backup Mirror settings, Open claude.ai, Reconnect Gmail, and so on. The button lands you on the exact control with it highlighted, so you never have to go digging through Settings yourself. Omniscio build-checks this: an alert that tells you to go do something can’t ship without a button (the rare case that genuinely needs a terminal command or a plain restart says so instead).
When an agent attaches a self-contained HTML file, the alert renders it as a styled page the moment you open it — just like opening a nicely-formatted email — instead of a plain file chip. It’s ideal for a report or digest you’d rather read as a formatted page than as plain text. The page is shown in a locked-down sandbox with no network access, so it can only display — it can’t call out to the internet, reach your data, or run anything harmful. This is the same safe preview that powers Drip. You can turn it off with the Drip / HTML preview switch in Settings, which makes these alerts fall back to a plain file chip.
Repeats Collapse
An alert can include a key. If an agent raises another alert with the same key, Omniscio doesn’t stack a second row — it folds them into one row with a ×N count showing how many times it has fired. A chatty watcher that pings “disk almost full” every few minutes stays a single, quietly-incrementing line instead of burying your inbox.
No Repeat Nagging
Once you dismiss a problem or warning alert, Omniscio keeps that same alert from popping back for 24 hours — so a card like “low disk space” can’t reappear minutes after you clear it. It’s a blanket rule that covers every kind of problem alert at once, so you never have to quiet them one by one. Real messages are never held back: a new Team Chat message always comes through, and a genuine emergency (like runaway AI spend) still breaks through right away. Prefer the old behavior? Switch it off under Settings → Notifications → Limit repeat problem alerts (on by default).
A few alerts wait much longer than a day, because they describe a standing situation you either fix once or decide to live with — nagging you daily about a choice you already made just teaches you to dismiss them on sight. “Backups are on the same disk as your data” comes back at most once every 3 months; “Mobile Access is on” and the monthly AI allowance notice wait 30 days. None of them goes silent for good — each returns on its own schedule for as long as the situation lasts — and fixing the underlying thing clears the card straight away rather than waiting out the timer.
Browse Recently-Dismissed Alerts
Open the Alerts row in the sidebar and your current alerts are listed down the left, with the one you click open on the right — so you can work through a pile without losing your place in the list. It works the same in a popped-out Alerts window (Open in new window): click an alert and it opens beside the list, Go to session takes the main window to that session, and the list keeps itself up to date as alerts arrive, are snoozed or are dismissed elsewhere. Any button in the alert that leads somewhere else — a Settings link, Open channel, Start session — opens it in the main window and brings that window forward. A few that only work there, like View your records, open the alert itself in the main window, so one more click there finishes the job. Dismissed an alert and wish you hadn’t? Beneath your current alerts is a “Recently dismissed” list — everything you dismissed in the last 7 days, greyed out. Expand it and click any one to re-read it on the right, or hit Restore to move it back into your current alerts. After a week a dismissed alert drops off the list on its own. (Nothing is deleted early — your dismissed alerts were already kept; this just gives them a place to appear.)
The Alerts screen also has a Sessions tab beside Alerts. Start a session while you’re looking at your alerts — the + at the top, or New session on the tab — and it runs as the Alerts screen’s own agent, listed right there so you can find it again later. The tab shows a count when agents are running, waiting for you, or have hit an error, so you can tell at a glance without leaving your alerts; click one to open its chat, and click Alerts to come back to the list. It’s handy for handing an alert to an agent to investigate: start the session from the Alerts screen and it works out of the Alerts screen’s own workspace.
How Agents Raise One
An Omniscio-spawned agent posts to the local CLI control server’s /alert endpoint. The request is bearer-authed with your CLI token (read from the environment as $AMC_CLI_TOKEN); the agent supplies the alert text plus any optional link, file, key, project, or start-session action. Omniscio applies it immediately — raising an alert is benign and never spends Claude tokens, unlike spawning a session.
Who Raised It
Open an alert and its detail view shows a “Generated by <session>” link near the top — click it to jump straight to the agent session that raised the alert. Agents that Omniscio launched identify themselves automatically, so their alerts are traceable; an alert raised by hand or by an external script simply shows no origin. It is the same provenance trail Omniscio keeps for approvals and spawned sessions.
Broadcast response forms
Some inbox cards can also ask you a question. A broadcast from the Omniscio team can carry a short Broadcast response form — one or more questions (free-text or multiple choice) that you answer right on the card and submit back, without leaving your inbox. Your answer is saved locally first and then sent, so a brief network hiccup never loses it, and re-answering simply updates your previous response.
Broadcast read receipts
When the Omniscio team sends you a targeted in-app message, your app quietly confirms back to the sender that it was received (it reached your app), presented (it landed in your inbox), and read (you opened the card) — so the sender can see their message actually arrived. It is best-effort and privacy-respecting: nothing is reported if you turn off “Receive developer messages & surveys” in Settings, and public fleet-wide announcements are never tracked per person.
Drip’s released items now flow through this same alert mechanism under the hood. Nothing changes about how Drip looks or behaves — it’s the same plumbing powering both, so a fix in one benefits the other.
Scheduled Messages
Write a rich-markdown note to your future self — a reminder, a checklist, a standing weekly prompt — and have Omniscio drop it into your inbox at the time you pick, once or on a repeating schedule.
Scheduled Messages is a letter to your future self. You compose a subject and a Markdown body (with optional inline images), choose when it should arrive, and Omniscio silently delivers it into your unified inbox when the time comes. The delivery is persistent — it survives an app restart — and the whole lifecycle is just read it and archive it. There is nothing to respond to and no agent involved.
Scheduled Messages is on by default: the scheduler runs and a fired note lands in your inbox for everyone. What’s hidden by default is just the “Scheduled Messages” sidebar row and its compose surface. Reveal it under Settings → Features → “Show Scheduled Messages in sidebar”; hiding the row never stops deliveries. The same Features screen still lets you turn the whole feature off, which quiets the scheduler; anything already delivered to your inbox is preserved.
Send Later defers a reply you are sending into a live Claude session — it dispatches your message to the agent at a chosen time. Scheduled Messages never touches a session: it delivers a note to you, into your inbox. Use Send Later to nudge a running agent later; use Scheduled Messages to remind yourself later.
Composing a Message
- Subject — a short heading (up to 200 characters) that becomes the inbox row title.
- Body — free-form Markdown, rendered live in a preview pane as you type, so what you see is what lands in the inbox.
- Images — use Add image to embed an inline picture. Omniscio keeps its own copy, so the original file can move or be deleted later without breaking the message.
Setting the Schedule
Pick a recurrence and a time of day (defaults to 8:00am local):
- Once — delivers a single time at the chosen date/time, then the message disables itself.
- Daily — every day at the chosen time.
- Weekdays / Weekends — Monday–Friday, or Saturday–Sunday.
- Custom days — choose exactly which days of the week it should fire.
Or just type it. A Schedule (plain English) box above these controls lets you write the timing in everyday words, like “every weekday at 8pm” or “tomorrow at 2:30pm”, and Omniscio fills in the recurrence, time, and date for you, with a one-line preview of what it understood. It only sets the schedule; your subject and message stay exactly as you wrote them. If you type a repeat Omniscio can’t store (say “every 3 weeks”), it sets a one-time delivery on the first matching date and tells you it did.
How It Reaches the Inbox
A background scanner checks every minute for messages that are due. When one fires it lands in your unified inbox as a Scheduled Messages row. Clicking the row opens the delivery on the right: the subject as a heading, a “Delivered <time>” line, and the Markdown body rendered as rich text. Each delivery is a snapshot — editing the message afterward never rewrites a note already sitting in your inbox. Archive a delivery with the Archive button to clear it; the message itself keeps running on its schedule.
Managing Messages
Open Scheduled Messages in the sidebar to see your messages split into Active and Paused sections, with live search. Each row offers:
- Pause / Resume — stop a message firing without deleting it, then start it again later.
- Delete — permanently removes the message and stops all future deliveries. Deliveries already in your inbox are kept. You’ll be asked to confirm.
Showing It in the Sidebar
- Open Settings → Features.
- Toggle Show Scheduled Messages in sidebar (off by default). The feature itself is already on — this only surfaces the “Scheduled Messages” row in the Omniscio group. (The same screen still lets you turn the whole feature off if you want to silence it entirely.)
- Click Scheduled Messages in the sidebar to open the management view. Use + New message to compose your first one.
Usage Forecast
A live prediction of when your Anthropic 5-hour rate window will run out, before it does.
Anthropic's API enforces a rolling 5-hour usage window per account. If you blow through your budget in two hours, you wait three before the next session can spawn. Usage Forecast watches your live usage rate against your account's cap and tells you, in advance, when you're projected to hit the limit.
Four Surfaces
Usage Forecast shows up in four places:
- Global banner — when the forecast says you'll exhaust your window in the next 30 minutes, Omniscio drops a banner across the top of the app. Click to see which account is at risk.
- Per-account row — in Settings → Accounts, every account row shows its current usage rate, projected exhaustion time, and the cap.
- Usage Stats page — a dedicated page (linked from the account row) with the full history: usage over the last 24 hours, the 5-hour rolling window, and a chart of your historical hour-of-day usage pattern.
- Usage widget (optional) — a compact chip you can add to the top header bar (from the … overflow menu or Settings → Widgets) for an always-visible read of your 5-hour and weekly usage with reset countdowns, color-coded as you approach the limit. Off by default; click it to jump to the Usage Stats page, and choose which fields it shows in Settings → Widgets → Usage widget.
The Hour-of-Day Model
The forecast isn't just "current rate × time remaining". Omniscio keeps a per-account history of how much you typically use at each hour of the day. If you usually spike your usage between 9–11 AM and taper off by 5 PM, the model knows that and adjusts the forecast accordingly — a fast morning rate isn't necessarily extrapolated as a fast afternoon rate.
The model needs about a week of usage history to be accurate. While it's learning, the forecast falls back to a simple linear projection.
What to Do When the Banner Appears
- Add a second account — Omniscio's rate-limit recovery will automatically switch to the second account when the first is exhausted. Two accounts effectively double your 5-hour budget.
- Pause non-urgent work — if you've got a recipe burning through tokens on something that can wait until tomorrow, pause it now and your urgent sessions get the remaining budget.
- Switch to a smaller model — Haiku is roughly 1/15 the cost of Opus. Many sessions don't need the heavy model for the rest of the day.
Open Settings → Accounts and click any account row to see its detailed Usage Stats page. The hour-of-day chart and 5-hour rolling window are useful even when you're not near the cap — they reveal which sessions and times of day are most expensive for you.
Statistics
A virtual hub that shows how you actually use Omniscio: feature usage, cost trends, active time.
Stats is a virtual hub in the sidebar (next to Bookmarks, Automations, etc.) that surfaces how you're actually using Omniscio. It's read-only — just charts and tables built from the same usage data Omniscio already collects in the background. Use it to answer questions like "how much did I spend on Opus this week?", "which features am I actually using?", or "how many hours did I have Omniscio open yesterday?".
The Tabs
- Overview — the high-level dashboard: total sessions this week, total cost this month, active time today, top three most-used features.
- Spend — the central “where is my AI money going?” view: one sorted list, biggest first, of your coding sessions plus every background feature that calls a paid model, with a running total that honors the time range. Expand any feature row to drill into the individual charges behind it — a per-model split and the biggest charges, each tied to the session, the context (an email subject, a document name…), or, for Asides, the question that ran it.
- Feature Usage — a per-feature breakdown of how many times each Omniscio feature has fired (Plain Speak, Inbox Pilot, automations, cron jobs, voice control, etc.) and the cumulative cost for the ones that call paid APIs.
- Shortcut Efficiency — for the handful of actions that have both a button and a keyboard shortcut (archive, new session, inbox, search, snooze, quick scratchpad, Super Prompts), how often you used the mouse versus the keyboard, plus a rough estimate of the time you could reclaim by using the shortcut. Passive — stats only, no pop-ups or nudges.
- Hotkey Usage — how often you actually press each keyboard shortcut, ranked most-used to least-used. The shortcuts at the bottom are the ones you rarely reach for — handy for deciding which to drop or leave unassigned. Each shortcut also shows how often you clicked its button instead of pressing the key — your “could’ve used the hotkey but didn’t” count, with a headline total — and a shortcut you only ever click still shows up, so the ones you never reach for stand out. It even estimates how much time each shortcut’s mouse-clicks cost you versus the key — based on how deep you had to dig (a top-level button, a menu, or a submenu) — shown per shortcut and as a rough total. Covers the main shortcuts plus the scoped ones (Gmail, diff review, mind map, notes, inbox approvals, the inbox detail pane, Team Chat, the terminal, and the AI Browser); only the press and click counts are recorded, never what you typed. Per-shortcut history is kept for about 90 days, so the “All Time” range shows roughly that window rather than your whole history — the tab notes this when All Time is selected.
- Trends — the same data over time. Charts of daily cost, daily session count, daily active time, and per-feature usage over the last 30 days.
- Usage — the rate-limit forecast: per-account usage rates, projected exhaustion times, and an hour-of-day usage model.
- Records — a gamified trophy case of all-time personal bests (see below).
Active Time
"Active time" is how long Omniscio was the foreground window or had a session actively streaming. Idle time (Omniscio minimized, no activity for a while) is excluded. The number is intentionally conservative — it's meant to be a real measure of how much time you spent working in Omniscio, not just "app was running".
Feature Usage
Omniscio tracks usage of every feature you can opt into. The Feature Usage tab shows them all in a sortable table:
- Count — how many times the feature has fired since you turned it on.
- Cost — cumulative API cost for features that call a paid model (Plain Speak, Inbox Pilot, AI suggestions, etc.). Features without paid API calls show a dash.
- Last used — when you last triggered it.
This is useful for spotting features you turned on once and never use (consider turning them off) and ones you use heavily that have high cost (consider switching to a cheaper model).
Records (trophy case)
The Records tab is a gamified trophy case of roughly 18 all-time personal bests, grouped into seven categories: Peak Parallelism (most sessions and projects running at once), Single-Session Feats (longest session, most turns, priciest session, most tokens, most hands-on time), Efficiency (best output-tokens-per-dollar), Lifetime milestones, Streaks (longest and current run of active days), Daily Bests (busiest day, biggest spend day), and Leverage (how much Omniscio automated for you). It's all-time, so unlike the other tabs it has no time-range selector.
A record you haven't earned shows as a locked card with a hint; once you set a value it becomes an earned trophy. Some records are simple "highest ever" bests, while others are tier ladders with named rungs (e.g. Rookie → Regular → Veteran → Master → Legend) and a progress bar toward the next rung. When you beat a celebration-worthy record, a confetti burst fires right on the tab — that's always on. The headline Peak Parallelism records are also tracked live in the background (sampled once a minute), and your full history is swept once to seed them so the trophy case isn't empty on day one. A couple of fairness rules keep records honest — for example, the "most output tokens per dollar" record only counts sessions that spent at least $0.50 and produced at least 50,000 output tokens.
Earned cards are clickable when they point at a moment. A single-session feat (longest session, biggest spender, most tokens, and so on) jumps you straight to the session that set it. A daily best (busiest day, biggest spend day, most automated day) opens a "Sessions on <date>" pop-up — the sessions you ran that day, each showing its status, name, time, and cost — and clicking any row opens that session. The single-session and daily cards also show the date you set them, and tier-ladder cards show how far you are from the next rung (e.g. "400 to Veteran"). Lifetime, streak, and parallelism records aren't tied to one session or day, so those cards aren't clickable.
If you'd like a celebratory toast to pop up anywhere in Omniscio (not just on the Stats tab) when you beat a parallelism record, turn on Settings → Notifications → Record-break notifications — it's off by default. The confetti on the tab itself needs no setting.
Separately, Omniscio can drop a quiet, dismissible inbox card when you set a genuine new milestone — so you find out even when you're not on the Records tab. It's off by default at Settings → Notifications → Record-break inbox alerts (matching the toast above, so both record-break notifications start off — turn on whichever you want), and it's deliberately rare: only the nine milestone records, only on a clear jump (about 50% bigger than the last one you were told about), with a quiet first week and at most two cards a day. Each card is a scannable mini-card, not just a number — it leads with the new value, spells out the leap (how much bigger and the percentage) over your previous best, and gives a plain-English line saying what the record measures (e.g. "New spending high: $4,150 — $739 (+22%) above your previous best of $3,411. That's the most you've ever spent on a single session."). A single-session best also names the session that set it as a tap-to-open link; a tier record names the rung you reached plus how far to the next one. (Dollar amounts follow Omniscio's house rule — no cents past $10.) The card leads with a gold trophy on a soft green “achievement” tile instead of the generic bell, and carries a View your records button that opens the Records tab straight from the card — it navigates inside the app, so it works on the phone/web view too, not just the desktop app.
Privacy
All stats are local. Nothing in this panel is sent to Anthropic, our servers, or anywhere outside your machine. Feature event names and counts live in your local Omniscio database, and personally identifying details (message contents, file paths, contact names) are never written into the events.
UI Usage
A local "used vs. never used" report of which controls and sidebar integrations you actually use — so unused things can later be removed or hidden.
Omniscio can quietly keep track, on your own device, of which named controls you click (buttons, links, toggles, tabs, menu items) and which sidebar integrations you open (Gmail, GitHub, SMS, Stats, The Vault, and so on). It then shows you a plain picture of what you actually use versus what you've never touched, so you can decide later what's worth keeping versus removing or auto-hiding to reduce clutter.
This is local-only. Nothing about your usage leaves your machine — no upload, no server call, no telemetry send.
Where to find it
Open Settings → Diagnostics. You'll see two things: a toggle labelled "Track which UI controls you use" (on by default), and a UI Usage card below it that shows the report.
What the card shows
A row of time-window buttons — Last 24h / 7 days / 30 days / All time (it opens on 30 days) — and a "Tracking since <date>" note. Below that, two groups, Controls and Integrations, each split into two lists:
- Used — what you've used in the selected window, most-used first, with a click count next to each.
- Never used — the catalogued things you haven't used, listed alphabetically.
Switching the window re-runs the report, so "Never used" under Last 24h means "you didn't touch it today", while under All time it means "you've never touched it since tracking began".
Under each Used list, a small mobile / desktop split (a phone icon and a monitor icon, each with a count) shows how much of that usage came from a phone versus a computer — handy for telling whether something you rely on is mostly a mobile habit. It appears once there's device-stamped usage to show.
Why "Never used" looks huge at first
On day one, everything is unused until you click it, so the "Never used" lists start long and the "Used" lists start short. That's expected, not a bug. As you use Omniscio over days and weeks, items move from "Never used" into "Used" and the lists become a meaningful map of your real habits.
Things you can't reach are left out — off is not unused
If you've turned an integration off so it isn't even in your sidebar, it is not listed under the integrations "Never used" list. The "could be opened" universe is the set of integrations currently visible to you, so a feature you deliberately disabled isn't held against you.
Controls follow the same rule. A control that simply can't appear in your copy of Omniscio is left out of the controls "Never used" list too — you never could have used it. That covers developer-only controls (not present in the shipped app), platform-specific ones (like the Windows-only AutoHotkey manager, hidden on Mac and Linux), and controls behind an in-development feature you haven't switched on. The moment such a control can appear for you — the right platform, or the feature enabled — it rejoins the "Never used" list until you use it.
The toggle is separate from telemetry
The "Track which UI controls you use" toggle is on by default; flip it off and Omniscio stops recording new clicks and integration opens. It is deliberately separate from the telemetry / "share data" consent: because everything stays on your device, this is just a local feature switch ("do I want Omniscio to keep this diary of what I use?"), not permission to send anything out.
Privacy
Only two things are stored per event: which control or integration it was, and when. No message content, no file names, no folder paths, no contact names — ever. Clicking a specific session row is ignored, too; only catalogued, named controls count, so one-off ids never enter the database. Everything lives in your local Omniscio database and goes nowhere. (An anonymous, randomly-generated install id is created on your machine for possible future use, but in this version nothing reads it and nothing sends it.)
Auto-Tidy
Optionally let Omniscio tuck away sidebar integrations and toolbar icons you never use — gently and reversibly, never by deleting anything.
Auto-Tidy uses the local UI Usage signal (which controls you've never clicked) to keep the interface calm over time. When you've gone 30+ days without ever touching a particular sidebar integration or toolbar icon, Omniscio quietly moves it somewhere less prominent — a sidebar integration collapses into a low-key "Unused" group, and a toolbar icon drops into the toolbar's "…" overflow menu.
The key idea is that tidying is a gentle, reversible move — never a deletion. Nothing is removed, disabled, or uninstalled; the feature still works exactly as before, it's just out of the way. Omniscio drops one inbox notice telling you what moved, and everything stays restorable in Settings with a single click.
Auto-Tidy is opt-in. Omniscio won't rearrange anything until you turn it on — auto-changing your UI without asking would be surprising.
Turning it on & restoring items
Open Settings → Diagnostics. You'll find:
- A toggle, "Automatically tidy away controls you never use" (off by default). Turning it on enables the whole loop.
- A "Hidden items" card listing everything currently tucked away, each with a one-click Restore. When nothing is hidden, it shows a short empty state.
What gets tidied, and when
Once it's on, Omniscio checks on launch and then at most once a day — the check is remembered across restarts, so quitting and reopening Omniscio several times in a day won't re-run it. Something is tidied only when all of these hold:
- Auto-Tidy is on.
- There's at least 30 days of usage history — so a fresh install never tidies anything (on day one everything looks unused).
- The item itself has been around, unused, for 30+ days. Omniscio remembers when it first saw each control, so a feature added in a recent update gets its own 30-day grace period — it's never tidied the day it appears (it shows zero clicks only because it's new).
- You've used the item zero times, all-time.
- The item is currently relevant — an enabled, visible integration, or a toolbar icon you actually have pinned. A feature you already turned off isn't "tidied" (off ≠ unused).
- You haven't restored it before.
To keep the first tidy gentle, Omniscio moves at most a handful of items per run; the rest move on later days. Each run that moves something posts one inbox notice listing what moved and pointing you to Settings → Diagnostics → Hidden items.
Nothing is deleted, and everything comes back
Tidying changes only where something lives. A demoted integration is still fully enabled and works the same — just inside the collapsed "Unused" group; expand it to see it. A demoted toolbar icon still works — just in the "…" overflow. The easiest way to bring something back is to just use it — open the tucked-away integration or click the toolbar icon and Omniscio restores it to its normal spot on the spot. You can also click Restore in Settings → Diagnostics → Hidden items, or flip the switch in the inbox notice. Restoring is also permanent: Omniscio remembers it and never auto-tidies that item again, even if you go another 30 days without using it. (The one exception is the notice's own open link, which is a look-only peek so you can check what a tidied item is without bringing it back.)
Privacy
Auto-Tidy is 100% local, like the usage tracking it builds on. It reads only this device's own click history and never uploads or shares anything; the only thing it ever creates is a local inbox notice.
Codebase Stats
A multi-tab health dashboard for any project: size, code health, git activity, dependency risk, AI spend, and test coverage in one place.
Codebase Stats analyzes a real project on disk and reports on its size, health, git history, dependency risk, AI spend, and test coverage — everything you'd normally piece together from a half-dozen command-line tools, gathered into one window. It scans the files, reads the git log, checks package.json, can run your test suite for coverage, and pulls session costs from Omniscio's own database.
Unlike the Statistics panel (which is about how you use Omniscio), Codebase Stats is about the health of a specific codebase. It's per-hub and only appears for real hubs with a folder on disk — virtual hubs like Gmail, SMS, or Skills have nothing to scan, so the menu item is hidden there.
Opening it
Click the three-dot menu on any real project in the left sidebar and choose View Codebase Stats. The dashboard takes over the screen. Results are cached for 24 hours, so reopening is instant — use the Refresh button (bottom-left) to force a fresh scan anytime.
Computed quietly in the background
Omniscio pre-computes these stats in the background so the dashboard opens instantly instead of scanning on the spot — you rarely wait for a fresh scan. It's built to stay out of your way: it only re-checks a project after its code actually changes, works one project at a time with pauses in between, and backs off when your computer is busy. It is designed to stay out of your way, but it is real work: on a very busy machine you may occasionally notice it, and you can switch it off in Settings → Diagnostics. The one network-heavy part (the dependency security check) is left for when you open a project and hit Refresh.
It's on by default. To turn it off, go to Settings → Diagnostics and switch off “Pre-compute codebase stats in the background.”
The seven tabs
| Tab | What it shows |
|---|---|
| Overview | Eight headline numbers: total lines, source vs test lines, commits in the last 30 days, AI spend to date, test count, TODO count, dependency count, and known vulnerabilities. A red alert banner appears at the top if any secrets were detected. |
| Files | Language breakdown and a table of file extensions. |
| Health | TODO/FIXME counts, loosely-typed any usages, detected secrets, and large files (over 300 lines). |
| Git | Recent activity, churn hotspots, knowledge silos (files only one person has touched), and stale files. |
| Deps | Outdated and vulnerable packages, grouped by severity. |
| Costs | Input/output token usage and total dollars spent across every session in the project. |
| Coverage | A coverage donut chart and a list of untested files. |
Running coverage
The Coverage tab doesn't run automatically — click Run Coverage and Omniscio runs your test suite with coverage instrumentation, streaming progress live as it works. If the coverage tooling isn't installed, Omniscio offers a one-click install first.
Acting on findings
- Ignore noise — click the X on any flagged finding (a large file, a TODO, a detected secret) to hide it from future reports. Restore it later with the "show ignored" toggle.
- Fix it in a session — click Fix in Session on a Health finding to spawn a new Claude session pre-loaded with a prompt asking it to address that specific problem.
Codebase Stats flags likely secrets (API keys, tokens, private keys) it finds in your files so you can rotate or remove them. It's a heuristic scan to help you spot mistakes — not a guarantee that the codebase is secret-free.
Question Widget
When the agent asks you a question, Omniscio renders the choices as one-click answer pills.
Agents often ask yes/no or multiple-choice questions ("should I delete the file?", "use option A, B, or C?"). With Question Widget on, Omniscio detects those questions in the reply, renders the choices as clickable pills right below the message, and submits your answer as a one-click response. No typing the same "yes" or "option B" reply over and over.
What It Looks Like
When the agent's message contains a question with explicit choices, Omniscio adds a small row of answer pills at the bottom of the message:
- One pill per detected choice, labelled with the choice text.
- Click any pill to send that choice as your next message — the agent gets exactly the literal text it offered.
- The pills sit at a stable, predictable position so your eye doesn't have to hunt for them between messages.
- On a tall question that scrolls off-screen, the widget's top control bar — the part with its buttons — stays pinned to the top of the chat as you scroll past it, so you can always navigate or dismiss it without scrolling back up.
- On a phone that control bar stays on one line by carrying fewer buttons: the close (×) and Ask the Council move into a … menu at the end of the bar, so tap the three dots to close a question widget.
- On a phone, moving to the next question (the Next button, or by picking an answer) scrolls the new question's heading back up to the top — so after reading a long list of options you don't have to scroll back up to see what's being asked. It only nudges when you'd actually scrolled down, and never when you first open a session.
- On a phone, tapping Custom answer opens a typing box at the bottom of the screen with the rest of the screen dimmed. Tap the dimmed area to close it and go back to the question. If you've already typed something, that tap just hides the keyboard and keeps your text, so you never lose an answer by accident.
If you'd rather type a custom answer, ignore the pills and use the composer as normal — nothing locks you into the offered choices.
After You Answer
Once your answer is sent, the question closes and stays closed. Scroll away and back, leave the session and return, even restart Omniscio — it still reads as answered, so you never get handed the same question twice. Omniscio records only the fact that you answered, never the answer text itself.
A question closes the moment you answer it — a pill, something you type, or a Quick Reply all count, and the pills disappear without waiting for the agent to reply. What doesn't count is Omniscio talking to itself: a background nudge or an automatic resume never closes a question, so one you still mean to come back to isn't quietly taken away from you. The question text stays in the conversation either way, so you can always read what was asked.
If the agent's message was split into cards, answering works the same way across the whole set: nothing is sent until you finish, and once it goes out every card closes together and can't be sent a second time.
What It Detects
Omniscio's question-widget parser recognises questions in several common forms:
- Yes/No — "Should I proceed?", "Want me to retry?"
- A/B/C lists — "Option A: ... Option B: ... Option C: ..."
- Numbered lists — "1. Foo / 2. Bar / 3. Baz".
- Inline dashes / bullets — "Would you like - foo - bar - baz?"
- Embedded inline choices — "Should I use jpg, png, or webp?"
If the parser can't confidently pick out choices, the message just renders as plain text — nothing breaks, the widget just isn't drawn. Omniscio errs on the side of not showing pills for ambiguous questions rather than offering wrong ones.
Inside Plain Speak
When Plain Speak is on, the Question Widget pills show up in the rewritten message's Questions section — same one-click behaviour, just attached to the Plain Speak structure instead of inline.
Question Widget is always on — there's no setting to disable it. If the parser fails to detect a question, the message just renders without pills. There's no degraded experience to opt out of.
Nighty Tidy
Automated codebase audits that keep your repos healthy — run on demand or on a nightly schedule, with structured findings and optional auto-fix.
Nighty Tidy is the codebase-audit panel. Point it at a repository and it runs deep, focused audits — bug hunts, security sweeps, race-condition checks, test-coverage analysis, and ~50 more — each as a normal Claude session that writes a structured report. It works the same on desktop and on your phone, and every screen updates live as audits progress.
The Five Screens
- Run — pick a repo, choose Read-only (report only) or Read-write (auto-fix findings at a severity you pick), tick the audits you want, optionally add custom instructions to scope the whole sweep to one feature, optionally pick a different engine and model (leave it on "Default" to use your usual one, or choose a cheaper model to save on the run), and Start Run. The audit queue below shows real progress — each row flips to Running and then Completed or Failed as it actually happens, and a Done — new run button appears only once everything has genuinely finished.
- Automate — the Automate screen is a list of your automations grouped under each repo, each with its own on/off switch. Click “+ New automation” to open a step-by-step wizard that walks you through it one page at a time: pick the repo, choose the audits, add optional custom instructions, pick a model, set the schedule, choose the auto-fix level (off by default), and give it a name. A repo can hold as many named automations as you like (say, one sweeping Feature A nightly and another sweeping Feature B on weekends), each with its own audits, cadence, auto-fix mode, instructions, and (optionally) its own engine and model. To tweak an existing one, click its row and change any setting in place — every change saves the moment you make it, and the list updates live even when an AI operator session edits an automation for you.
- History — every run with its status and finding counts. An audit that couldn't even start (say, its recipe was removed) shows up here as a failed run with a plain-English reason — a broken automation is never silent. Delete rows individually or clear the list; saved reports on disk are never touched.
- Findings — a structured view of one run's findings: severity summary, filters, grouping, expandable cards. A clean pass says so ("Clean pass"), a still-running audit says so, and a failed run points you back at History for the reason.
- Custom audits — write your own audit type. Give it a name, a category, and a plain-language description of what to look for; it then appears in the Run and Automate pickers next to the built-in audits (badged Custom) and runs exactly like them. You only describe what to hunt for — the audit engine supplies the multi-phase sweep and the findings list, so a good custom audit can be a few sentences. Custom audits are available for every repo; edit or delete your own any time (the built-ins stay read-only).
Turning It On
- Settings → Plugins → enable Nighty Tidy. A moon-icon entry appears in the sidebar’s Plugins section, which is open by default. You can also click Open on its card in Settings → Plugins to go straight there.
- Open it, pick a repository on the Run screen, tick a couple of audits, and hit Start Run.
- When an audit finishes it stays in your Needs-You inbox so you can read the result — the queue keeps moving regardless.
Every run gets its own name — the audit plus the date and time — so repeated runs of the same audit are easy to tell apart in your inbox and in History. Want to name a run yourself? Type an optional short Label on the Run screen (e.g. “checkout-flow”), or set one per automation; leave it blank and an automation falls back to its own name.
Audits That Stay Sharp
The audit instructions ship with the app and improve with every release. Nighty Tidy keeps your installed copies current automatically: any audit spec you haven't touched is refreshed when a newer version ships, while a spec you've customized is never overwritten — it's kept exactly as you left it and shown with an Edited badge in the audit picker. Two audits (CLI Coverage and Universal Feature Compliance) are written for Omniscio's own infrastructure and carry an Omniscio-specific badge — they run anywhere, but their results are Omniscio-flavored.
Scheduling & Spend Safety
Each automation advances through its list before repeating any audit, at the pace you choose — how many run at once (one at a time, a few, or as many as allowed) and an optional per-day limit, either a simple cap or an even drip spread across the day — all bounded by a global cap on how many audits run at once across all automations. Turning an automation off also stops the audits it had already queued. Every audit runs unattended by design: it never parks waiting for a question, and if its audit type is already up to date at the current commit it finishes immediately instead of re-running. If the app restarts mid-audit, a finished audit's result is rescued from its report on disk at next launch instead of being marked failed.
By default the nightly rotation starts at the first audit in the app's list and advances from there. To begin it at a specific audit instead — or to move a running automation's queue — pick one under Start from in the automation editor's Advanced section (it appears once you've selected two or more audits). Changing it repositions the rotation to that audit and continues from there, cycling through the rest — so if an automation is up to audit 13, you can move it to 25 and it carries on from 25. The picker shows which audit is up next, so you can see where the rotation is before you move it. (Changing an unrelated setting never moves the queue, and moving it never resets your run or spend limits.)
To bound how long an automation runs, set Stop after N runs in the automation editor (off by default = runs indefinitely). One “run” is a full pass through the automation's audits, so “stop after 2 runs” means every selected audit runs twice, then the automation stops and reads Complete — it stays in the list (raising or clearing the cap re-arms it). Your manual Run now never counts toward it.
More Than One Automation per Repo
A repo can hold several automations — for example one per feature or area. Create each with the “+ New automation” button on the Automate screen and pick the repo on the wizard's first page. They appear as separate rows grouped under that repo, each with its own audits, schedule, and on/off switch. Scope each to just the area it covers by choosing its audits (and optional instructions) in the wizard. Remove one you no longer want with “Delete this automation” (a confirm, plus Undo), and its on/off switch pauses just that one automation without deleting it. Give each one a name — every session it spawns opens with “Run the Test Coverage audit. (automation: Nightly billing audit)”, so you can tell at a glance which automation a run came from, along with any custom instructions you set for it. A manual Run now and an automation you haven’t named yet show just the plain line.
Operator Sessions (desktop)
The panel sidebar has an Operator sessions list: spawn an AI operator and tell it things like "set up a nightly security sweep for my shop repo." It drives Nighty Tidy through a gated local API — reads and automation edits apply directly, but anything that spends (running an audit now) always waits for your approval in the inbox. Retried requests are recognized, so a flaky connection can't double-create an automation.
Start every repo with a read-only nightly automation of the audits you care about, skim History over coffee, and only enable auto-fix once you trust the findings. Auto-fix work happens in a separate, visible session on a branch — nothing lands silently.
System Instructions
Quick access to your project's CLAUDE.md and MEMORY.md (plus the global ones) — the first sub-group inside the Dashboard's Auto Context sidebar panel.
This used to be a standalone Claude Files sidebar section. It's now the first sub-group inside the unified Auto Context (N) panel — same rows, same one-click peek — alongside the Always-inject and On-demand context sub-groups (see Auto Context). "Claude Files" survives only as a historical synonym; the in-app label everywhere is now System Instructions.
Claude Code reads its instructions from CLAUDE.md in the project root and from your global ~/.claude/CLAUDE.md. It builds long-term memory from MEMORY.md files. Editing those four files is one of the most direct ways to change how AI sessions behave, so the System Instructions sub-group gives you one-click access to each.
The Four Rows
The sub-group shows up to four rows, always in the same order:
- project CLAUDE.md — the per-project rules file at the root of the currently active project.
- project MEMORY.md — the per-project navigation index (under
.claude/memory/). - global CLAUDE.md — your user-wide rules (
~/.claude/CLAUDE.md) that apply to every project. - global MEMORY.md — the user-wide auto-memory loaded every conversation.
Each row shows two lines: the file's identity (e.g. project CLAUDE.md) on top, and <relative time> · <token estimate> below (e.g. 2h ago · 3.2k tokens). The token count is a size-based estimate (bytes / 4), not a real tokenizer count — good enough to tell you "this file is small" vs "this is eating my context window," off by maybe 10–20%. Rows for files that don't exist yet render at 40% opacity with no click handler.
Click any existing row to open it in Omniscio's file peek overlay (the same right-side slide-in that opens when you click a file path elsewhere). It's read-by-default; the overlay has its own Edit-in-Monaco button if you want to change the file.
Why It's There
Without the System Instructions sub-group, getting to your global CLAUDE.md takes opening File Explorer, navigating to ~/.claude/, and double-clicking the file. The sub-group collapses that into a one-click row, always present, always synced to the currently active project's file.
Synced Mirrors
If you've enabled Agent Instructions Sync, an additional Synced mirrors subheader appears below the four canonical rows with one row per mirror file (AGENTS.md, GEMINI.md, .cursorrules, etc.). Each mirror row has a status dot showing whether it's in sync, edited externally, or a manual file Omniscio won't touch.
Protected from Bulk Operations
System Instructions rows are deliberately unselectable when the Auto Context panel is in multi-select mode. The other two sub-groups gain checkboxes; System Instructions stays plain. A stray Ctrl+A + Delete would otherwise wipe CLAUDE.md / MEMORY.md in one confirm dialog — a high-cost destructive accident the design explicitly avoids. To edit or remove a System Instructions file, open the row's peek overlay and use the overlay's own controls.
The sub-group is always visible inside Auto Context — there's no setting to disable it. If you don't use CLAUDE.md / MEMORY.md, the rows will just sit dimmed and stay out of your way.
Auto Context
The Dashboard sidebar panel that surfaces everything this project automatically tells the agent — System Instructions, Always-inject docs, and On-demand docs — under one umbrella with one filter row.
This used to be two separate sidebar sections — Claude Files and Project Docs. They've been folded into one Auto Context (N) panel with three sub-groups: System Instructions, Always-inject, and On-demand context. The underlying .claude/docs/ mechanism (always-inject at top, RAG in .claude/docs/rag/) is unchanged — only the UI grouping changed.
The Three Sub-Groups
Expand Auto Context (N) in the right-hand Dashboard sidebar (the (N) is the live count of all rows across the panel). You'll see up to three sub-groups, in this order:
- System Instructions — the four
CLAUDE.md/MEMORY.mdrows (project + global). One-click peek; never participates in bulk-select. See System Instructions for the full breakdown. - Always-inject — files at the top of
.claude/docs/. Auto-attached to every new session, gated by a per-project size cap. Bulk-selectable. - On-demand context — files in
.claude/docs/rag/. Not sent automatically; the agent pulls them with itsReadtool when relevant. No size cap. Bulk-selectable.
Above the sub-groups sits a search input so you can narrow the visible rows across all sub-groups at once by filename. The (N) count in the panel header updates as you filter.
If you have a project where the agent needs the same reference material every single time — a database schema, an API contract, a style guide, a screenshot of the design system — you can drop those files into .claude/docs/ in your project root and Omniscio will automatically include them in every new session.
Two Delivery Layers
Omniscio delivers the docs in two different ways depending on the file type:
- Text files (Markdown, plain text, source code —
.md,.txt,.json,.csv, etc.) are inlined directly into the first message of every new session. The agent sees them as part of that opening prompt — invisibly, so your chat bubble still shows only what you typed. - Binary files (PNGs, JPEGs, PDFs, screenshots) are attached to the very first message of every new session. The agent sees them as visual context from the start; subsequent turns can refer back to them but they're not re-attached.
Two Buckets — Always vs RAG
Project Docs has two buckets that decide when the agent sees a file, separate from how it's delivered:
- Always-inject (default) — files at the top level of
.claude/docs/. Every new session gets them attached or appended automatically. Counts toward a per-project size cap (so you don't accidentally burn the whole context window on docs before the conversation even starts). Use this for the things every conversation actually needs. - RAG (on-demand) — files in the
.claude/docs/rag/sub-folder. These are not sent automatically. Instead, Omniscio drops a short table-of-contents into the session's rules so the agent knows what's available, and the agent fetches any file it decides is relevant using itsReadtool. No per-project size cap — you can park a multi-megabyte schema dump or a full archive in there without paying for it in every session's context budget.
Rule of thumb: if every conversation in this project needs the file, put it at the top of .claude/docs/. If only some conversations need it, put it in .claude/docs/rag/ and let the agent decide.
How to Use It
- In your project root, create a folder called
.claude/docs/. For on-demand reference material, also create.claude/docs/rag/inside it. - Drop any reference files you want every session to have at the top of
.claude/docs/. Drop bigger / occasional-use files in therag/sub-folder. - Launch a new session in that project — on any engine (Claude, Codex, Gemini, Cursor, Pi, …). Omniscio handles the rest — always-inject text files get inlined into the first message, always-inject binaries get attached to the first message, and RAG files show up in a table-of-contents the agent can pull from on demand.
There's nothing to configure in Settings; the feature is "files appear in the folder, they get used." Delete a file from .claude/docs/ and Omniscio stops sending it to new sessions.
When you add docs through the in-app modal (Dashboard → Project Docs → + Add), there's a Where: toggle — Always-inject or RAG (on-demand). The modal drops the file into the right sub-folder for you.
Drag and drop straight onto the panel. You don't have to open the modal at all — drag one or more files from Explorer / Finder anywhere onto the Auto Context sidebar section (collapsed or expanded) and Omniscio uploads them into the always-inject bucket, auto-expanding the section so you see them land. The section shows a dashed accent border while you drag over it. Up to 20 files per drop (extras are skipped with a warning toast); use the + Add modal when you want the RAG bucket or the Paste / Google Drive / ContextDock sources.
The modal's From Google Drive tab accepts any Google Docs, Slides, or Sheets URL — Omniscio fetches the file through the Drive API and writes it into .claude/docs/ (Docs as markdown, Slides as PDF, Sheets as .xlsx with multi-sheet preserved). Requires being signed into Google.
Convert a PDF to Markdown. Right-click a PDF in the list and pick Convert to Markdown to extract its text on-device (free, private — no upload, no AI tokens). A dialog asks whether to Keep both (leave the PDF, add the new .md) or Replace PDF (move the original to the trash after a successful conversion). The new .md is plain text, so every engine reads it as always-inject context — not just the ones that can open a PDF directly. It's text-only: a scanned / image-only PDF yields little (no OCR), and on the Replace path an empty extraction never deletes the original, so you can't lose the only copy.
Inject a Doc as an Instruction
The buckets above deliver a doc as reference material — context the agent may consult. Sometimes you want a doc to be an instruction the agent must follow instead — a house style, an "always do X" rule, a workflow. Right-click a markdown doc → Inject as instruction (toggle it back off with Stop injecting as instruction). Flagged docs show a small Instruction badge on their row.
A flagged doc is pulled out of the skimmable "background docs" block and written instead into the project's .claude/amc-instructions.md under a Project Instructions heading — the same file Claude auto-loads like your CLAUDE.md. So the agent treats it as a standing instruction on every turn, not one-time background context. It's the per-project version of Settings → Agent Instructions → Custom Instructions (which applies globally).
A few things worth knowing: a flagged doc no longer counts toward the always-inject size cap (so it can't push other docs out); the change takes effect on the next session, not ones already running; renaming a flagged doc keeps the flag, and deleting it cleans up automatically. Only a top-level text / markdown doc is eligible — a RAG doc or a binary can't be an instruction.
Selection Mode — Bulk Copy & Bulk Delete
The Auto Context sidebar panel has a small Select square button next to the + add button (desktop only). Click it to enter selection mode — rows gain a checkbox slot in place of the drag handle, and clicks toggle a row's selection instead of opening the file. Shift+click a second row to range-select everything between, and Ctrl/Cmd+click a row (even outside selection mode) auto-enters with that row pre-selected. The Always-inject and On-demand sub-groups participate — the System Instructions sub-group is deliberately exempt (its rows show no checkboxes), so a stray Ctrl+A won't sweep up CLAUDE.md / MEMORY.md.
Once at least one row is selected, a footer slides in at the bottom of the panel with three buttons:
- Copy — concatenates every selected doc's full contents into one clipboard payload, separated by
--- filename ---headers. Binary files (images, PDFs) emit a placeholder line so you still see them in the output. Capped at 5 MB total so you can't accidentally dump a gigabyte of image data into your clipboard. - Delete — opens one confirmation listing the selected filenames; on Confirm, Omniscio loops through each file with a single summary toast at the end.
- × Cancel — exits selection mode without touching anything.
The single-row right-click menu adapts too: with 2+ rows selected and the menu opened on one of them, it shows Copy N docs and Delete N docs instead of the per-doc entries. Right-clicking an unselected row still shows the single-doc menu — and that menu now includes a Copy contents item even outside selection mode, for the one-doc-to-clipboard shortcut.
Keyboard shortcuts work too, scoped to the panel itself so they don't fight your text editing elsewhere: Esc exits selection mode, Ctrl+A selects every doc in the panel, Ctrl+C triggers bulk copy, and Delete / Backspace opens the bulk-delete confirmation.
What's a Good Fit
Things worth dropping into the always-inject layer (top of .claude/docs/):
- A short summary of your project's architecture (often a copy of an
ARCHITECTURE.mdalready in your repo). - Your API contract or database schema (if small enough to fit in the cap).
- A list of conventions (commit message format, file naming, code style).
- Screenshots of your design system (use binary — they'll be attached to the first message).
- A PDF of the spec or product requirements.
Things worth dropping into the RAG bucket (.claude/docs/rag/):
- Large schema dumps, full API specs, or archived knowledge bases the agent only occasionally needs to consult.
- Multi-megabyte PDFs or reference manuals where loading every page into every session would be wasteful.
- Per-topic deep-dives that only matter when the conversation touches that topic.
Things not worth dropping in either bucket:
- Anything secret — everything in
.claude/docs/can be read by the agent. - Anything that changes frequently — you'd be re-injecting stale content. For dynamic context, use Context Dock instead.
- For the always-inject layer specifically, very large files — they consume context window on every session. Move those to the RAG sub-folder instead.
Docs are injected once, into the first message of each new session — Omniscio does not modify your CLAUDE.md and does not re-inject on later turns. If you add a new doc while a session is already running, that session won't see it; spawn a new session (or let the next scheduled run start) to pick up freshly-added docs.
Bug Report Intake
Pull bug reports into a tracked Claude session three ways: testers email [BUG: slug], Omniscio polls your Sentry org for new unresolved issues, or Omniscio polls a GitHub repo's open issues.
If you're shipping a product, end-users find bugs: in emails, and in your error tracker. Bug Report Intake is the one place Omniscio handles both. Testers can email [BUG: my-app] to your intake address and the report auto-spawns a Claude session in the matching project; in parallel, Omniscio polls your Sentry organization every five minutes and spawns a session per new unresolved issue. Everything lives in a single Bug Intake sidebar entry (Sources / Review / Audit tabs).
The Bug Intake Sidebar
A new Bug Intake entry lives in your sidebar's Omniscio group (Bug icon). It has four tabs:
- Sources — configure which projects are wired to which Sentry orgs or GitHub repos. One row per (project, source). A Sentry row shows the org / project pair and its credential; a GitHub row shows the owner / repo (and optional label filter) and needs no credential. Both show the last poll timestamp and toggles for Enabled and Auto-spawn.
- Review — issues the triage gate is holding rather than auto-spawning (see Sentry Triage Gate below), plus first-connect-cap deferrals. Each row shows the real error title, level, and event count, with Spawn, Ignore this, Ignore class, and Dismiss buttons. Reports the safety screen held also wait here (see The Safety Screen below).
- Ignored — your active ignore rules (one per "Ignore this" / "Ignore class" you've clicked), each with an Un-ignore button to start spawning again.
- Audit — the last 500 decisions across every intake source (email, Sentry, and GitHub), with reason text — now including the new
ignored/consolidated/triageoutcomes.
Held issues also appear as read-only cards in the unified Inbox (under a Bug Intake header with a bug icon), so you can triage without opening this panel. Each card shows a severity dot and the real error title; tap a card to open a detail popup where you can Spawn, Ignore, or Dismiss it — the list itself has no buttons, so a stray tap can't spawn a session. An issue captured without a title shows “Sentry issue #<id>” until the next poll fills in the real title.
A Pause all polling toggle at the top of the view suspends every Sentry source instantly without losing the per-source enabled state. Beside it sit the Dedup pre-check toggle (on by default, the 24-hour duplicate detection described under Duplicate Detection below) and the triage gate controls (Triage gate, Consolidate, Spawn bar, Auto-promote at) covered next.
When you tap the inbox's “+N more” overflow card (the held-issue roll-up), the Bug Intake view skips straight to the Review list and tucks those settings away — so you just see the items. A small ⚙ Settings button in the header brings them back if you need them. (Tapping an individual held-issue card opens its detail popup instead, as above.) Opening Bug Intake from the sidebar shows the full settings view as usual.
The Safety Screen
Before Omniscio starts an agent on a bug report sent from inside the app, handed over by a teammate, opened on GitHub or raised by Sentry, a very cheap AI reads everything that agent would receive — the text, screenshots and text attachments — and checks it for prompt injection (text trying to give the agent orders) and dangerous requests. Reporting a serious or security-related bug is fine; the screen only asks whether the report tries to instruct the agent. Emailed reports already pass the email screen, so they are not checked twice. It is always on while Bug Intake is on.
A report it flags, or cannot check — the AI provider is down, the day’s $2 screening budget is spent, the report is too long to read in one pass, or an attachment is a kind it can’t read — is held instead of started. It shows in Review and as its own inbox card with a Held by safety screen badge and the reason. Nothing starts a held report automatically: only you can start it with Spawn anyway, which uses exactly the saved copy you were shown (or opens the investigation already running on the same Sentry crash), or remove it with Dismiss, which asks first because the report’s saved copy is deleted.
Email Gets The Same Protection
The same safety screen reads every email addressed to your agent before any agent acts on it — whether it arrives at your agent’s own email address, your AgentMail inbox, or the Gmail inbox your bug reports arrive in. A flagged or unreadable email is always held, the same way a bug report is: never bounced back to the sender, never deleted.
Held emails show up on one inbox card that counts them without ever naming who sent them; tap Review held emails to open the list and read each one in full, with Approve and Dismiss buttons. Approve starts or continues the session exactly as the email arrived, attachments included. Dismiss asks you to confirm, then lets the sender know their message couldn’t be processed. Only you, in the app, can approve or dismiss a held email — an agent can ask you to release one, but it can never decide that on its own.
Sentry Intake
Once you wire up a Sentry source, Omniscio polls its unresolved-issue feed every 5 minutes (with a small jitter so app startup doesn't thunder-herd Sentry's API), and for each newly-seen issue it can spawn a Claude session in the linked project. The session's first operator message renders the flattened Sentry event — title, severity, culprit, first/last seen, count, and a permalink — so the agent sees the same context you'd see in Sentry's UI.
Adding a Sentry Source
- Open the Bug Intake sidebar entry → Sources tab → Add source.
- Pick a project from the dropdown (only your real projects; virtual ones like Settings / Skills are excluded).
- Set the Source type to Sentry, or pick GitHub for a repo-issues source (see GitHub Intake below).
- Enter your Org slug and Project slug — both must match Sentry's
[a-z0-9_-]{1,64}shape. - Pick a Sentry credential from the dropdown. Manage credentials at Settings → Automations → Credentials (kind sentry, holds the Sentry auth token; OS-keyring encrypted, never crosses IPC).
- Toggle Auto-spawn if you want polled matches to spawn sessions immediately. Leave it off to land everything in Review for manual approval first.
- Click Test connection — Omniscio does a one-shot GET against the Sentry endpoint and reports OK or the exact error verbatim. Nothing is written to the database; this is purely a probe.
- Click Save. The first poll fires within a few seconds.
What Happens on a Poll
- First connect (a brand-new source): up to 5 most-recent unresolved issues spawn sessions; the rest land in Review tagged "deferred by first-connect cap".
- Subsequent polls: only issues whose first-seen timestamp is after the last successful poll are considered. Each candidate is deduped by Sentry issue ID, so a repeat poll can never spawn the same issue twice.
- If a source stops working — say its Sentry token expires — Omniscio raises a notice in your Inbox (desktop and mobile) after about an hour of continuous failure, naming the problem and pointing you to Bug Intake → Sources to fix it. The notice clears itself once the source polls successfully again, so a broken credential can't quietly stop new sessions for days. The Sources tab also marks a failing source red.
Sentry Triage Gate
Sentry splits one underlying bug into many distinct issue IDs — a native crash surfaces from four stack frames, a JavaScript error embeds variable data in its title — so spawning a session for every new ID gave you a pile of near-duplicate investigations. The triage gate sits between "Omniscio noticed a new Sentry issue" and "Omniscio spawns a session," and decides whether each issue is worth a session at all. For each new issue it runs these checks in order and stops at the first match:
- Ignore list — if you've ignored this exact issue, or its class (the kind of error), it's skipped.
- Consolidate — if a session investigating this same error class is already open, the new issue is held instead of spawning a duplicate. This alone kills the "four identical sessions at once" problem.
- Severity bar — issues clearly above your bar (default error) auto-spawn; issues clearly below it are held for review. A regression, or an issue that has already fired 50+ times, spawns even at the bar.
- AI second-look — for the gray-zone issues right at the bar, a cheap, daily-$-capped AI call reads the error and recommends spawn / hold / ignore. It only runs on borderline issues, is deduplicated to one call per error class per poll, requires an API-key account, and always falls back to holding the issue if anything goes wrong (it never spawns on its own uncertainty).
Anything the gate doesn't spawn lands in the Review tab, where you click Spawn, Ignore this (mute this exact issue), Ignore class (mute this kind of error forever), or Dismiss (a one-off, not a permanent rule).
Auto-promote. A held issue isn't forgotten — each poll re-checks it against fresh Sentry data, and if its event count crosses your Auto-promote at threshold (default 100) or its level escalates above the bar, it's promoted to a full session automatically. Set the threshold to 0 to turn auto-promote off.
The four header controls (Triage gate, Consolidate, Spawn bar, Auto-promote at), plus the AI on/off and daily-cap, all take effect immediately — no restart. Turn the Triage gate master switch off and every issue auto-spawns exactly as it did before this feature.
GitHub Intake
Point a source at one GitHub repository and Omniscio polls its open issues every 5 minutes (the same scheduler as Sentry), spawning a Claude session per new issue in the linked project. The session's first operator message renders the issue (number, title, reporter, labels, link, and body) inside an "untrusted external data" fence, so the agent treats a public issue as data to investigate, not instructions to follow.
Two things make GitHub simpler than Sentry:
- No token to manage. GitHub intake uses the GitHub login Omniscio already has (the
ghCLI), so a GitHub source needs no stored credential. If you use any other GitHub feature in Omniscio, you are already signed in. - Straight to investigation. Issues are human-filed, so there is no triage gate. Every new open issue that matches your filter spawns a session, bounded by a per-source daily cap and the same 24-hour duplicate detection the other sources use.
Adding a GitHub Source
- Open the Bug Intake sidebar entry → Sources tab → Add source.
- Set the Source type to GitHub.
- Pick a project from the dropdown (your real projects only).
- Enter the Owner and Repository (for example
jlstradingcoandagent-orchestrator). - Optionally set a Label filter to watch only issues carrying one label (for example
bug). Leave it blank to watch every new open issue. - Click Test connection. Omniscio checks the repository is reachable under your current GitHub login. Nothing is written to the database.
- Toggle Auto-spawn and click Save. The first poll fires within a few seconds; on first connect the 5 most-recent open issues spawn and the rest are skipped, then only brand-new issues spawn after that.
Email Intake (the [BUG: slug] Convention)
If you've connected Gmail or AgentMail, you can enable per-hub email intake from the hub's gear menu (Edit Hub → Auto-triage incoming bug reports). Testers then send their bug reports with a subject line of the form:
[BUG: my-app] Login crashes on save[FR: my-app] Add a dark-mode toggle to settings
Omniscio matches the slug to a project that has bug intake enabled and spawns a new Claude Code session in that project, pre-seeded with the email body inside an "untrusted external data" fence. A subsequent reply on the same email thread (subject Re: [BUG: my-app] ...) does NOT spawn a second session — it appends to the existing one, so the conversation stays in one place.
When the investigation finishes, Omniscio emails the agent's findings back to the tester on the same thread. One note for Gmail: a reply on a Gmail bug thread is not yet threaded into the running session, so a follow-up only starts a fresh report if it is sent as a new email with a fresh [BUG: slug] subject.
Attachments come through too. Images become inline vision blocks, PDFs become document blocks and save to the session workdir, text docs save to the workdir with their path injected into the prompt, and Office files are auto-extracted to Markdown. Unmatched emails just stay in your normal inbox, tagged "Unrouted bug report".
Routing by sender: Email rules
By default the slug alone picks the project. If you want a specific sender to go to a specific repo, open Bug Intake in the sidebar → Sources tab → the Email rules section, and add a rule: From address + slug → project. When an email from that address arrives with that slug in the subject, it spawns in the rule's project — overriding the default slug match. A sender you've written a rule for is also let in automatically, so you don't have to add them to an allow-list separately.
The [BUG: slug] / [FR: slug] subject is still required — a rule decides where a tagged email goes and who is allowed, not whether a plain email becomes a bug report. Every inbound is still spam-screened first; email rules are a routing convenience, not a security check (a "From" address can be forged).
What You See in a Spawned Session
A bug-intake session looks like any other Claude session, with two differences: the session is named with a bracketed source prefix — [BUG] (or [FR] for a feature request) followed by the slug and subject for an emailed report, and [SENTRY] followed by the issue title for a Sentry issue — and the first operator chat row carries the bug payload (email envelope + body, or flattened Sentry event). The agent is instructed up-front to investigate read-only and report findings before changing any code — you stay in the loop.
Add Your Own Instructions to Every Investigation
You can tack your own guidance onto the prompt every bug report hands to Claude — no code required. There are two boxes, and they stack:
- Global — one box at the top of the Bug Intake sidebar view. It applies to every report, from every source (email, Sentry, in-app feedback), across all projects.
- Per-hub — a box in each hub's Edit Hub dialog. It applies only to that hub's reports, and stacks on top of the global text.
For example, set the global box to “Always reproduce before proposing a fix” and a specific project's box to “Check the billing module first.” Both get appended to the investigation instructions, above the reporter's (untrusted) words — so your guidance is treated as trusted instruction while the report itself stays safely fenced. Leave a box blank and nothing changes.
Duplicate Detection — One Investigation per Issue
When two people report the same bug within a day — or the same Sentry error keeps firing — you don't want two separate investigations open. With Dedup pre-check on (the default), Omniscio collapses the repeat into a single session. It works in two steps, and a human is never cut out of the loop:
- A hint, when a new report arrives. Omniscio compares the incoming report against the last 24 hours of reports from the same source — matching the sender and subject (email) or the error's location and title (Sentry), never the message body. If something looks similar, the new session still spawns, but its agent is told up front: “this may be a duplicate of session X — compare them.” Nothing is blocked or archived at this stage.
- A decision, made by the agent. The spawned agent reads both reports in full and decides. If it confirms a duplicate, it posts a “Same issue reported again” note on the original session (so you can see the bug resurfaced) and then archives the duplicate — in that order, so a report is never silently lost. If it turns out to be a genuinely new bug, both sessions stay.
Turn Dedup pre-check off and every report gets its own investigation again. Exact repeats are always collapsed regardless of this toggle — a reply on the same email thread appends to the existing session, and the identical Sentry issue ID never spawns twice.
Safety
- Untrusted-data framing: the bug payload is wrapped in clear "untrusted external data" markers in the prompt, and the agent is told not to act on instructions hidden inside it.
- Idempotency: each email message ID and each Sentry issue ID is recorded exactly once, so app restarts and overlapping polls never double-spawn.
- Orphan cleanup: if the CLI fails to launch a spawned session, the session row is soft-deleted so no ghost row remains in your sidebar.
- 90-day retention: Omniscio purges bug-intake decision rows older than 90 days every six hours, so the Audit tab stays scannable.
- Daily cap (email): each project takes at most 50 routed emails per day by default; back-to-back emails for the same slug get a 30-second cooldown.
- First-connect cap of 5 (Sentry): a misconfigured Sentry org won't spawn hundreds of sessions on its first poll.
If you're maintaining a product and Sentry is already your error tracker, wire up Sentry intake first — you get a session per real production error with zero work from your users. Add the email [BUG: slug] convention on top for direct user reports that don't go through Sentry.
Codex Provider
Run sessions backed by OpenAI's Codex CLI alongside your Claude Code sessions, in the same Omniscio UI.
Omniscio supports running sessions against OpenAI's Codex CLI, not just Claude Code. With Codex installed and configured, you can spawn a Codex-backed session and get the same Omniscio UI — sidebars, attachments, snippet picker, Plain Speak, Inbox Pilot — but with Codex driving the agent.
The Codex Icon
Codex sessions are marked with the Codex icon (the OpenAI mark) next to the session title, so you can spot them at a glance among your Claude Code sessions. Every session shows its engine mark next to the title now, Claude Code included (in its brand orange); only engines with no logo (OpenClaw, orchestrator) show nothing. Each provider's mark renders in its brand color (Gemini's gradient bloom, Cursor's indigo, and so on), with Codex's OpenAI mark and Kimi's rendered monochrome so they stay visible in both themes.
Two Readiness Gates
For Codex to be available, two things need to be true:
- Codex CLI installed — Omniscio checks for the
codexbinary in your PATH. Install it via OpenAI's official instructions. - Provider enabled — in Settings → Accounts, turn on Show alternative AI providers, then enable Allow Codex sessions in any project.
No API key required. Codex signs in with its own login (Sign in with ChatGPT, or an OpenAI account) and Omniscio uses that session, so your usage runs on your own ChatGPT/OpenAI plan. The easiest way: once the Codex CLI is installed, click the one-click Sign in with ChatGPT button in Settings → Accounts — it opens a real terminal window and runs codex login for you (or run codex login yourself in any terminal). An OpenAI API key in Settings → Accounts is optional: add one only if you'd rather bill a dedicated API key, and it overrides the CLI login.
If either gate is missing, the "Spawn Codex session" option is hidden from the new-session menu and the Settings page shows you which gate is failing. (Auth is not a readiness gate — if you have neither a codex login nor an API key, the session still starts but the first message returns a friendly "run codex login, or add a key" message instead of a cryptic failure.)
How to Spawn a Codex Session
- Make sure both readiness gates are green (Settings → Accounts → Allow Codex sessions in any project shows "Ready").
- Right-click a project and pick New session → Codex.
- Or use the keyboard shortcut for new session and pick Codex from the model menu.
What Works, What Doesn't
Most Omniscio features work across providers:
- Pick the model and how hard it thinks — on a fresh Codex session, before your first message, the launch-config pickers (the same spot where you pick the provider) let you choose which Codex model runs (GPT-5.6 by default, or GPT-5.5 / GPT-5.4) and a reasoning-effort level (Minimal → High). Leave either on its default and Omniscio picks a model your plan can run. Once the first message is sent the choice locks in for that session.
- Works the same — chat UI, attachments, snippet picker, Inbox Pilot, Question Widget, session tagging, archiving, sidebar grouping, and the collapsed tool-activity view: a long multi-step Codex turn folds its step-by-step work (commands it runs, files it edits) into a compact, expandable activity summary and shows just the final answer in full — the same way Claude turns do.
- Full access + approval prompts (like Claude) — Codex runs with full access, so it can use git and create its own worktrees just like a Claude session (previously it was blocked from running git at all). It now also pauses for an Allow / Deny approval before running shell commands or editing files — surfaced in the same "Needs You" prompt Claude uses — instead of running everything unprompted.
- Doesn't apply — Claude-specific features that depend on the Claude CLI's protocol (some MCP integrations, the Anthropic-specific rate-limit forecast). Codex sessions show a small "—" instead of the rate forecast in the account row.
- Different bill — Codex sessions bill against your OpenAI account, not your Anthropic account. The Stats project shows OpenAI spend in a separate row from Anthropic.
The most common reason is to A/B compare: if you're stuck on a hard task with Claude, spawning a parallel Codex session against the same project lets you see how a different model approaches the problem — without leaving Omniscio.
Dedicated Codex Virtual Hub
For a no-friction "open a Codex chat" surface, Omniscio ships a dedicated Codex virtual hub — the structural twin of the built-in Claude hub, but for Codex. It lives on disk at ~/Codex and shows up in the regular hubs list in the sidebar (it is not pinned at the top like the Claude hub), labeled Codex with the OpenAI mark icon. Every session you start inside this virtual hub always uses Codex by definition.
The row is off by default. Flip Settings → Accounts → Show Codex virtual hub to turn it on. Toggling back off hides the row but preserves its sessions — flip it back on later and the same row reappears with all prior sessions still attached.
Sessions inside the dedicated Codex virtual hub skip the global Allow Codex sessions in any project toggle — the binary check still applies, but the user-preference gate is bypassed because the VP exists specifically to spawn Codex. The bypass is narrowly sentinel-scoped: it only applies inside this one virtual hub, not to any other folder.
The Account section has two separate Codex toggles: Allow Codex sessions in any project (lets you spawn Codex from any folder) and Show Codex virtual hub (adds the dedicated sidebar row). They're independent — you can enable either one alone, or both together. The dedicated VP works even with the "any project" toggle off.
Gemini Provider
Run sessions backed by Google's Gemini CLI alongside your Claude and Codex sessions.
Omniscio supports Google's Gemini CLI as a third provider. With Gemini installed and configured, you can spawn a Gemini-backed session and get the same Omniscio UI as Claude or Codex sessions, with Gemini driving the agent.
The Gemini Icon
Gemini sessions are marked with the four-point Gemini bloom logo (in Google's brand gradient) next to the session title. Every session is badged now — Claude Code shows its own brand-colored mark too — so together with the other providers' brand-colored marks you can tell at a glance which model is driving a session.
Per-Turn Spawn Model
Unlike Claude Code (which keeps a long-lived process per session) and Codex (similar), Gemini CLI is spawned fresh for each turn of conversation. That's how the upstream Gemini CLI is designed — it's a one-shot tool, not a persistent agent. Omniscio handles the lifecycle for you: when you send a message, Omniscio spawns a Gemini process with the full conversation history, captures the reply, and tears the process down.
Practical consequences:
- First-turn latency is similar across providers; subsequent-turn latency includes Gemini's process startup cost (typically a few seconds).
- Long sessions re-send the full conversation each turn — the cost scales with conversation length more steeply than for persistent-process providers.
- No "session is paused" state — there's no live process to pause. Gemini sessions are always between turns.
--yolo Mode
Gemini CLI has a --yolo flag that skips the per-action confirmation prompts. Omniscio exposes this as a per-session toggle in the session-options menu. With yolo on, Gemini runs commands and writes files without asking; with it off, every action goes through Omniscio's approval inbox first — same flow as Claude Code's permission-prompt protocol.
How to Spawn a Gemini Session
- Install Gemini CLI per Google's instructions.
- Sign in to the Gemini CLI — easiest via the one-click Sign in with Google button in Settings → Accounts (shown once the Gemini CLI is installed), which opens a real terminal window and runs
geminifor you; its first interactive run completes the Google sign-in (no API key needed). Or rungeminiyourself in any terminal. Prefer a dedicated key instead? Add a Gemini API key in Settings → Accounts — it's optional and overrides the sign-in. - Open Settings → Accounts and turn on Allow Gemini sessions in any project (the Gemini card lives with the other alternative providers there).
- Right-click a project and pick New session → Gemini.
Nothing stops you from running Claude, Codex, and Gemini sessions side-by-side. They share the same Omniscio sidebar, attachments, snippet library, and Inbox Pilot rules. The Stats project tracks spend per-provider so you can see who's costing what.
Dedicated Gemini Virtual Hub
For a no-friction "open a Gemini chat" surface, Omniscio ships a dedicated Gemini virtual hub — the structural twin of the built-in Claude hub, but for Gemini. It lives on disk at ~/Gemini and shows up in the regular hubs list in the sidebar (it is not pinned at the top like the Claude hub), labeled Gemini with the Gemini sparkle icon. Every session you start inside this virtual hub always uses Gemini by definition.
The row is off by default. Flip Settings → Accounts → Show Gemini virtual hub to turn it on. Toggling back off hides the row but preserves its sessions — flip it back on later and the same row reappears with all prior sessions still attached.
Sessions inside the dedicated Gemini virtual hub skip the global Allow Gemini sessions in any project toggle — the binary check still applies, but the user-preference gate is bypassed because the VP exists specifically to spawn Gemini. The bypass is narrowly sentinel-scoped: it only applies inside this one virtual hub, not to any other folder.
The Account section has two separate Gemini toggles: Allow Gemini sessions in any project (lets you spawn Gemini from any folder) and Show Gemini virtual hub (adds the dedicated sidebar row). They're independent — you can enable either one alone, or both together. The dedicated VP works even with the "any project" toggle off.
DeepSeek Provider
Run sessions backed by DeepSeek's Anthropic-compatible API alongside Claude, Codex, Gemini, and Anti-Gravity.
Omniscio supports DeepSeek as an additional session provider. Unlike Codex or Gemini, DeepSeek does not have its own CLI binary — instead, it publishes an Anthropic-compatible API. Omniscio reuses the same claude CLI you already have installed and redirects every HTTP call to DeepSeek's endpoint, by setting two environment variables on the child process. From the agent's perspective, it's talking to Anthropic; you just get DeepSeek's models on the other end.
What You See
A DeepSeek session looks identical to a Claude session — same chat UI, same streaming bubbles, same Ctrl+Enter, same Plan / Auto-Accept / Bypass Permissions modes, same tool-call approval flow. The visible difference is the engine mark — a DeepSeek mark in the session header where a Claude session shows the Claude mark (every started session is badged now).
No yolo mode. Unlike Gemini and Anti-Gravity, DeepSeek sessions go through the standard Claude tool-approval flow — every tool call surfaces an approval prompt unless you've put the session into Auto-Accept or Bypass Permissions, exactly like a Claude session.
DeepSeek is cheaper but noticeably weaker at autonomous coding — give it smaller, more explicit steps. The provider picker shows a one-line heads-up to that effect. Omniscio also defaults a DeepSeek session to its fast, tool-capable deepseek-v4-flash model when you haven’t picked one; deepseek-v4-pro is the high-capability option, and both drive the Claude-Code tool protocol.
How to Enable
Two gates — no binary check, because there's no separate CLI to install:
- Flip the master Show alternative AI providers toggle in Settings → Accounts (off by default). This reveals the alternative-provider section that includes DeepSeek alongside Gemini, Codex, Anti-Gravity, and Kimi.
- Flip Allow DeepSeek sessions in any project on (off by default). This reveals the API key field below — the key can't be entered until DeepSeek is turned on.
- Paste a DeepSeek API key into the now-visible DeepSeek API Key field. Get one from platform.deepseek.com.
How to Spawn a DeepSeek Session
Three ways:
- Per-launch override — on a fresh (zero-message) session, use the provider switcher in the new session's main panel to pick DeepSeek for that one session.
- Per-project default — in the project's three-dot menu → Edit → Default provider, pick DeepSeek so the sidebar "+ New Session" button spawns DeepSeek automatically.
- Programmatically — recipes, automations, and the CLI control HTTP API all accept
provider: 'deepseek'.
How It Works Under the Hood
DeepSeek's API speaks the same protocol as Anthropic's Messages API. So Omniscio spawns the standard claude CLI with two environment variables set on the child:
ANTHROPIC_BASE_URL=https://api.deepseek.com/anthropic— redirects every HTTP request.ANTHROPIC_AUTH_TOKEN=<your DeepSeek key>— supersedes the Claude credential for this child only.
The child process never knows it isn't talking to Anthropic. Streaming, multi-turn (--resume), tool calls, all work because they're handled by the standard claude binary against a vendor-hosted compat endpoint.
The Stats project breaks down DeepSeek spend in its own row, separate from your Anthropic, OpenAI, or Google spend. Per-turn cost is captured from the same stream-json output the claude CLI already emits.
Cost tracking tells you what you already spent. To hear about it before the account hits zero, the DeepSeek balance forecast is on by default — switch it off in Settings → Notifications if you would rather not. Omniscio reads the account balance every 15 minutes, measures how fast it is actually draining, and raises one inbox card with a one-click Recharge when the account is projected to empty inside your warning window (24 hours by default). The card shows you the numbers behind the warning — the balance it just read, the rate it measured, and what has left the account today — so you can judge how close you really are instead of just reacting to it; those figures appear for an account billed in US dollars, while an account billed in another currency gets the run-out time alone rather than a dollar amount that would be wrong. The card appears only when something is genuinely draining the account — a balance that is merely low while nothing is spending raises nothing — and it withdraws itself once you top up. It only ever reads your balance: it never spends or recharges anything for you. Note this watches the account behind your own API key; if you run sessions on Omniscio’s DeepSeek credits instead, that is a different balance it cannot see.
Kimi Provider
Run sessions backed by Moonshot's Kimi Anthropic-compatible API alongside Claude, Codex, Gemini, Anti-Gravity, and DeepSeek.
Omniscio supports Kimi (Moonshot) as an additional session provider. Like DeepSeek, Kimi publishes an Anthropic-compatible API — Omniscio reuses the same claude CLI you already have installed and redirects every HTTP call to Kimi's endpoint via two spawn-time environment variables. From the agent's perspective it's talking to Anthropic; you just get Kimi's models on the other end.
What You See
A Kimi session looks identical to a Claude session — same chat UI, same streaming bubbles, same Ctrl+Enter, same Plan / Auto-Accept / Bypass Permissions modes, same tool-call approval flow. The visible difference is the engine mark — a Kimi mark in the session header where a Claude session shows the Claude mark (every started session is badged now).
No yolo mode. Unlike Gemini and Anti-Gravity, Kimi sessions go through the standard Claude tool-approval flow — every tool call surfaces an approval prompt unless you've put the session into Auto-Accept or Bypass Permissions.
How to Enable
Two gates — no binary check, because there's no separate CLI to install:
- Flip the master Show alternative AI providers toggle in Settings → Accounts (off by default).
- Flip Allow Kimi sessions in any project on (off by default). This reveals the API key field below — the key can't be entered until Kimi is turned on.
- Paste a Kimi API key into the now-visible Kimi API Key field. Get one from platform.moonshot.ai.
How to Spawn a Kimi Session
Three ways — same options as DeepSeek above:
- Per-launch override via the new session's main-panel provider switcher on a fresh session.
- Per-project default via the project's three-dot menu → Edit → Default provider.
- Programmatically — recipes, automations, and the CLI control API accept
provider: 'kimi'.
How It Works Under the Hood
Identical to DeepSeek's mechanism, just a different base URL and credential field:
ANTHROPIC_BASE_URL=https://api.moonshot.ai/anthropicANTHROPIC_AUTH_TOKEN=<your Kimi key>
The standard claude CLI handles streaming, multi-turn (--resume), and tool-call protocol because the wire format is the same.
Stats breaks down Kimi spend in its own row, captured per-turn from the stream-json output. The cost ledger source field tags the row with kimi.
OpenCode Provider
Run sessions through the opencode CLI — a different agent harness that runs Claude (Sonnet) by default, or any hosted model (Kimi, GPT, DeepSeek…) you pick.
Omniscio can spawn sessions backed by the OpenCode CLI (opencode), a separate command-line coding agent you install yourself. Unlike DeepSeek and Kimi (which reuse the claude CLI against a vendor endpoint), OpenCode is its own binary — and it’s model-agnostic: out of the box it runs Claude (Sonnet) on your Anthropic key, but with the new OpenCode model picker you can point it at any hosted model OpenCode supports — Kimi, GPT, DeepSeek, and hundreds more through OpenRouter. Omniscio hands OpenCode the right key for your chosen model automatically. Left on the default it’s simply “Claude, driven by a different harness”: token-by-token streaming, and cost-tracked.
What You See
An OpenCode session looks almost identical to a Claude session in the sidebar and chat — same status dots, same streaming bubbles, same Ctrl+Enter to send. Three differences:
- OpenCode icon in the header. An OpenCode session shows the OpenCode mark (brand orange) next to its title — like every non-default provider (Codex, Gemini, Anti-Gravity, Cursor, DeepSeek, Kimi, Hermes, Pi). Only the internal-only engines (OpenClaw, orchestrator) show no icon now — every other session, Claude included, shows its mark. You can also pick OpenCode from the provider switcher in a fresh session’s main panel, which shows the same mark when it’s selected.
- Token-by-token streaming. OpenCode streams its reply as it generates, so it appears incrementally in the bubble (like Gemini, unlike Anti-Gravity’s all-at-once block mode).
- Tools auto-approve. Once running, OpenCode runs its own tools (file writes, shell commands) without per-call approval prompts — there is no Plan / Auto-Accept toggle. The “Allow OpenCode sessions” gate is what controls whether you can launch it at all; after that, it acts on its own.
- No MCP servers (for now). Unlike a Claude session, an OpenCode session does not get your enabled MCP servers (MemPalace, The Vault, Zapier, Google Workspace, your custom ones). This dropped when OpenCode moved to a shared background server; MCP for OpenCode is a planned follow-up.
How to Enable
Three gates, all in Settings → Accounts — and unlike DeepSeek/Kimi there is a binary check, because OpenCode is a real CLI you install:
- Flip the master Show alternative AI providers toggle on (off by default). This reveals the alternative-provider section — including the OpenCode (CLI provider) panel — alongside Gemini, Codex, Anti-Gravity, DeepSeek, and Kimi. With the master off, OpenCode is hidden from the provider switcher even if everything below is configured.
- Flip Allow OpenCode sessions in any project on (off by default). This reveals the OpenCode CLI binary card and the API key field below — they can't be entered until OpenCode is turned on.
- Install the
opencodeCLI yourself and make sure it’s on yourPATH. The panel’s OpenCode CLI binary card reports Installed (version…) or a “not found on your PATH” hint — Omniscio bundles no installer and no download button for it. - Paste the API key for the model you’ll run into the now-visible field. On the default that’s an Anthropic key in OpenCode API Key (Anthropic) (OpenCode runs Claude through it). If you pick a non-Claude model, paste that provider’s key instead — e.g. an OpenRouter key (there’s a field for it in the same panel) unlocks Kimi, GPT, Claude, and more. Every key is stored encrypted and handed to the CLI as an environment variable, never on the command line.
Pick a model (optional). The OpenCode model dropdown offers curated choices (Claude Sonnet, GPT-4o, Kimi K2, DeepSeek…) plus a Custom… box for any model id OpenCode supports. Leave it on the default and nothing changes — you keep Claude Sonnet on your Anthropic key. OpenRouter is the easy catch-all: one OpenRouter key reaches almost any model. (Local models like Ollama aren’t supported yet — they’ll tell you so rather than fail mysteriously. And Omniscio only ever uses your OpenRouter key, never a shared one, so a session can’t run up someone else’s bill.)
How to Spawn an OpenCode Session
Two ways — and note OpenCode is deliberately not offered as a per-project default:
- Per-launch override — on a fresh (zero-message) session, use the provider switcher in the new session's main panel to pick OpenCode for that one session, then send your first message.
- Programmatically — recipes, automations, and the CLI control API accept
provider: 'opencode'. The same three readiness gates apply on the backend.
There is no “Default provider” radio for OpenCode in the project editor and no dedicated sidebar entry for it — it just isn’t wired into the project-default surface yet, so you launch it explicitly each time.
How It Works Under the Hood
- One shared background server. Omniscio runs a single
opencode servebackground server (on your own machine, loopback-only and password-protected) that all your OpenCode sessions share. It starts the first time you send an OpenCode message and shuts itself down a short while after your last OpenCode session ends — so it costs nothing when you’re not using OpenCode, and if it ever wedges Omniscio restarts it for you and drops a note in your inbox. (This replaced the old “launch OpenCode fresh for every message” approach, which made two OpenCode sessions running at once collide on OpenCode’s shared database and both freeze.) - Native multi-turn, even across restarts. Each session keeps its own OpenCode conversation, and OpenCode restores prior history itself (unlike Anti-Gravity, where Omniscio re-sends the conversation each time). Because the conversation lives in OpenCode’s own database, it survives an Omniscio restart — reopening the session picks up right where it left off.
- Auth by environment. The key for your chosen model is handed to the background server only —
ANTHROPIC_API_KEYfor Claude,OPENROUTER_API_KEYfor OpenRouter models, and so on — never written to the command line, and encrypted at rest on disk. - Stop button. Pressing stop cancels just that session’s current turn (the shared server and your other OpenCode sessions keep running); any text already streamed is kept, and the conversation is preserved so the next turn still continues.
Unlike Gemini and Anti-Gravity (which are Google-billed and emit no cost to Omniscio), OpenCode reports an authoritative dollar figure for every turn. Stats records it in your spend ledger tagged with the source opencode and the actual model you ran, so the dashboard matches your provider console.
Devin (Cognition) Provider
Run sessions on Cognition’s Devin — a remote cloud coding agent driven over Devin’s REST API, on your own Devin API key. No binary to install.
Omniscio can spawn sessions backed by Devin, Cognition’s autonomous cloud coding agent. Unlike the local-CLI providers (Codex, Gemini, OpenCode…), Devin runs entirely on Cognition’s cloud — there is nothing to install. Omniscio drives it over Devin’s public v1 REST API and polls for progress. Devin is a first-class pickable provider alongside Claude, Grok, and Codex; you just add your own Devin API key.
What You See
- Devin icon in the header. A Devin session shows the Devin mark next to its title, like every non-default provider, and appears in the provider switcher on a fresh session.
- Polled progress. Devin has no streaming, so Omniscio polls its cloud and surfaces each new Devin message as it lands (rather than token-by-token).
- “Cost not reported.” Devin bills in ACUs on your own Devin account and its session API returns no per-turn dollar figure, so Omniscio honestly shows cost not reported rather than a misleading $0.
- No re-attach after an app restart (v1). If you restart Omniscio mid-run, the Devin session keeps going on Cognition’s side, but Omniscio won’t automatically reconnect to it.
How to Enable
Two things in Settings → Accounts → Devin (Cognition) — and unlike the CLI providers there is no binary check, because Devin is remote:
- Flip the master Show alternative AI providers toggle on (off by default) to reveal the alternative-provider section, including the Devin card.
- Flip Allow Devin sessions in any project on (off by default). This reveals the API key field.
- Paste your Devin API key (an
apk_key from your Devin dashboard — the card’s Get your Devin API key button opens it). The key is stored encrypted and never reaches the browser. Usage is billed in ACUs on your own Devin account, and Omniscio always sends a hard per-session ACU cap so a runaway session can’t drain your account.
How to Spawn a Devin Session
- Per-launch override — on a fresh session, pick Devin in the provider switcher before sending your first message.
- Per-hub default — the Edit Hub dialog’s “Default provider” radios include Devin; the hub’s “+ New Session” button then spawns Devin.
- Programmatically — recipes, automations, and the CLI control API accept
provider: 'devin'. The same readiness gates apply on the backend.
Good to Know
- First-message length limit. Devin rejects a prompt of 30,000+ characters, so a Devin session’s first message is budgeted to 29,000 characters — Omniscio fits your task plus its own context under the cap and warns you if it had to trim. Follow-up messages aren’t budgeted.
- Honest errors. A rejected key, a rate-limit, or a connection failure each surface as a clear, specific message — never a blanket “check your API key.”
Devin runs on Cognition’s cloud and bills in ACUs on your Devin account. Its session API returns no per-turn cost, so Omniscio shows “cost not reported” for Devin turns rather than a misleading $0. Omniscio always sends a hard per-session ACU cap on create as a runaway guard.
Image Studio
AI image generation built into every Claude session — generate, compare, enhance, and share images without leaving the chat.
Image Studio is an AI image generation service that connects to Omniscio as an MCP server. When enabled, every Claude session automatically gets a set of image tools — no per-session setup, no switching apps. Sessions can generate images from text prompts, compare how different models render the same idea, get AI enhancement suggestions, download results, manage reusable templates, and create shareable links.
How to Enable
- Go to Settings → Accounts.
- Scroll to the Image Studio section (near the bottom, outside the alternate-providers gate).
- Turn on Image Studio.
- Paste your API key (starts with
jls_ak_) into the field that appears. Get one at jls-image-studio.web.app.
Available Tools
Once enabled, every Claude session can use these tools automatically:
- generate_image — Generate images from a text prompt. Supports style, aspect ratio (1:1, 4:3, 16:9…), count (1–10), and model selection.
- compare_models — Render the same prompt across multiple models side-by-side to compare styles and quality.
- enhance_image — AI analyzes an existing image and suggests improved prompts for better results.
- download_image — Get a download URL for any generated image by its ID.
- estimate_cost — Preview the cost of a generation before running it.
- list_images — Browse recent generations, optionally filtered by model or search term.
- list_templates / create_template — Save and reuse prompt templates so repeated styles don’t need to be re-described every time.
- create_share / list_shares / revoke_share — Generate expiring shareable links for images, list active links, or revoke one early.
- open_for_annotation — Get the JLS web app URL to open an image for markup and comments (see note below).
Models
The default model is gemini-2.5-flash-image. You can pass any model name the Image Studio service supports to generate_image or compare_models — ask Claude to list what’s available or check jls-image-studio.web.app for the current model catalog.
The open_for_annotation tool returns the Image Studio web URL for an image — it doesn’t open a panel inside Omniscio. You’ll follow the link in your browser to annotate.
Quick Replies
Your library of saved snippets — drop them into any composer with Alt+S, or wire them into Away Mode and Automations.
Quick Replies is a virtual hub that holds your saved response snippets. Each snippet has a label, a body of text, and an optional auto-submit flag. You can insert any snippet into a composer with the Alt + S picker, attach snippets to Away Mode rules so they fire as auto-responses, or reference them by label inside an Automation's auto_respond action.
The Three Tabs
Opening Quick Replies in the sidebar shows a three-tab layout:
- Settings — the per-feature toggles for AI suggestions on/off, suggestion model, Quick Reply Button visibility, the Quick Reply Message text, and the Quick Reply Hotkey. This tab is the single home for these settings — there is no longer a separate entry under the main Settings page.
- Quick replies — your library of snippets and dividers. Drag rows to reorder, click a row to edit it inline, hit the trash icon to delete (with undo toast). Add a new snippet from the top toolbar or from a dashed button at the bottom of the list.
- Sessions — AI edit sessions for the snippet library itself. Spawn a session here and Claude can add, edit, and reorder snippets on your behalf without going through the approval inbox.
Creating a Snippet
- Open Quick Replies in the sidebar's Automation group.
- Click the Quick replies tab.
- Click + Add reply at the top of the list (or the dashed + Add quick reply button at the bottom).
- The editor opens with two tabs — Content (active by default) and Behavior. Each tab shows a small numeric badge with how many things are configured behind it so you can tell at a glance whether the other tab has anything in it.
- Content tab — the Label (what shows in the picker and sidebar row; must be globally unique), the Body textarea (the text that gets sent), and two chip rows for citing other quick replies as a shared header or footer (see Reusing other quick replies below).
- Behavior tab — the Auto-send when selected toggle (with it on, picking the snippet sends immediately; with it off, the text lands in the textarea for you to edit before hitting send) plus the per-snippet effect toggles described in the next subsection.
- Click Save. The Save / Cancel / Delete footer is pinned and visible from either tab. Ctrl+Enter (or Cmd+Enter on Mac) saves from anywhere in the editor; plain Enter saves from any single-line field.
Dividers
If your library gets long, you can insert dividers (label-only rows) to visually group snippets. Click + Divider in the top toolbar, give it a label, and drag it to the right position in the list. Dividers don't fire as snippets and aren't shown in the picker — they exist purely to organize the list.
Per-Snippet Effects
The editor's Behavior tab holds five opt-in toggles plus an auto-apply tags row:
- Set session title from this snippet — if this is the first user message in a fresh session, Omniscio names the session using the snippet's title text (or its label if blank). The AI title-generator may still rename later. Two checkboxes appear when this is on: Append usage count tacks on how many times this quick reply has fired, including the current one (e.g.
#150), and Append timestamp adds the local date and time (e.g.· 2026-05-30 14:32). - Override Plain Speak "Latest" with this snippet — when the agent replies to a snippet send, Omniscio stamps your override text onto the Latest line of Plain Speak for that one message. The other four sections are unchanged. The stamp is sticky — even if you scroll back days later, that one message keeps the override.
- Allow Inbox Pilot to auto-send this reply — gates whether the AI classifier in Inbox Pilot can pick this snippet as an auto-respond reply. When on, you can also fill an optional Hint for the classifier (e.g. "acknowledge thanks", "ask for more details") so the classifier knows when this snippet is the right pick. Turn it off for snippets you only want fired by a hotkey or click — for example, a "Send my home address" snippet you don't want an AI choosing on your behalf.
- Run on a specific engine & model — under Advanced options. Off by default, so the reply uses whatever the session is set to; flip it on and pick the engine, model, and thinking level from the exact same pickers you use when starting a new session. The choice applies when the reply starts a brand-new session; in a chat that's already going, it sends on that chat's current engine.
- Auto-apply tags — pick up to 5 tags from your library; each time the snippet fires, those tags are applied to the receiving session. Sessions cap at 10 tags total; extra tag applications past the cap silently no-op (the message still sends).
Reusing Other Quick Replies
The editor's Content tab includes two chip rows — Prepend other quick replies and Append other quick replies — for citing existing quick replies as shared headers or footers. Helpful when you have a common greeting or signoff you want to reuse without duplicating the text into every snippet.
- Each row caps at 5 entries; the + Add button visibly disables once you hit the cap. Remove a chip with the × on the chip.
- The picker for each row excludes the snippet you're currently editing (no self-reference), anything already on the same row, and dividers / folders (they have no sendable body).
- The two rows are independent — you can prepend up to 5 and append up to 5 on the same snippet.
When the snippet fires, Omniscio sends the final text by concatenating, in order: each resolved prepend body, the snippet's own body, then each resolved append body — joined by single newlines. So prepend = greeting, body = "Thanks for the heads-up.", append = signoff produces:
Hi there!
Thanks for the heads-up.
— Bot
A live What gets sent preview renders just below the chip rows whenever at least one prepend or append is configured, so you can see the exact expanded text before saving. Expansion is fail-open: a reference to a snippet that's been deleted is silently skipped (no error, no blank line), references nest one level only (if A prepends B and B prepends C, sending A emits B-body then A-body — not C-body too), and a stale id pointing the snippet at itself is also skipped instead of looping. Inbox Pilot fires (Respond auto-replies) record the fully expanded text in the audit log, so replay shows exactly what was sent even if you later edit one of the referenced snippets.
Exporting, Sharing & Importing
The Quick replies tab's toolbar has three library-level actions — Export, Share, and Import — for moving your whole library to another machine or to another person. They have no keyboard shortcuts on purpose, so a stray keypress can never write a file or publish your library.
- Export — writes your entire library to one JSON file, at a place you choose in a save dialog (it suggests a name like
omniscio-quick-replies-2026-09-29.json). Every snippet, divider, and folder goes in, and the folder structure is kept, so importing the file rebuilds your folders exactly. How often each reply has been used, and when it was last used, are deliberately left out — those stay on your machine. - Share — publishes your library as a readable page at a public Omniscio Shares link and copies that link to your clipboard. It warns you first that anyone with the link can open it, and only publishes once you confirm. The link also appears in Shares, where you can revoke it later. Sharing an unchanged library again returns the same link.
- Import — takes either an exported file (Choose a file…) or the block pasted from a shared page (Or paste a shared library). Nothing is added until you click Add to my quick replies. Before that it shows exactly what it will do: how many replies, folders, and dividers the source holds; how many will be added; how many are already in your library and will be skipped; any that will arrive under a numbered name; any tags it will create; and any pinned shortcut digits it will drop.
An import is add-only and repeatable. It never deletes, replaces, or edits anything already in your library. A reply whose label and text already match one you have (of the same kind) is skipped — so importing the same file twice adds nothing. If a label is already taken by a different reply, you keep both: the incoming one arrives named (2), (3), and so on. A pinned number key is never taken from a reply that already holds it — an incoming pinned digit survives only where that digit is free. And the whole import is a single step that either fully succeeds or changes nothing, so a problem partway through can't leave you with half a library.
Using a Snippet
- Alt+S picker — inside any session composer, press Alt + S, arrow-key to the snippet, hit Enter. Right-click a snippet for Copy (its text), Edit, or Delete — Delete always asks you to confirm first, and in a session composer it leaves an Undo toast (Ctrl + Z) that restores the reply exactly as it was. The Quick Launch (Ctrl+Space) picker has the same right-click Delete, but as a lighter inline two-step confirm (Delete → Confirm delete) with no undo. Organize in place (desktop): drag any row to reorder it within the current level, drag it onto a folder to move it inside, and right-click a folder — or empty space — to add a New folder right there (right-clicking a folder also offers “New folder inside…”); type the name in the inline box and press Enter. Dragging is a mouse gesture (it does nothing on touch — phones keep using the management tab and the right-click “Move to folder…” action) and is off while a search is active.
- Number keys — with the picker open, each row shows a small number badge; press 1–9 to fire it instantly. A reply sends (or drops into the composer to edit, per its auto-submit setting); a folder opens (drills in), just like clicking it. Numbers count from the bottom of the on-screen list upward (or from the top if you switch the Quick Replies Settings tab → Numbering direction to Top-down), and replies and folders share one sequence — so a folder simply takes its place in the count. Digits work only while the search box is empty. Toggle the whole feature in the Quick Replies Settings tab → Number-key quick send (on by default).
- Auto-reply rule — in Away Mode, point a rule at a snippet by label.
- Automation auto_respond — in an Automation's actions, reference a snippet by label.
- Zap button — with the Quick Reply Button toggle on, a lightning-bolt button next to the snippet picker fires your designated "Quick Reply Message" with one click (hotkey: Alt + Z).
Attachments you've added to the composer (screenshots, PDFs, text docs) ride along on snippet sends — the snippet text is sent along with any attached files in the same message.
AI Edit Sessions
The Sessions tab lets you spawn a Claude session pre-seeded with your snippet library, the snippet HTTP endpoints, and an in-app token. Ask the agent to "add a snippet that thanks the sender and confirms I'll reply tomorrow" and watch the Quick replies tab update in real time. Writes the agent makes via the in-app token skip the CLI approval inbox — the trust boundary is "this session was launched in-app by you."
This feature was previously called "Response Snippets". The underlying database table and HTTP endpoints still use the old name; everything you see in the UI now says "Quick Replies."
Mobile Access
Respond to your AI agents from your phone.
Mobile Access lets you use Omniscio from your phone or tablet's web browser. On the same Wi-Fi as your computer it works directly — no tunnel needed. To reach it from anywhere, Omniscio uses Tailscale (see below).
You can install Omniscio on your phone so it opens like a real app — its own icon, full screen. See Install on Your Phone for the Android and iPhone steps.
Setting Up
- Click the phone icon in the toolbar (top-right), then Enable & Show QR.
- Omniscio starts its web server and shows a QR code plus a link you can copy.
- Scan the QR code with your phone's camera (your phone must be on the same Wi-Fi).
- Omniscio opens in your phone's browser, already signed in. To make it an app, see Install on Your Phone.
Mobile Interface
The mobile interface is a simplified version of Omniscio optimized for small screens. It opens straight onto your Inbox — everything that needs you, across all projects — and loads its data in parallel with connecting, so the app appears quickly even on a slow connection. You can:
- See all sessions that need attention
- Read agent messages
- Type and send responses
- Use voice dictation
- Archive and manage sessions
Your phone's Back gesture steps back one screen at a time. When a button inside an alert or a chat opens another part of Omniscio right there — an alert's Open Settings, say — Back takes you straight back to that alert instead of to the Settings list. If the alert was cleared in the meantime, Back lands on the Inbox list.
On the same Wi-Fi, your phone talks to your computer directly over your local network — no tunnel involved. To reach Omniscio from anywhere (cellular, a different network), turn on Access from anywhere in the same dialog: Omniscio uses Tailscale for a secure, encrypted connection. Either way, access is protected by a private token and works only while Omniscio is running on your computer.
Mobile access requires your desktop computer to be running and connected to the internet. If your desktop goes to sleep or loses connection, the mobile interface will disconnect.
If something you tap gets no answer for about 5 seconds — usually because the connection dropped without warning — the phone shows “Waiting for your computer…”. If the connection turns out to be lost, that changes to “Reconnecting…” and the phone tells you the tap didn't go through, so you know to try it again once it's back.
SSH Remote
Run a session's Claude on a different machine — a GPU box, a Linux server, a cloud VM — while you drive it from Omniscio on your desktop.
SSH Remote lets any single session run its Claude on a different machine while you control it from the Omniscio window here. Omniscio opens an SSH connection to the remote host, launches Claude there, and streams the output back to your local UI as if it were running on your desktop. It's useful when the code Claude needs to edit lives on a remote box, when a session needs GPU horsepower your laptop doesn't have, or when you want session work isolated to a cheap cloud VM.
It's per-session, not per-project — so you can freely mix local and remote sessions in the same project, picking where each one runs when you start it.
Setting up a remote
- Add the host. Go to Settings → SSH Remotes → Add remote. Give it a nickname, host, port (default 22), and username, then pick a key strategy: have Omniscio generate a new key for this host, or use an existing private key file you already manage.
- Install the public key on the server. Omniscio shows you the public key — add it to
~/.ssh/authorized_keyson the remote host (or use your usual method). - Test the connection. Click Test connection. Omniscio does a quick handshake and reports success, or the exact error if something's wrong.
- Trust the host. The first connection records the server's SSH host key. Later connections verify against it and fail closed if it changes — which is exactly what you want if someone tries to impersonate the server.
Running a session on a remote
When you start a new session, the launcher shows a Run on dropdown listing Local plus all your configured remotes. Pick one. Each project gets its own folder on the remote — a new session runs in a project-named folder under the remote’s configured working directory, created automatically the first time, so two projects never share a folder. That folder is chosen once and stays put, so renaming a project or editing the remote never moves a running session’s work. The session then behaves exactly like a local one — the status dot, the streaming output, and the input box all work the same.
If most of your work happens on one machine, make it the default with Settings → SSH Remotes → Set as default. New sessions then start there automatically, with Local still one click away.
Keys Omniscio generates are stored on your machine with restrictive file permissions, and Omniscio keeps the remote host fingerprints in its own private file so it never reads or changes your personal ~/.ssh config. Protection for the private key on disk is your operating system's file permissions — Omniscio doesn't add a separate passphrase — so keep your machine's account secure.
SSH Remote is the opposite of CLI API: SSH Remote is Omniscio reaching out to control Claude on another machine, while the CLI API is other tools reaching in to control Omniscio on this one.
CLI Control API
Control Omniscio programmatically from the command line or scripts.
Omniscio runs a local HTTP server that lets you control it from the command line, scripts, or other applications. This is the CLI Control API.
Connection Details
| Detail | Value |
|---|---|
| Host | 127.0.0.1 (localhost only) |
| Port | 19519 (configurable via AMC_CLI_PORT env var) |
| Auth | Bearer token (auto-generated, stored at ~/.amc/cli-token) |
Example: List Sessions
curl -H "Authorization: Bearer $(cat ~/.amc/cli-token)" \
     http://127.0.0.1:19519/sessions
Available Endpoints
| Endpoint | Method | Description |
|---|---|---|
/sessions | GET | List all sessions |
/project/:name/new | POST | Start a new session in a project |
/sessions/:id/respond | POST | Send a response to a session |
/session/:id/pause | POST | Pause a session |
/session/:id/unpause | POST | Resume a paused session |
/session/:id/snooze | POST | Snooze a session |
/session/:id/save | POST | Save (bookmark) a session |
/session/:id/unsave | POST | Remove a session from Saved |
/session/:id/archive | POST | Archive a session |
/session/:id | PATCH | Rename a session |
/recipes/run | POST | Start a recipe run |
/cron | GET | List cron jobs |
/settings | GET/PATCH | Read or update settings |
/search | GET | Search sessions and messages |
/status | GET | App health and status |
The CLI API is only accessible from your local machine (localhost). The bearer token is stored securely and should never be shared. Some endpoints (like creating sessions or running recipes) require additional approval in the Inbox.
Sticky Notes
Floating scratch notes that stick to your window and survive restarts.
Sticky Notes are little draggable notes that float above the main app — a quick place to park a phone number, a to-do, or a snippet you'll need in a minute. They're color-coded, resizable, and persist across sessions and app restarts, so they're right where you left them next time you open Omniscio.
Opening It
Click the sticky-note icon in the top-right toolbar. The first click creates your first note and shows the overlay; after that, the icon toggles all your notes' visibility on and off.
What You Can Do
- Create notes from the toolbar, or use the + button on any note to add another.
- Type freely — notes auto-save as you go.
- Drag a note anywhere by its grip handle; resize it from the bottom-right corner.
- Color-code each note from six pastel presets (yellow, blue, green, pink, purple, orange); the text adjusts for contrast automatically.
- Minimize a note to a small chip, then click the chip to expand it again.
- Delete a note with its × button, or toggle every note's visibility from the toolbar.
Sticky Notes are on out of the box (desktop only). To turn them off, go to Settings → Features → Enable Sticky Notes.
Journal
A personal journal with freeform writing and guided AI reflection modes.
Journal is a private place to write freely — or get an AI mentor to walk you through a guided reflection. Write without structure, or start from a template (gratitude, daily reflection, problem-solving, emotional processing) and let the mentor prompt you with Socratic questions to go deeper. Entries are synced, searchable, and taggable, so your writing is easy to come back to.
Opening It
Click Journal in the sidebar to open the writing surface. If you don't see it, make sure the feature is enabled under Settings → Features → Journal.
Writing Modes
- Freeform — just write. No prompts, no structure.
- Guided templates — pick gratitude, daily reflection, problem-solving, or emotional processing, and the AI mentor walks you through it.
- AI mentor — a Socratic companion that asks follow-up questions to help you work through what you're writing about.
Managing Entries
- Synced — your entries are stored with your account, so they're available across devices.
- Searchable — search your writing by content.
- Taggable — add tags to organize entries and find them again.
Decks
Describe a presentation in plain language and let AI build the slides — a Gamma-style deck builder inside Omniscio.
Decks turns a sentence into a finished slide deck. You describe what you want, Claude returns an editable outline for you to approve, then it generates each slide ("card") with real content, a chosen layout, and speaker notes. Edit anything by hand, present it, publish it as a link, or download it as a PDF, a web page, or a PowerPoint file.
Decks is a built-in plugin, off by default. Enable it under Settings → Plugins and a Decks entry appears in your sidebar. (Generation uses an API-key account and is capped at $5/day by default — adjustable in the plugin's settings.)
Building a Deck
- From a prompt — describe the deck, approve the AI's outline, then it generates the cards. Optionally run an "Interview me first" Q&A (up to five questions) to enrich it.
- From your existing work — build a deck from a file (PDF, Word, PowerPoint, Excel, CSV, or text), a past session, a whole project, or a Mission Control board.
- Edit freely — reorder, edit, add, and delete cards (per-card delete has undo; deleting a whole deck asks first).
- Restyle instantly — pick from 7 themes and 13 slide layouts; changing the theme re-styles the whole deck at once.
Presenting & Sharing
- Present with a built-in presenter overlay — current slide, next-slide preview, speaker notes, and a timer (press S).
- Publish to a shareable public web link (it rides the same Shares pipeline, so you can revoke or expire it).
- Download as a PDF or a self-contained HTML file (desktop only).
Support Chat
Message the Omniscio team directly from inside the app.
Support Chat is a direct line to the Omniscio team — a small chat panel you open from the toolbar to ask a question, report a problem, or send feedback. It's separate from Get Help (which answers from the docs first): Support Chat goes straight to a person.
Using It
- Click the chat bubble icon in the top toolbar — a panel opens in the bottom-right.
- The first time, set a display name so the team knows who they're talking to.
- Type your message and send. Replies come back in the same panel, and the toolbar icon shows an unread dot when there's a new one.
Support Chat is on out of the box (desktop only). To hide it, turn off Support chat under Settings → Channels.
Asides (Fork Sessions)
Start side conversations from any point in a session.
An aside is a branching conversation that forks from an existing session. It's like pulling someone aside for a quick side chat, then going back to the main conversation.
When to Use Asides
- You want to ask a quick question without interrupting the main session's flow
- You want to explore an alternative approach without affecting the current work
- You need clarification on something the agent said, in a separate context
Creating an Aside
- Right-click a message in the chat.
- Choose "Fork / Aside" from the context menu.
- A new session opens, branching from that point in the conversation.
- The aside session has access to the main session's context up to the fork point.
Asides use Claude Code's --fork-session feature. The forked session starts with the full conversation history up to the fork point, then continues independently. Changes in the aside don't affect the original session.
Ask About This Page
A floating chat popover that answers questions about whatever is currently on your screen — without leaving the page you're on.
This is an in-development feature, hidden until you turn it on. Open Settings → Lab and flip the "Ask about this page" toggle (Lab holds experimental flags, all off by default). Once on, a sparkle button appears in the top bar (next to Bookmarks and your account indicator) and the Ctrl+J shortcut starts working. It is desktop-only.
Ask about this page lets you ask Claude about what you're looking at — "what is this session waiting on?", "summarize my inbox", "what does this setting do?" — in a small floating chat. It is non-blocking: there's no full-screen overlay and the page behind it stays fully clickable while the chat is open.
Opening It
- Click the sparkle button in the top bar, or press Ctrl+J. The chat drops down from the button (it won't cover your message box at the bottom).
- The first time, accept the one-time privacy notice (see below).
- Type a question and send it — by default Enter sends (the popover follows your global Enter-to-send preference), or click Send.
What It Captures
When you send a question, Omniscio takes a snapshot of your current screen and sends it along with your question, so Claude can answer in context. Depending on what you're viewing, the snapshot is the active session's recent messages, your unified inbox, or the visible content panel. The snapshot is re-taken on every message, so each answer reflects what's on screen right then. Your chat stays clean: the snapshot is sent to Claude but never appears as a message — your bubble shows only what you typed. Click the "Context from this page attached" chip above the message box to preview exactly what will be sent.
The The Vault / secrets vault is never read by this feature — if it's the active surface, a neutral placeholder is sent instead. Any region the app marks sensitive is stripped out before capture. And the captured screen text is wrapped as untrusted data, so text on your screen can't trick the helper into following hidden instructions. The first time you open the popover, a consent notice explains all of this and you must accept before anything is sent.
It's a Real, Persistent Chat
- Real session. The helper is a full Claude session running in its own private scratch workspace, so if it needs permission to use a tool, an Allow / Deny prompt appears right inside the popover — it never silently hangs. A running cost shows in the footer. It cannot see or change your real projects.
- Continue where you left off. Re-opening the popover resumes your most-recent chat.
- New chat. The message-plus icon in the header starts a fresh conversation.
- History. The clock icon opens a list of your past chats — click any to reopen it.
These helper chats never show up in your hubs sidebar, the inbox, or the "Needs You" count — they live only in the popover, even while one is waiting on an approval (you handle that from the popover). It's a separate feature from Ask Omniscio, with its own workspace and history.
Get Help
Ask a question in plain English and get an instant answer drawn from the app’s own help pages — and if the answer doesn’t help, send it straight to the developer.
Get Help is a new feature that is hidden until it ships. If you can see the panel, your developer has switched it on for testing.
Opening Get Help
Press Ctrl+Shift+H from anywhere in the app. The Get Help panel slides open over your current screen.
On desktop the widget sits in the bottom-left corner by default. A small move button in the widget’s header moves it to the other side of the screen (left ↔ right) — your choice is remembered. A full-screen button expands the widget into a full console that fills the app below the title bar — your conversations listed on the left and the open chat on the right, with who the conversation is with and its status shown at the top of the chat itself. The console never shrinks back into the corner widget — close it with the ✕ button or Esc. Each conversation in the left-hand list is a single tidy row (a small coloured status dot, then the question on one line, matching every other list in the app), and hovering a row reveals a delete button.
While the console is full-screen, your Help Desk row in the app’s far-left navigation is highlighted to show that’s where you are. That row is always in your sidebar while Get Help is switched on — it’s an ordinary hub row alongside your other integrations, not a fixed slot of its own, so you can reorder it, group it or pin it like any other. Clicking anywhere else in that navigation — a project, the Inbox, Settings — closes Get Help and takes you to that page, so you’re never stuck on the Get Help screen when you try to move elsewhere.
Asking a question
- Type your question in the box at the bottom — anything you’d normally type into a search box: “how do I pause a session?”, “what is Focus Mode?”, “why is my session stuck?”
- Press Enter or click Ask.
- Omniscio searches its built-in help pages and generates a plain-language answer. Small source chips under the answer name exactly which help pages the answer was drawn from. Click any chip to read the full source page.
- If the question is outside what the app’s help covers, the answer says so honestly rather than guessing.
The panel allows up to 10 questions per minute. If you hit the limit, a short message tells you how long to wait.
Rating the answer
After the answer appears, two buttons let you rate it:
- 👍 Thumbs up — the answer helped. Your rating is saved as feedback so the team can see what’s working — it doesn’t change the request’s status.
- 👎 Thumbs down — the answer didn’t help. The rating is saved so the team can improve coverage, and a Send to developer button appears.
Sending to the developer
If the AI answer didn’t help, click Send to developer. Your question goes to the developer directly — no AI is involved from this point on. The request status changes to Waiting on developer.
The developer will read your question and reply in plain text from inside their copy of the app.
My requests — tracking your questions
The My requests tab lists every question you’ve sent, with its current status:
- Waiting on developer — your question has been sent; the developer hasn’t replied yet.
- Answered — the developer has replied. Click the row to read the reply.
- Resolved — the support team has closed the request. Resolving a conversation is the developer’s call now — your rating is feedback only.
When the developer replies
You don’t need to keep the app open and watch for it. When a reply arrives, Omniscio shows a desktop notification with a soft chime — even when the app is in the background or behind other windows. Click the notification and Omniscio comes to the front with the conversation already open on the reply. If you’ve paired your phone, the same alert also arrives as a phone notification.
Inside the app you’ll also see an Inbox notification ("Developer replied to your question") — click it to jump straight to the thread, or open My requests and find the row marked Answered.
The same works in the other direction: when you send a question (or a follow-up) to the developer, their copy of Omniscio raises a desktop notification too — so your question is seen promptly even if they’re not looking at the app.
Sending a follow-up
If the developer’s reply raises another question, open the thread and type a follow-up message. The request goes back to Waiting on developer and the developer is notified. You can send as many follow-ups as you need.
When a request is resolved
You don’t close requests yourself — the support team marks a conversation resolved once it’s handled. When that happens, a small muted “Marked Resolved” note appears at the end of your chat (and disappears again if the conversation is reopened). Your 👍 / 👎 rating is feedback only and never changes a request’s status.
A resolved conversation isn’t locked: type a new message and the AI assistant answers again — and if you still need a person, you can send it to the developer afresh.
Related
- Ask Omniscio — a different feature: a full back-and-forth chat with Claude about the app, with the ability to configure settings for you. Open it from the Ask Omniscio tab in Quick Launch.
- Ask About This Page — a floating popover that answers questions about whatever is currently on your screen.
Cross-Device Sync
Keep your Omniscio setup in step across your own computers — end-to-end encrypted, with your secrets never leaving your machine.
Cross-Device Sync keeps your Omniscio setup — projects, sessions, automations, recipes, bookmarks, and non-secret settings — in sync across your own computers. Everything is encrypted on your machine before it leaves, so the server only ever holds ciphertext it cannot read, and your secrets (API keys and credentials) never leave your computer at all.
Set it up on one machine, then enroll each additional computer with a one-time recovery code. From then on your changes flow between them automatically, so you can start work on one computer and pick it up on another.
Your scheduled jobs — crons and scheduled recipes — sync like everything else, but each one runs on only one of your computers, so a synced job never fires twice at once. A cron runs on the computer you created it on (edit it on the computer you want it to run on to move it there); crons you made before turning sync on bind the first time you edit each one, and scheduled recipes bind on their next run. Omniscio’s own background maintenance still runs on every computer.
Backup Mirror writes a full encrypted snapshot to a folder you point at a cloud drive — an offsite copy you restore from. Cross-Device Sync keeps two or more of your own computers continuously in step over an encrypted hosted locker. Different jobs: one is a snapshot you fall back to, the other is live multi-computer sync.
Backup Mirror
A continuous, encrypted full-state mirror of your Omniscio install to a folder you choose — typically inside Dropbox, OneDrive, or iCloud Drive — so you can rebuild Omniscio on another machine with every conversation intact.
Backup Mirror writes an encrypted snapshot of your entire Omniscio install (the database with every conversation, your config, and every attachment) to a regular folder on disk. Point that folder at a cloud-sync target like Dropbox / OneDrive / iCloud Drive and your snapshot syncs offsite automatically. When you set up Omniscio on a second computer, you can restore from the mirror and pick up exactly where you left off.
Setup Backup to Gmail emails a small, config-only archive (projects, snippets, recipes, skills — no chats) to your inbox weekly. Backup Mirror writes the full database (including every conversation) plus all attachments to a local folder you control. Different scopes, different targets — you can run both side by side.
What Gets Backed Up
- The full SQLite database — every project, session, message, automation, recipe, bookmark, skill, snippet, setting. Written via SQLite's
VACUUM INTOso the snapshot is a clean copy with no WAL leftovers. - Your config file — encrypted credentials stay encrypted in the mirror; on restore, Omniscio re-decrypts with your machine's keys (so if you restore to a different machine, you'll re-sign-in to accounts but everything else carries over).
- The attachments tree — every image, PDF, and Office doc you've sent to sessions.
- Excluded: the SQLite write-ahead log (
.db-wal/.db-shm) and the live in-memory ephemera (anything not persisted).
Turning It On
- Open Settings → Backup & Restore → Backup Mirror.
- Pick a folder. Omniscio detects your cloud-sync folders (Dropbox / OneDrive / iCloud Drive / Google Drive) and offers each as a one-click choice that creates an
AMC-mirrorsubfolder for you — or use Browse… to choose any folder. - Set a passphrase. Click Generate strong passphrase for a strong, typeable one (then copy it), or type your own. This is the only key to the mirror — lose it and the backups are unreadable forever — so save it in a password manager and tick I’ve saved this passphrase before your first backup.
- Flip Enabled on. The first time, Automatic sync defaults to When I open & close Omniscio so it keeps itself in step (change it any time).
- Optional: set Retention count (default 5 — older snapshots are pruned newest-first).
- Click Run now to take an immediate snapshot, or wait for the next scheduled run.
Backup Mirror needs both a folder and a passphrase to work. If you flip Enabled on before setting a passphrase (or picking a folder), nothing is backed up off-site yet — so Omniscio shows a gentle “Finish setting up Backup Mirror” reminder in your inbox until you complete setup, then it clears itself. It’s a nudge, not an error — finish the last step, or turn the toggle back off if you changed your mind.
Your passphrase is used to derive the encryption key locally (AES-256-GCM with PBKDF2-SHA256, 600,000 iterations). Omniscio never stores it on a server — only a copy on your own machine for the scheduled writes. If you forget it, the mirror is permanently unreadable. Treat it like a master password.
When It Writes
Backup Mirror piggy-backs on the same schedule as Setup Backup — one weekly run on the cadence you've already configured. There's no separate scheduler to tune. You can also click Run now at any time to take an extra snapshot (handy right before risky operations).
Writes are atomic — Omniscio writes the new snapshot to a .tmp file first, then renames it into place. If the write is interrupted (power loss, Omniscio quit, cloud-sync conflict), the old snapshot stays intact — you never end up with a half-written mirror.
Automatic Sync (Two Devices)
If you use Omniscio on two computers, Automatic sync keeps them in step without you clicking anything. In Settings → Backup & Restore → Backup Mirror, set Automatic sync to one of:
- Off (default) — nothing automatic. Use the Sync now button (send yours and pull in your other device’s latest) or Mirror now (send only) whenever you like.
- When I open & close Omniscio — Omniscio pulls your other device’s latest work and sends yours when it opens, then does a quick catch-up pull when you close it. Once per session — the right rhythm for a snapshot that can be 1–3 GB. (Sending happens on open, not close, so a large backup can never make the app hang while it’s closing.)
- On a schedule — the same, on a timer you choose: every 1, 3, 6, or 12 hours.
It’s built to be frugal: if nothing changed since the last backup, the sync is skipped entirely — it won’t rewrite a multi-gigabyte archive for nothing. And it always pulls your other device’s work before sending yours, so nothing gets deleted before it’s saved.
When automatic sync is on, the panel shows Last synced…, and tells you when new work is available from your other device or when this device has changes to send. If a sync ever fails (say the two devices’ passphrases don’t match), it says so plainly instead of failing silently.
Automatic sync works once both computers point their mirror folder at the same synced folder and use the same passphrase. That first setup is manual on each machine (the passphrase can’t be filled in for you — that’s what keeps the backups private). After that, it’s hands-off.
Restoring on Another Machine
There are two ways to start a restore, followed by two restore modes. Both paths decrypt with your passphrase first — if the passphrase is wrong, Omniscio refuses to touch any local data.
Starting the restore
- From the folder listing — if you’ve already configured a mirror folder, the Restore from mirror section lists every
.amcmirrorfile in that folder. Pick one and enter your passphrase. - Restore from file (recommended for a fresh machine) — the Restore from file button is always visible in the Backup Mirror section, even before you’ve configured anything. It opens a standard file picker filtered for
.amcmirrorfiles, shows you a preview of the archive (size, creation date, source machine name), and lets you choose a restore mode. This is the easiest path when setting up a brand-new computer — just copy your.amcmirrorfile onto the new machine (USB, cloud drive, email — any way you like) and browse to it.
Restore modes
- Replace — the new machine becomes a faithful copy of the old one. Before applying, Omniscio takes a snapshot of your current local state so you can roll back. The mirror’s files are staged to a side path; on the next Omniscio startup, they’re swapped in atomically. Use this when you’re moving to a new computer and want the new computer to be your Omniscio.
- Merge conversations — useful if you’ve used Omniscio on both machines in parallel. Omniscio reads the mirror, then inserts only the conversation rows that don’t already exist locally. Your existing local sessions are untouched; only new history rows from the mirror are added. (Other tables — settings, projects, recipes — are not merged in this mode; conversations are the only thing the mode is safe to combine.)
Resuming Sessions After Restore
When you restore on a new machine, the Claude CLI's per-session work directories no longer exist on the new disk. Rather than fail, Omniscio clears the link between each session and its Claude CLI session ID and marks the session "needs its transcript re-injected on next spawn". The next time you open the session and send a message, Omniscio walks the conversation history from the database and injects it into the Claude CLI's context for you — the agent picks up with full memory of the prior conversation. You don't need to do anything special; just open the session and talk to it.
Cron Jobs After Migration
Cron job definitions migrate with the database, but several things about them are machine-specific and need manual attention after restoring on a new computer. Test every active cron job after migration — go to Settings → Features → Enable Cron Jobs and trigger a manual run for each one.
Common failures
- Path not found (
ENOENT) — the script path, executable path, or working directory points to a location that doesn’t exist on the new machine. Edit the cron job and update all paths to match where the project lives now. - Missing dependencies (
MODULE_NOT_FOUND) — the project was re-cloned butnode_modulesweren’t installed. Runnpm installin the project directory. - Environment variables empty — cron job env vars were encrypted with the old machine’s OS-level encryption (DPAPI on Windows, Keychain on macOS) and can’t be decrypted on the new machine. Edit the cron job and re-enter each env var.
- Google Cloud / Firebase auth failure — Application Default Credentials are machine-specific. Run
gcloud auth application-default loginand sign in with the relevant Google account. - Wrong results — hardcoded paths inside the script itself may reference old-machine locations. Check the script source and update them.
For each active cron job: (1) verify all paths exist on the new machine, (2) re-enter any env vars, (3) run npm install if the project uses Node.js, (4) re-authenticate any cloud credentials, and (5) trigger a manual test run to confirm it works.
Beyond Omniscio — Your Development Environment
The Backup Mirror restores everything inside Omniscio, but Omniscio sits on top of a broader development environment that is machine-specific. After restoring your Omniscio data, walk through the checklist below to get the rest of your environment working.
Drive letters and Dev Drives
Omniscio may be configured to create worktrees on a dedicated drive (e.g. D:\Worktrees on a separate NVMe Dev Drive). Drive letter assignments do not transfer between machines — the new machine needs the same drive set up, or the path updated in worktree-locations.json in the repo root.
External CLI tools (toolchain)
Omniscio integrates with external command-line tools that are installed separately. None of these transfer with the backup — they must be reinstalled on the new machine. Open Settings → Connected Tools to see which tools are installed and which are missing. Most can be reinstalled directly from that screen.
Some tools require separate authentication after installation: gh auth login for GitHub CLI, gcloud auth application-default login for Google Cloud, gws auth login for Google Workspace CLI, and gog auth add <email> for gogcli.
Re-authentication checklist
Many tools store their own credentials on the machine. After migration, you need to re-authenticate each one — none of these credentials transfer.
- Omniscio API keys and OAuth — Settings → Accounts → re-enter keys and re-authenticate
- GitHub CLI —
gh auth login - Google Cloud SDK —
gcloud auth application-default login - Google Workspace CLI (gws) —
gws auth login - gogcli —
gog auth add <your-email>(rebuild the binary first if needed) - MCP server secrets — the MCP Servers sidebar entry (under Agent Tools) → re-enter secrets for each custom server
- SSH remotes — Settings → SSH Remotes → regenerate keys and re-deploy public keys
- Cron job env vars — edit each active cron job and re-enter its environment variables
Cloud test fleet cache
If you use the cloud test offload system (--cloud), the fleet cache at ~/.amc/cloud-fleet.json does not transfer. Without it, cloud testing may intermittently fall back to running tests locally. Run npm run cloud:sync-fleet after migration to rebuild it from your live GCP fleet.
Claude Code files that don’t transfer
The Backup Mirror includes your CLAUDE.md files and auto-memory trees, but several other Claude Code files are not included: ~/.claude/settings.json (permissions, theme, model preferences), ~/.claude/skills/ and ~/.claude/recipes/ (manually copy from old machine, or use Setup Backup to Gmail which includes them), ~/.claude/scripts/ (deployed automation scripts), ~/.claude/amc-repo.path (re-run the setup script to point to the repo on this machine), and ~/.claude/secrets/ (DPAPI-bound, re-enter any stored secrets).
Memory files with machine-specific paths
Global Claude Code memory files (~/.claude/projects/*/memory/) do transfer via Backup Mirror. However, they may contain hardcoded paths from the old machine — usernames, drive letters, or CLI binary locations — that become stale after migration. Review any reference-type memory files and update paths to match the new machine. Sessions that rely on these files will silently get wrong information until the paths are corrected.
Per-project .claude/ configs (no action needed)
Each project directory has .claude/settings.json and .claude/amc-instructions.md files that Omniscio uses to configure Claude Code sessions. These may appear missing after migration if the project hasn’t been opened yet — this is normal. Omniscio automatically regenerates these files on every session spawn, so they self-heal the first time you open a session in that project.
After restoring your Omniscio data: (1) verify your worktree drive exists and update worktree-locations.json if the path changed, (2) set ~/.claude/amc-repo.path to the repo’s new location, (3) re-enter Omniscio API keys and OAuth at Settings → Accounts, (4) open Settings → Connected Tools and install missing tools, (5) re-authenticate external CLIs (GitHub, gcloud, gws, gogcli), (6) re-enter MCP server secrets, (7) regenerate SSH remote keys, (8) edit cron jobs to re-enter env vars and verify paths, (9) copy ~/.claude/settings.json, skills/, and scripts/ from the old machine, (10) run npm install in any project directories you plan to work in, (11) run npm run cloud:sync-fleet to rebuild the cloud test fleet cache (if you use --cloud test offload), (12) review memory files in ~/.claude/projects/*/memory/ for old-machine paths and update them, and (13) per-project .claude/ configs auto-regenerate on first session spawn — no action needed.
Safety Properties
- Authenticated encryption — AES-256-GCM detects any tampering. A corrupted mirror file is rejected, never silently restored as garbage.
- Manifest validation — every snapshot carries a manifest the restore flow checks before doing anything destructive.
- Archive ID validation — the identifier inside a mirror file is checked before it’s ever used to build a file path, so a tampered archive can’t write outside its intended location.
- Schema gate on Merge — the mirror and local DB must be at compatible schema versions or the merge refuses to run.
- Mandatory pre-restore snapshot on Replace — if the restore goes wrong, you have a one-click rollback.
- Atomic swap on startup — the in-place file replacement happens before Omniscio opens any DB connection, so there's no half-restored state at runtime.
The point of Backup Mirror is to get your Omniscio state off the machine. The simplest way is to point the mirror folder at something Dropbox / OneDrive / iCloud Drive already syncs — the cloud service handles the transport, Omniscio handles the encryption. Omniscio never talks to any cloud provider directly.
Post-Restore Credential Wizard
After restoring a Backup Mirror on a new machine, Omniscio walks you through re-entering credentials that can no longer be decrypted.
When you restore an Omniscio backup onto a different computer, the OS-level encryption key changes. API keys, OAuth tokens, and MCP server secrets that were encrypted with the old machine’s key can’t be read on the new one. The Post-Restore Credential Wizard detects this automatically and shows you exactly which credentials need re-entering.
What Happens After a Restore
When Omniscio starts after a Replace-mode restore from a Backup Mirror on a different machine, it detects the restore and opens the credential wizard automatically. (Same-machine restores skip the wizard since the encryption key hasn’t changed.) The wizard checks thirteen categories:
- Omniscio Accounts — login and API key accounts whose stored credentials can’t be decrypted
- Provider API Keys — AI provider keys (OpenAI, Gemini, Groq, DeepSeek, etc.)
- MCP Server Secrets — encrypted environment variables and headers for your MCP server integrations
- Cloud Infrastructure — GCP service account key used for cloud test offload, stored in the DPAPI vault
- Integration Tokens — third-party service tokens (Slack, Jira, Ollert, Linear, Notion, Pushbullet, etc.)
- Google Authentication — Google OAuth tokens (refresh, ID, access)
- Automation Credentials — encrypted credentials used by your automation rules
- Cron Job Secrets — encrypted environment variables in your active cron jobs
- Backup Passphrases — your setup backup and mirror backup passphrases
- CLI Authentication — checks whether
gh,gcloud,gws, andgogare still logged in (skips tools not installed) - SSH Remotes — verifies that SSH identity and key files still exist on disk
- Environment — checks your worktree drive path and Claude Code config files (
~/.claude/) - Toolchain — reports developer tools that are missing or errored
Fixing Broken Credentials
Each category shows as a collapsible section with an “N of M healthy” counter. Categories with broken items expand by default; healthy categories stay collapsed.
- The wizard opens automatically after a restore and shows all credentials grouped by category.
- Each broken item has an action button: Go to Accounts (navigates to settings), Copy (copies a CLI command), or Open Terminal (copies the command and opens a terminal window). A command you have to edit first — such as
gog auth add <email>, which needs your own address — is offered as Copy only, since there is nothing that can be launched as-is. - Re-enter the credential — the key itself is still valid at the provider; Omniscio just can’t read its stored copy.
- Return to the wizard and click Re-check next to that item. If the credential is now readable, it updates in-place to show as healthy.
- When all items are fixed — or you choose to fix them later — click Dismiss. If broken items remain, a confirmation dialog warns you before dismissing. The wizard won’t reappear until the next restore.
The credentials themselves haven’t changed or expired — Omniscio just can’t read its own encrypted copy because the encryption key is tied to the original machine. Re-entering the same key or signing in again is all that’s needed.
Not everything Omniscio stores is yours to re-enter. Three of its encrypted values are its own: the Real Chrome Bridge pairing token (which your paired extension holds), the CLI control token (which every script and agent holds), and the push notification key (which every subscribed phone holds). If the keyring can’t unlock one of those, Omniscio keeps the stored value instead of generating a replacement — because replacing it would silently break the extension, the scripts, or every phone, and you’d have to set them up again to recover from a temporary fault. The feature that needs it simply waits: My Real Chrome stops connecting, or push notifications pause, until the machine’s keyring can read the value again (usually a restart after fixing the keyring). Your pairing, your subscriptions and your connected tools all keep working — nothing has to be redone. An inbox alert tells you when this has happened and which feature is affected.
Running It Manually
You can run the credential health check at any time, not just after a restore:
- Open Settings → Backup & Restore.
- Click Run credential check…
This opens the same wizard and probes all thirteen categories.
Inbox Alert
When broken credentials are detected after a restore, Omniscio also raises an inbox alert so you don’t lose track of the issue. The alert follows standard inbox behavior — you can snooze, archive, or dismiss it like any other inbox item.
Portable Backup
One encrypted file you export and carry to another computer yourself — a USB stick, a cloud drive, an email attachment — instead of relying on a continuously-synced shared folder.
Portable Backup is hidden by default while it’s in development. Turn it on at Settings → Lab → Portable Backup, or launch Omniscio with AMC_SHOW_PORTABLE_BACKUP=1. Once it ships to everyone, the Labs toggle will disappear and it will be on for all users.
Portable Backup writes a single .amcbackup file containing your whole database (every project, session, and conversation), your config, and your attachments — encrypted so the file is safe to carry anywhere. Unlike Backup Mirror, which writes continuously to a folder your cloud-sync client keeps in step across machines, Portable Backup is a one-off: you create the file, move it yourself, and import it once on the destination computer.
Backup Mirror keeps two machines continuously in sync through a shared cloud-sync folder — best when you regularly use Omniscio on two computers. Portable Backup is a single encrypted file for a one-time move, with no shared folder to set up first. Export/import (backup ZIP) is the plain, unencrypted, always-full-replace option with no passphrase or recovery code at all. Pick whichever matches how you’re moving your data.
Exporting a Backup
- Open Settings → Backup & Restore → Portable Backup. Optionally tick Include my saved credentials (off by default — see the callout below) to carry your API keys and sign-in tokens too, then click Export a backup….
- Choose where to save the
.amcbackupfile. - Omniscio shows a Backup Created dialog with a recovery code — a 32-character code shown to you exactly once. Save this code somewhere safe right now (a password manager is ideal). Tick I’ve saved this to confirm you’ve recorded it.
- Optionally click Show in folder to reveal the saved file so you can copy it to a USB drive, cloud storage, or attach it to an email.
The recovery code is not stored anywhere in Omniscio and cannot be shown again after you close the dialog. On the same computer that made the export, Omniscio can usually unlock the file again without asking for the code. But on any other computer — which is the whole point of a portable backup — the recovery code is the only way to open the file. If you lose it, that backup is unreadable.
Importing a Backup
- Copy the
.amcbackupfile onto the computer you want to import it into (USB drive, cloud storage, email attachment — any way you like). - Open Settings → Backup & Restore → Portable Backup and click Import a backup…, then pick the file.
- If the file needs its recovery code — a different computer than the one that made it, or no matching saved key on this machine — Omniscio asks you to enter it.
- Omniscio shows a preview: when the backup was made, the app version it came from, and how many projects, sessions, messages, and attachments it contains. Nothing has changed on your computer yet.
- Confirm to apply it. Omniscio automatically decides what to do next (see below) and always takes a safety snapshot of your current data first.
On a brand-new install with no projects yet, Omniscio may show a one-time banner — “Have a backup from another computer? Import it now.” — as a shortcut straight into this flow once you’re signed in.
What Happens When You Import
Omniscio decides automatically whether to replace or merge — there is nothing for you to choose:
- Brand-new / empty computer — a full restore. Omniscio takes a safety snapshot, stages the restore, and asks you to restart; the restore finishes the moment Omniscio reopens.
- Computer that already has data — an additive merge, no restart needed. Omniscio takes the same safety snapshot, then adds everything from the backup that isn’t already on this computer: new projects and sessions with their conversation history, plus other saved content such as tags, bookmarks, saved prompts, and automations. Nothing you already have is overwritten or deleted — only new items are added.
By default a Portable Backup carries no credentials — you sign back in on the new machine, and any encrypted secrets the file happens to hold just trigger a credential recheck (see Post-Restore Credentials). If you tick Include my saved credentials before exporting, your API keys and sign-in tokens are re-encrypted for the backup and, on import, restored under the new computer’s own secure storage — so an OS reinstall or new machine doesn’t leave you re-entering everything. They are never written to disk unencrypted; if the new machine’s secure storage is unavailable, Omniscio safely skips the credential restore rather than storing them in the clear. Because anyone with both the file and its recovery code could then read those secrets, keep both somewhere safe.
How It’s Protected
- Encrypted once, sealed shut — the whole backup (database, config, attachments) is encrypted under a freshly generated random key with authenticated encryption, so any tampering with the file is detected and rejected rather than silently restored as garbage.
- Two ways to unlock it — your saved recovery code always works, on any computer. This computer’s own saved key (when available) can also unlock a backup made right here, without re-typing the code.
- Recovery code masked everywhere it’s shown in an approval request — if an automation or CLI tool requests an import on your behalf, the recovery code is always displayed masked in the approval card, even though Omniscio still needs the real code behind the scenes to actually perform the import once you approve it.
- Mandatory safety snapshot — every import, whichever mode is chosen, takes an automatic backup of your current data first, so a botched import is always recoverable.
Moving to a new computer once, or sending your data somewhere via USB/email? Use Portable Backup. Keep two computers continuously in step? Use Backup Mirror. Just want a quick, unencrypted local snapshot before a risky change? Use the plain Export/Import ZIP.
Agent Permission Level
Choose how much your agents can do before Omniscio stops to ask you.
Omniscio runs Claude agents in the background. Agent Permission Level is a single setting that decides how much freedom an agent gets before Omniscio pauses for your approval. Set it during onboarding (the “Agent Access” step) or any time in Settings → Workflow.
The four levels
Read-only
The agent reads and proposes, but asks you before writing any file or running any command. Maximum control.
Guarded (default for new installs)
Auto-approves file edits inside your project. Asks before running shell commands, editing config files, or writing outside the project.
Autonomous
Auto-approves edits and commands inside the project. Asks only before writing files outside it.
Full trust
The agent does everything on its own with no permission prompts — sensitive files included.
Always-on protection
At Read-only, Guarded, and Autonomous, Omniscio always asks before an agent touches a genuinely sensitive file (SSH keys, cloud credentials, system files, shell startup files). Full trust is the deliberate exception — it auto-approves everything, sensitive files included, because that’s what full trust means. One rule never relaxes at any level: a session started by an inbound email is locked down harder, can’t be turned off, and still gets the sensitive-file prompt even under Full trust.
New vs. existing installs
A brand-new install starts on Guarded. An install you’ve already been using is kept on Full trust the first time it starts up after this feature ships — so your running agents behave exactly as before, with no sudden wave of approval prompts. Switch to a stricter level any time in Settings.
Which agents it controls
This setting governs Claude Code sessions (and Claude-compatible engines like DeepSeek, Kimi, and GLM). Other engines — Cursor, Gemini, Codex — manage their own permissions in their own systems.
A note on Guarded
Guarded is deliberately chatty for command-heavy work. Because it asks before every shell command, an agent that runs many commands will produce many approval prompts — that’s the point of the tier. Power users often pick Autonomous or Full trust.
Themes & Colors
Customize Omniscio's appearance to match your style.
Light / Dark Mode
Omniscio supports both light and dark themes. Toggle between them in Settings → Appearance → Theme.
Visual Themes
Beyond light/dark, Omniscio offers several visual themes that change the overall feel:
Glassmorphism (Default)
Frosted glass panels with subtle blur effects. Modern and clean.
Linear-Inspired
Inspired by Linear's minimal dark interface. Sharp and focused.
Warm
Warm brown/amber tones for a cozy feel.
Spotify
Green accent on deep black. Familiar to Spotify users.
Gold
Luxurious gold accent tones.
Violet
Purple-focused theme.
GitHub
Matches GitHub's color scheme.
Terminal
High-contrast monochrome with bright white accents.
Accent Color
Each theme has its own accent color, but you can see the current accent in use throughout buttons, links, and interactive elements.
Workspace Icon Colors
In Team Chat, each self-serve workspace tile in the switcher rail can be given a custom gradient color so you can tell your workspaces apart at a glance. Right-click (or long-press on mobile) a workspace tile to choose from eight colors: green, blue, red, purple, orange, pink, slate, and teal. Choose Remove color to reset. Colors are stored locally on your device.
Motion & Polish
Visual flourishes that make Omniscio feel alive — on by default. Everything auto-quiets under your OS “reduce motion” setting and Low Power Mode, and Settings → Appearance → Motion & Polish gives you one master switch that turns the whole set off in a single click, plus advanced sub-switches to keep or drop each piece. If you had already turned any of these off, your choice is kept.
- Interactive surfaces — buttons lift on hover.
- Dashboard motion — Insights numbers count up and the stat cards cascade in.
- Ambient backgrounds — a slow drifting accent gradient behind the welcome and “all clear” screens.
- Depth & elevation, view crossfades, glide-on-reorder, and an Inbox Zero celebration are available as separate switches too.
Everything here automatically quiets down when your system is set to reduce motion, or when Omniscio’s Low-Power mode is on.
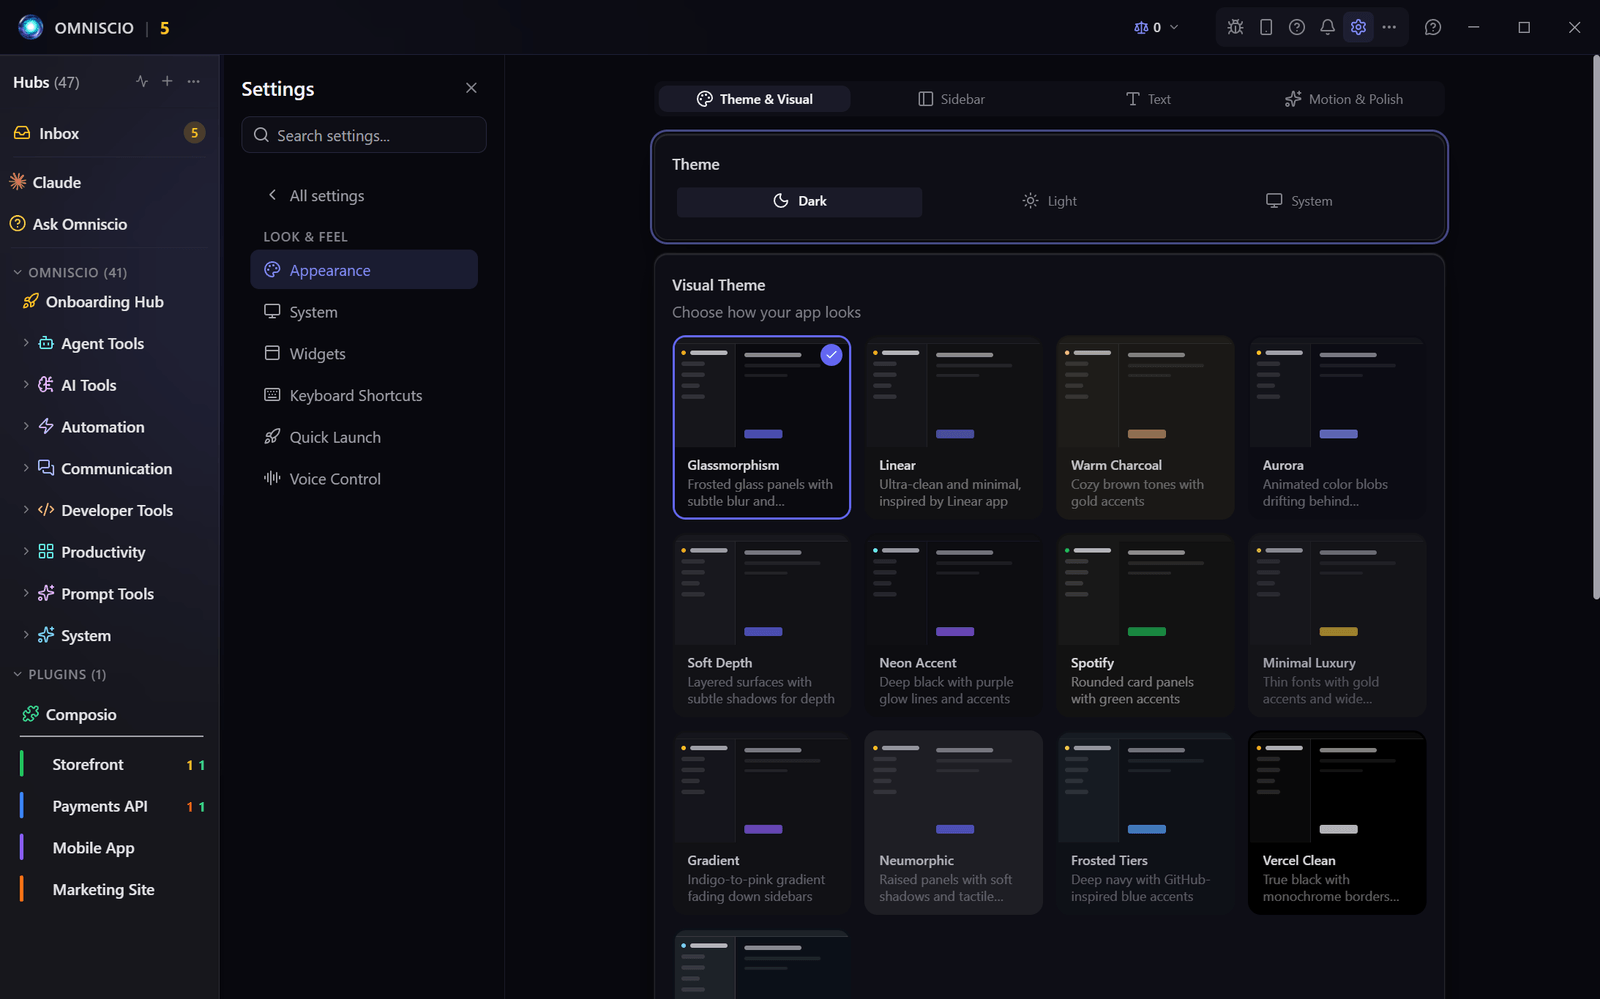
Keyboard Shortcuts
Navigate Omniscio faster with keyboard shortcuts.
Global Shortcuts
| Shortcut | Action |
|---|---|
| Ctrl + K | Open global search / command palette |
| Ctrl + G | Jump to a hub — a hub jumper palette that fuzzy-searches every hub (including ones inside collapsed sidebar groups) and switches you to it |
| Ctrl + , | Open Settings |
| Ctrl + N | New session in current project |
| Ctrl + W | Close / archive current session |
| Ctrl + Tab | Switch to next session |
| Ctrl + Shift + Tab | Switch to previous session |
| Ctrl + Shift + I | Toggle Inbox view |
| Ctrl + \ | Hide or show the hubs sidebar |
| Ctrl + Shift + \ | Hide or show the sessions sidebar |
| Ctrl + E | Toggle the File Explorer panel for the active session (silent no-op when no session is selected) |
| Ctrl + = | Increase app text size one step (works anywhere, even while typing) |
| Ctrl + - | Decrease app text size one step (works anywhere, even while typing) |
| Escape | Close current modal / overlay |
Pop-out Windows
These work in any window you have popped out of the main one: a hub or app, The Vault, Scratchpad, Writer, Support Chat, the Job Monitor, project docs, or a single SuperMail email.
| Shortcut | Action |
|---|---|
| Ctrl + W | Close the pop-out window, like its close button (a dialog open inside it closes first; a popped-out session asks before closing) |
Session Navigation
| Shortcut | Action |
|---|---|
| J / Arrow Down | Next session in sidebar |
| K / Arrow Up | Previous session in sidebar |
| Enter | Open selected session |
| E / Ctrl+W | Archive selected session |
| Shift+J / Shift+K | Multi-select sessions |
Chat Shortcuts
Opening a session leaves the cursor outside the message box, so the single-key shortcuts stay live while you read — press R when you actually want to type, Gmail-style. Prefer the cursor placed for you automatically? Turn on Settings → Workflow → Auto-Focus Input on Session Switch. Either way, a brand-new session — and any session you start yourself — puts you straight in the box.
| Shortcut | Action |
|---|---|
| R | Put the cursor in the message box to start a reply (works whenever you’re not already typing) |
| Enter | Send message |
| Shift + Enter | New line in message |
| Ctrl + Enter | Submit form / send in modals |
| Arrow Up | Edit last message (when input is empty) |
| Ctrl + Home / Ctrl + End | Jump to the top / bottom of the conversation thread (when the message box isn't focused) |
Browser Panel
These work while the AI Browser panel is active. The first group works even while the web page itself has focus; Ctrl + K is deliberately not captured while a page is focused, because many sites (GitHub, Slack, Notion…) use it for their own search.
| Shortcut | Action |
|---|---|
| Ctrl + T | New tab |
| Ctrl + W | Close tab |
| Ctrl + L | Focus the address bar |
| Ctrl + R | Reload the page |
| Ctrl + F | Find in page |
| Ctrl + = / Ctrl + - / Ctrl + 0 | Zoom in / out / reset |
| Ctrl + Tab / Ctrl + Shift + Tab | Cycle open tabs, most-recently-used first (release Ctrl to switch) |
| Ctrl + K | Browser command palette — search tabs, bookmarks, and history (when Omniscio’s own chrome has focus, e.g. after clicking the toolbar) |
Customizing keyboard shortcuts
Open Settings → Keyboard Shortcuts to rebind any shortcut. The panel is a two-pane layout — pick a group on the left, edit its shortcuts on the right — with a search box at the top that filters across every group at once:
- System-wide — every shortcut that fires even when Omniscio is in the background, now in one place: the core hotkeys (Show / hide Mission Control, Quick Launch composer, Omni briefing, Vault window), a shortcut for every Quick Launch tab (Calendar and Task ship with defaults — Ctrl+Alt+J and Alt+Space respectively — alongside Alarm, Drip, Bookmark, Search, Ask Omniscio, Team Time), and one per saved Quick Email contact. The tab and contact rows mirror Settings → Quick Launch and Quick Email — edit them in either place. If you assign a combination another global shortcut already uses, an amber “Also used by …” note appears so you never set one that silently loses. And if Windows or another app already owns a combination, its row shows a red “Not active — another app on your system is using this key” note the moment registration fails — plus a one-time warning toast the first time a given failure is seen — so a dead hotkey is never silent. Hovering a Quick Launch tab inside the composer also shows its works-anywhere shortcut once you’ve set one.
- General — everywhere in the app when Omniscio is focused.
- Navigation — sidebar and message-list movement.
- Session — archive, pause, snooze, send quick reply.
- Gmail — only active when the current project is a Gmail channel.
- Diff Review — only active when reviewing a session's changes.
- Daily Digest — only active when viewing the digest.
Every shortcut can hold several keys at once — the in-app actions and the System-wide hotkeys alike (Quick Launch tabs and Quick Email contacts included), so you never have to pick just one. They show as labelled pills (joined by “or”, and stacking one-per-line at three or more) with a Customized badge on anything you’ve changed from its default. Press Add on a row to record another combination, and each pill has its own remove × — so you can layer custom shortcuts on top of the defaults instead of replacing them (keep Alt+Space for the Task tab, say, and add Alt+T right beside it). The Settings search bar pins the Keyboard Shortcuts panel to the top of results when you type hotkey, shortcut, or keyboard shortcut.
One-handed layout
Just below Reset to defaults is an Apply one-handed layout toggle. Turn it on to set up a left-hand-only scheme so you can drive the conversation thread without leaving the home row: W/S move between sessions, A/D step one message down/up (or hold Shift — Shift+W/Shift+S), Ctrl+W/Ctrl+S also step one message, Alt+W/Alt+A jump to the top/bottom of the thread, and E archive, R reply, H snooze, G jump to attention, F pause. It writes these as normal editable bindings (your other custom shortcuts are kept); turning the toggle off — or Reset to defaults — undoes it, and the toggle reads on whenever the layout is currently applied. Because the layout reuses Ctrl+W for “up one message” and frees A/D for message-stepping, archiving moves to E, snooze to H, and jump-to-attention to G once it’s applied. The Alt+W/Alt+A jumps fire even while the message box holds the cursor (they scroll without pulling your cursor out of it), so the one-handed jump works no matter where your focus is; the default Ctrl+Home/Ctrl+End still only jump when the box isn’t focused, so those keep moving the text cursor while you type.
Send on Caps Lock (optional). Right below that is a Send on Caps Lock toggle, off by default. Turn it on and pressing Caps Lock in the message box sends your message — exactly like Enter. It’s a reachable send key for one-handed use, so your left hand can send without reaching across to Enter; it works whether or not you’ve applied the one-handed layout, and doesn’t change how Enter or Shift+Enter behave. Desktop only. One caveat: pressing Caps Lock still toggles your keyboard’s Caps Lock light — the app can’t stop that.
Press ? anywhere in Omniscio to open a live cheat-sheet overlay listing the currently-active bindings (it reflects your customizations, not just defaults). New installs get pointed here automatically: shortly after your first session on a desktop machine, a one-time toast says “Tip: press ? anytime to see every keyboard shortcut” with a Show me button — dismiss it (or open the overlay yourself) and it never returns. And you don’t even need the overlay for a single control: hover almost any button that has a shortcut and its current key appears right in the tooltip, drawn as a small physical key-cap — the same key-cap you see in the Keybindings panel and the cheat-sheet, and it updates the moment you rebind the action.
Notifications
Control how Omniscio alerts you when agents need attention.
Notification Types
- Desktop notifications — Windows toast notifications that appear in the corner of your screen
- Sound alerts — Audio chimes when agents need attention
- Tray badge — The system tray icon shows a count of items needing attention
- In-app toasts — Brief messages inside the Omniscio window
Configuration
Go to Settings → Notifications to configure:
- Enable or disable desktop notifications
- Enable or disable notification sounds
- Set "Silence Until" to mute all notifications until a specific time
- Configure Focus Mode for batched notifications
Mobile Push Notifications
When you open Omniscio on your phone (in your mobile browser, through Web Access), you can turn on push notifications so your phone alerts you when a session finishes or needs you — even when the Omniscio tab is in the background or your screen is off.
The first time you open Omniscio on a new phone or browser, a small banner offers a one-tap Enable. Tap it to turn push on for that device, or tap the × to dismiss it — once dismissed, that device won't keep nagging you.
- Per device — push is remembered separately on each phone or browser. Turning it on (or dismissing the banner) on one device doesn't affect the others.
- Turn it on or off any time at Settings → Notifications → "Push notifications". The switch reflects whether the device you're holding has push on and flips it for that device — this is how you re-enable push after dismissing the banner.
- If notifications are blocked for the site in your browser, the switch tells you instead of silently failing — allow them in your browser's site settings, then turn it on.
Anthropic Outage Alerts
When Anthropic itself has an outage, your Claude sessions start failing with API errors and it can look like something is wrong with your setup. Omniscio watches Anthropic's official status page in the background and tells you automatically when an Anthropic incident is the real cause — and tells you again when it's fixed. You never have to check status.anthropic.com yourself.
- One inbox card per incident, with a View status page button that opens Anthropic's live status page. The card updates in place as the incident evolves and never duplicates.
- One desktop notification when the incident is first detected, and one more when Anthropic marks it resolved. No repeats in between.
- A note in affected sessions — a session that fails during a known incident gets one line in its chat: "this failure is likely on their end, not your setup."
- Auto all-clear — once Anthropic resolves the incident, the card archives itself.
Omniscio checks every 5 minutes (every 60 seconds during an active incident) and also checks immediately whenever one of your sessions actually fails with an Anthropic API error, so the warning lands right when things break. Incidents that only affect the claude.ai website are filtered out — they don't break your sessions. If you dismiss the card, it stays dismissed (even across a restart); only a genuinely new incident raises a fresh one.
New Model Alerts
AI providers release new models all the time, and Omniscio's model picker is a curated list — so a new model won't appear until it's added. Omniscio watches each provider you've set up, in the background, and tells you automatically when one is offering a model Omniscio doesn't list yet. You never have to watch a changelog yourself.
- One inbox card per new model — "New (Provider) model: (name)".
- One desktop notification when it's first detected.
- A one-click "Add it for me" — the card's Start session button launches a session that adds the model properly (looks up its real price, adds it to the picker with a label, updates the tests) and leaves the work on a branch for you to review. It never pushes or merges on its own. Or just dismiss the card.
It watches the providers with a real model list — Claude, DeepSeek, GLM, MiniMax, Meta, OpenAI, Gemini, Kimi — and only the ones you've added a key for. A few can't be watched because they have no model list (or you pick the model per session): Antigravity, Hermes, Terminal, OpenClaw, OpenCode, and Pi. The very first check of each provider mostly just learns what's already there and stays quiet on older models — though it will still flag a current-generation model Omniscio doesn't list yet — and after that it alerts on anything genuinely new. Each model alerts once, and if you dismiss it, it stays dismissed.
Window Management
Control how the Omniscio window behaves.
Close to Tray
By default, clicking the X button closes Omniscio. If you enable "Close to Tray" in Settings, the X button minimizes Omniscio to the system tray instead, keeping your sessions running in the background. You can restore the window from the tray icon.
Custom Title Bar
Omniscio uses a custom title bar (no standard Windows title bar) for a cleaner look. The window controls (minimize, maximize, close) are built into the app's header.
Sidebar Resizing
You can drag the border between the sidebar and the main content area to resize the sidebar. The width is remembered across restarts.
Hide the Sidebars
Either side panel of the dashboard can be collapsed to maximize the chat area:
- Hubs sidebar (leftmost column) — click the small panel-close icon in the sidebar header, or press Ctrl + \.
- Sessions sidebar (right of the projects column) — click the matching icon in its header, or press Ctrl + Shift + \.
When a sidebar is hidden, a thin 8-pixel-wide edge gutter takes its place. Hover the gutter and a panel-open icon fades in — click anywhere on the gutter to bring the sidebar back at its previous width. The two toggles are independent: you can fold one or both. The choice persists across restarts.
Settings mirrors are at Settings → Appearance → Hide Hubs Sidebar and Hide Sessions Sidebar.
Font Size
Adjust the app-wide font size in Settings → Appearance → Font Size (seven steps, Extra Small → XXX-Large). This affects all text in the app.
You can also change it from anywhere with Ctrl + = (larger) and Ctrl + - (smaller) — these work even while you're typing in the composer, and a brief toast confirms the new size. The shortcut and the Settings control are the same setting, so either one moves the other. The natural “Ctrl and the + key” press works too, as do the numpad + / - keys.
Per-Window Zoom
Any window you pop out into its own window — a popped-out session, a project or integration window, or the Vault, Scratchpad, Quick Launch, Job Monitor, Support Chat, or Clipboard History windows — has its own browser-style zoom. Press Ctrl + + / - to zoom in and out one step, Ctrl + 0 to reset to 100%, or hold Ctrl and scroll the mouse wheel. It scales the whole window — text, icons, and images together — from 75% to 150%, and each window remembers its own zoom the next time you open it (session pop-outs remember per session).
Each window is independent: zooming a pop-out never changes any other window, and it never affects the main Omniscio window, which keeps the app-wide Font Size above. In the Vault and Scratchpad windows the keyboard shortcut steps aside while your cursor is in the text editor (so the editor keeps its own Ctrl + -) — zoom those with Ctrl + mouse wheel, or click outside the editor first.
All Settings
Complete reference of every setting in Omniscio.
Omniscio has a comprehensive settings panel accessible via the gear icon in the toolbar or Ctrl + ,. Here's every section and what you'll find in it.
Use the search function in Settings (or the global search with Ctrl + K) to quickly find any setting by name.
Settings is organized into clearly-named “rooms” — groups like Look & Feel, Notifications & Inbox, Sessions & Agents, AI & Accounts, and Connections that gather related settings together. Multi-level Settings navigation presents those rooms as a drill-down: pick a category, then a page, instead of scrolling one long list. Nothing about any individual setting changed — only how they’re grouped and named — so Settings search and direct links still land in the same place.
The largest Settings pages are split into tabbed sub-pages so a long scroll becomes a short tab strip — Appearance (Theme & Visual / Sidebar / Text / Motion / Layout Mods), Sessions (Behavior / Display / Waiting / Cost / Custom Render), and Voice Control. Rarely-used knobs fold under an Advanced disclosure, and a couple of settings show a small live preview (text size, chat bubble depth) that updates as you change them. Only the presentation changed — every setting still exists, just reachable through a tab. This is the default for everyone.
Multi-level Settings navigation
Instead of one long scrolling list of every Settings section, Multi-level Settings navigation opens Settings to a category picker: pick a category (a room), then the page within it — a two-level drill-down with a breadcrumb back. Turning it on also enables the room grouping described above. Settings search and direct deep links skip the drill-down and jump straight to any setting as before. Shipped as the default on 2026-08-03.
Accounts
Manage your Anthropic accounts (OAuth logins and API keys). Add, remove, and switch between accounts. View account usage.
Appearance
Theme selection (light/dark + visual themes), accent colors, font size, sidebar width.
Session Defaults
Default model, system prompt, max tokens, and other settings for new sessions.
Away Mode
Enable/disable auto-responses, configure rules, set default responses. See Away Mode.
Automations
Create and manage automation rules. See Automations.
Cron Jobs
Schedule recurring tasks. See Cron Jobs.
Alarms
Natural-language scheduled reminders that ring at the right time. See Alarms.
Pomodoro
Built-in focus-timer with presets, recurring auto-start schedules, project attribution, and Today / This Week / by-project stats. See Pomodoro.
Recipes
Create and manage recipe templates. See Recipes.
Notifications
Desktop notifications, sounds, silence periods, Focus Mode.
Voice Control
Enable voice input, choose STT provider, configure wake word. See Voice Control.
Integrations
Gmail, Calendar, GitHub, AgentMail, SMS, RSS, AHK connections.
Email Summarizer
Auto-processing rules for incoming emails. See Email Summarizer.
Plugins
Enable/disable plugins, plugin-specific settings, marketplace. See Plugins.
Toolchain
Tool detection and installation. See Tools & Toolchain.
Skills
Manage installed skills. See Skills.
MemPalace
Enable/disable memory system. See MemPalace.
Mobile Access
Mobile access (Tailscale), auto-start, and security settings. See Mobile Access.
CLI Control
CLI server settings, token regeneration, port configuration.
Agent Instructions Sync
Auto-mirror your CLAUDE.md to AGENTS.md, GEMINI.md, .cursorrules, and other agent-rule files. See Agent Instructions Sync.
Plain Speak
Enable or disable the five-section message rewrite with a single master toggle. See Plain Speak. (Inbox Pilot has its own home in the sidebar — see the Inbox Pilot page.)
Daily Digest (and Weekly Summary)
Enable/disable the morning briefing, set the delivery time, choose which integrations contribute. The Weekly Summary sub-section at the bottom of the same panel controls the Monday-morning recap — independent toggle, schedule hour, and daily Haiku spend cap. See Daily Digest and Weekly Summary.
Usage Forecast
Per-account usage rates, projected exhaustion times, and the hour-of-day usage history. See Usage Forecast.
Codex Provider
Enable OpenAI's Codex CLI as a session provider. Two readiness gates: binary installed, toggle on — sign in with codex login (an OpenAI API key is optional). See Codex Provider.
Gemini Provider
Enable Google's Gemini CLI as a session provider. Per-turn spawn model with optional --yolo. See Gemini Provider.
Focus Mode
Batch notification settings and thresholds. The Auto-Enable Focus Mode During Focus Blocks toggle (under Alarms) wires Focus Mode into Pomodoro phase changes.
Super Prompts
Browse and manage prompt templates.
Security & Privacy
API key session guards, credential management, data handling.
Diagnostics
Log level, startup / interaction / heartbeat trace viewers, crash dump folder, and an Outbound feedback emails pair of toggles — Send bug reports & feedback and Email crash reports & weekly digest. Both default on so existing installs behave exactly as before, but they differ in reach. Turning off Send bug reports & feedback stops the whole thing from your install: no email, no upload to us, and nothing saved to retry later, so nothing leaves your computer. Turning off the crash and digest toggle silences its email leg only, and the on-disk crash log is kept locally either way. Searchable from Ctrl+K with keywords like "resend", "feedback email", "crash email", "weekly digest email".
Advanced
Close to tray, debug mode, startup diagnostics, log viewer, data export.
Troubleshooting
Startup trace viewer, reset options, diagnostic tools.
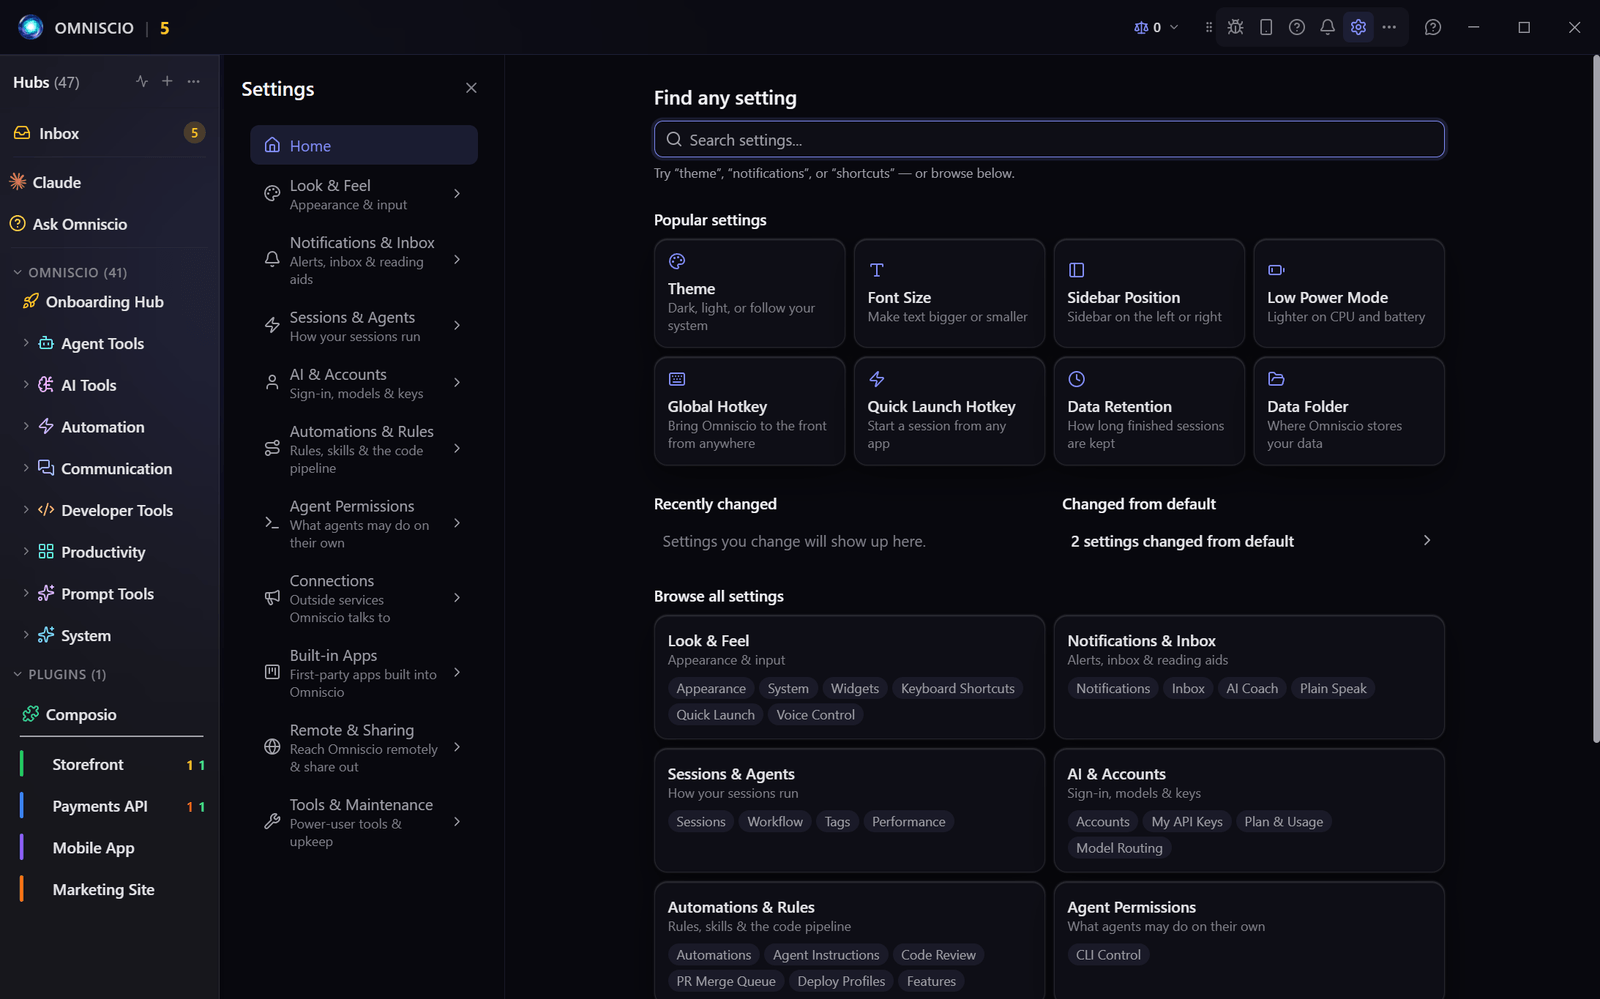
Troubleshooting
Common issues and how to fix them.
Installing
A blue "Windows protected your PC" screen is Microsoft SmartScreen, not a virus warning. Omniscio's installer is code-signed as JLS Publishing LLC, but SmartScreen still warns on newer apps until enough people have downloaded them — the warning fades as that reputation builds. Click More info, then Run anyway.
To check the signature first, right-click the installer → Properties → Digital Signatures — the signer is listed as JLS Publishing LLC. The full walkthrough lives on the download page under "Seeing a Windows security warning?".
If your antivirus quarantines or deletes the installer instead, that is the same unfamiliar-app reputation problem: restore the file from your antivirus's quarantine list and allow it, or add your Downloads folder and the installed Omniscio.exe to that product's exclusions, then run it again. Re-download from the official download page if the file was deleted — a partial download can also fail to launch with no message at all.
Signing in is required to use Omniscio, so the app waits on the "Sign in to continue" screen until it succeeds. If it will not move past it:
- Sign-in opens in your web browser — check for a browser window or tab waiting behind the Omniscio window.
- Confirm you have a working internet connection; the sign-in check needs to reach our servers.
- If the browser finished but the app did not, close Omniscio completely and reopen it — it re-checks on launch.
This is the Omniscio sign-in, which is separate from your Anthropic account (the AI service that powers sessions). For what the sign-in involves, how to delete your account, and the data tied to it, see Account & Sign-In. If an Anthropic account is the one failing, see Authentication instead.
Session Won't Start
This means Omniscio can't find the Claude Code CLI on your system — usually because it isn't installed, or was uninstalled. Install it globally:
npm install -g @anthropic-ai/claude-codeThen just start a new session — Omniscio picks up the reinstalled CLI automatically, no app restart needed. If you installed it with a different package manager or to a custom location, make sure the claude command is on your system PATH, or set its exact path in Settings → System → Claude CLI Location.
This can happen if:
- Your internet connection is down
- Your Anthropic account credentials have expired — try signing out and back in
- The Claude Code CLI process crashed — try ending the session and starting a new one
This means you've hit Anthropic's usage limits. Omniscio handles this automatically by:
- Waiting for the rate limit to reset
- Switching to another account if you have one configured
- Showing a timer until the limit resets
Adding a second Anthropic account in Settings helps avoid interruptions.
App Performance
For a full, do-this-in-order walkthrough, see Computer feels slow? — it orders every fix from free and instant down to (last resort) new hardware. The quick answers below cover the most common individual cases.
Each active session uses memory. If you have many sessions running simultaneously, memory usage can add up. Try:
- Archiving sessions you're done with
- Ending sessions that are no longer needed
- Restarting Omniscio periodically
Omniscio pre-creates one blank session per project in the background so that pressing Ctrl+T (or N) to start a new session is instant — the session panel appears immediately with no loading delay. This ready-and-waiting blank looks like any other new session in your sidebar, with a plain “Session #” number.
Once you click into it and start typing, it just becomes a normal session — if you use AI-generated titles, it picks one up from your first message. You don’t need to do anything special; the pre-created blank is only there to make starting new work faster.
If you’d rather not have these pre-created sessions — for example, if you’re running close to the session cap — you can turn it off in Settings → Performance → “Pre-load new sessions.” When off, Ctrl+T still works, it just takes a moment longer (~700 ms) to spawn the session.
Open Settings → Performance and enable “Cap CPU when many sessions are running”. This soft-caps the combined CPU usage of every Omniscio Claude process tree (sessions, subagents, npm test, vitest, builds) when the host is contended, and runs them at below-normal priority so foreground apps (browser, IDE, Zoom) always feel responsive. An isolated single session can still use the full machine — the cap only kicks in when something else wants CPU.
Default cap is 50%, configurable between 25–90% in 5% steps. Lower = friendlier to your other apps, slower for batch work. Changes take effect live without restarting Omniscio. No effect on macOS or Linux (those platforms have different scheduler models).
Also on by default: “Let sessions yield the disk to the app” runs every session — and everything it spawns — at low disk priority and below-normal memory priority (Windows only). When the app needs the disk or its own memory pages back, it goes ahead of the sessions, which is what keeps typing and clicking responsive while a busy fleet hammers the drive. Sessions run at full speed whenever the app is idle. If it’s ever off, turn it back on before reaching for heavier levers.
Alt+Tab protection is automatic on Windows: when every Omniscio window loses focus, its running agent process trees move to Windows’ strongest background-yielding CPU priority. The app you switched to gets first claim on the processor while every session keeps running, and focusing any Omniscio window restores their normal speed immediately. There is no setting to manage and no session-count limit involved.
When dozens of sessions are streaming at once, the session you’re reading shares one rendering pipeline with all of that background work — so clicking between sessions can feel sluggish. Open Settings → Performance and enable “Isolated session view (experimental)”: the active session’s chat is then rendered by its own background process inside the same window, so switching into it and typing stay fast no matter how busy the rest of the app is. The app looks identical — one window, same layout — and the mode takes effect on the next session you click.
It’s experimental and off by default. Desktop only; it uses about one extra process’ worth of memory (∼200 MB) while active, and if anything goes wrong it silently falls back to the normal view. Turn it off any time from the same toggle.
If you leave long or overnight jobs running and come back to find a session stalled, your computer may be going to sleep mid-task and suspending the work. Open Settings → Performance and enable “Keep computer awake while sessions are running”. Omniscio keeps the machine awake for exactly as long as at least one session is actively running, and lets it sleep normally again the moment the last one finishes.
This blocks system sleep only — your display can still dim and sleep on its normal schedule to save power, since the work runs in the background. It’s off by default. Works on Windows and macOS; on Linux it depends on your desktop environment.
Windows Modern Standby can kill Electron apps during idle periods. This is a known Windows behavior, not an Omniscio bug. Omniscio includes handling for suspend/resume events, but if crashes persist, try:
- Turning on Settings → Performance → “Keep computer awake while sessions are running” (above) so the machine stays awake while a session is working
- Disabling "Close to Tray" and closing Omniscio before sleep
- Setting Windows power settings to hibernate instead of sleep
Omniscio stores everything in one database file that only grows — when old cached data is deleted, the space stays inside the file as reusable empty space rather than being returned to your disk. After months of heavy use this file can reach several gigabytes, much of it reclaimable.
To shrink it, open Settings → Diagnostics, find the Session turns cache card (it shows your current Database size), and click Reclaim disk space → Clear & schedule. This clears the cache and schedules a one-time cleanup for the next launch.
You then need to restart Omniscio — the file only shrinks on the next launch (you'll briefly see “Reclaiming disk space…” on the splash screen). Omniscio won't restart for you, so do it when convenient. Your conversations are never affected; the cleanup only removes empty space, and it's safely skipped if your disk is too full to do it.
Omniscio also clears out old background status messages on its own — the bookkeeping rows (“Session ready,” tool activity, recovery notices) that heavy multi-agent use piles up — once their session has been finished for about two weeks, so the database no longer grows without bound. The first time that cleanup runs on an already-large database it frees enough space to schedule that same one-time compaction by itself, so you may see “Reclaiming disk space…” on one restart without having clicked the button. Your conversations are never removed by this — only disposable status messages from long-finished sessions are.
This is usually git rather than your actual files. Every fetch, branch, and worktree leaves behind loose objects and extra pack files, and nothing removes them on its own. On a busy project this grows until git itself gets slow — every command has to scan the pile — and it can take tens of gigabytes.
Open Settings → Diagnostics and find the Git storage card. It lists every project Omniscio knows about with its real size on disk, so you can see which one is actually bloated. Tick the ones you want cleaned up, then choose Compact on next restart or Restart & compact now.
Why it needs a restart: this kind of cleanup can’t run while anything else is using the project, and Omniscio itself runs git constantly in the background for your sessions. So it does the work during its own startup instead — before the window opens and before any session resumes — which is the one moment nothing is in the way. You’ll see live progress on the startup screen.
How long does it take? A small project is done in seconds; a large, long-neglected one can take 5 to 30 minutes. You are never stuck waiting: the startup screen shows a Skip and open now button for as long as the compaction runs, and pressing it stops the work and opens Omniscio straight away. The line under the button says what the tidy-up is and that stopping costs you nothing — whatever had already finished is kept. That button only appears during a compaction, so you won’t see it on a normal startup.
Your sessions are suspended and resume automatically afterwards, and nothing is lost if you force-quit part-way through — git only swaps the new data in at the very end. It never deletes any of your work: it reorganizes how git stores what it already has, and a cleanup you schedule also deletes git data nothing has used for two weeks — leftovers no branch, recent history or open worktree still points at. Newer unused data is set aside, and a later cleanup you schedule deletes it once it has gone unused for two weeks; the card says how much was set aside. If a project has been moved, isn’t a git project, or your drive is too full, Omniscio tells you and changes nothing.
On an older git: git versions before 2.53 can’t combine the storage of a project that keeps some of its files only on the server (a “partial clone”). On such a project the cleanup skips that one step instead of failing, does everything else, and the card tells you to update git to 2.53 or newer — then schedule the cleanup again.
Startup Trace
If Omniscio is starting slowly, you can view a detailed startup timeline in Settings → Diagnostics → Startup Trace. This shows exactly how long each part of the startup process took, helping identify bottlenecks.
Interaction Trace
If clicks, typing, or session-switches feel laggy, open Settings → Diagnostics → Interaction Trace and click Reveal Interaction Log. Omniscio continuously records every interaction over 200 ms (with input-delay and processing-time breakdown), every long animation frame over 100 ms, and any session-switch phase timings. The file keeps growing across launches (capped at 1 MB) and ends with a “Top 10 worst offenders” summary. Attach it to a bug report when the UI feels sluggish.
Debug Console
Click the bug icon in the toolbar to open the debug console. This shows internal logs that can help diagnose issues. You can share these logs when reporting bugs.
Computer Feels Slow?
A do-this-in-order fix-it guide — the cheapest, easiest fixes first, with new hardware as the very last resort.
About 9 times out of 10, “my whole computer is slow” means it ran out of fast memory (RAM) and started using the much slower disk as overflow (“swap-thrash”). The signs: the whole machine freezes for a few seconds at a time, the CPU looks busy but never quite hits 100%, and the fans spin up.
It is almost never “too many sessions.” Idle sessions cost very little; what eats the machine is memory pressure plus background junk (backup software, antivirus, leftover files). So the fixes below mostly free up memory and clear out junk — not “use Omniscio less.”
Many speed-ups ship inside Omniscio itself. If you’re running a build from a while ago, you don’t have them yet — when in doubt, restart Omniscio (Tier 2). Turning off a misbehaving feature sometimes also needs a restart to fully release what it was using.
Step 0 — Let Omniscio’s AI scan your computer first
The fastest way to know which steps you actually need is to let an AI look. The scan only reads information — it never changes anything.
- On Windows, use the built-in guided health-check (the “First Mission”): a read-only scan that shows what it finds and asks your approval before any change, with undo. Replay it anytime from a project’s empty state → “Run a guided mission.”
- On any platform, open any session and paste: “Please do a read-only scan of my computer and tell me why it might be slow, then point me to the right fixes. Don’t change anything — check free vs total RAM, my top memory-using processes, how many processes are running, free disk space, whether my pagefile is fixed or growable, and my antivirus exclusions.”
- Inside Omniscio, open Settings → Tools & Maintenance → Diagnostics → Resources (or the toolbar … menu → Resources) for a live, read-only, Task-Manager-style view of every Omniscio process — each session’s CPU and memory, with a Kill button for a runaway. It answers the first question fast: is one session eating everything, or is the whole machine just low on memory?
Every command an agent uses for this is a read-only Get- command on Windows PowerShell — for example:
Get-CimInstance Win32_OperatingSystem    # free vs total RAM
(Get-Process).Count                      # ~250 on an idle PC; 1,000+ is a red flag
Get-PSDrive C                            # free disk space on your system drive
Get-MpPreference                         # antivirus exclusions already in place
Tier 1 — Free, instant, no restart
Open the gear icon → Settings → Performance and turn these on. Start with the first — it bundles several of the others.
- “Lite mode (optimize for a less powerful computer)” — the best starting switch. One toggle turns on Low Power Mode, holds new sessions when memory is low, reclaims RAM from idle sessions, staggers startup loading, and stops pre-building extra chats. Turning it off restores your previous settings. (If Omniscio ever offered you a “Make Omniscio lighter” button, a low-spec notice in your Inbox with a “Turn on Lite mode” button, or a slowness card with a “Go to Lite mode” button, that’s this switch — say yes.)
- “Reserve a CPU core for Omniscio so the window never freezes” (Windows, hybrid CPUs) — sets aside one fast core just for Omniscio’s window so a swarm of sessions can’t freeze the interface. Add “Make the reserved core truly dedicated” if it still hitches. On a processor without separate performance and efficiency cores the switch is greyed out and says why — it cannot work there.
- “Real-conversation layout” — shows just your messages and the agent’s final replies, folding tool work into a collapsed “N actions” pill. The single biggest rendering-cost cut on busy chats.
- “Release idle sessions to reclaim more RAM” — gives back ~250–450 MB per idle session; the chat stays on screen and your next message reloads it. Lower the minutes to reclaim sooner.
- “Low Power Mode” and “Hold new sessions when memory is low” — drop heavy visual effects, and pause bursts of new sessions when memory is tight.
Turning it off forces slow software rendering and makes everything worse. Leave GPU Acceleration on unless you’re chasing a specific graphics glitch.
You don’t have to turn these on: Omniscio already reclaims RAM from its own idle sessions when free memory runs low, and each session loads only the tools it was given (not every one you have installed) — which quietly saves gigabytes across a swarm of sessions. If you’re still squeezed for memory, turn off “Keep recent sessions instant” and “Keep recently-opened panels loaded” in Settings → Performance to trade instant-switching for reclaimed memory.
Tier 2 — Free, but needs a restart or quick cleanup
- Restart Omniscio. The highest-value single step — it picks up every speed-up shipped since your last launch and frees memory held by a long-running app.
- Free RAM by stopping sessions you’re not using. Use the one-click bulk Stop (sessions stay in your list and resume on your next message). Archiving finished sessions helps too.
- Turn off background features you don’t use, then restart — anything that scans files or polls on a timer adds constant load.
- Sweep abandoned project copies (developers) — leftover git worktrees, each with their own dependencies, can pile up to hundreds of gigabytes and get re-scanned forever by backup/antivirus. (Omniscio also sweeps these on a schedule; tune it in the Dev Pipeline panel’s Setup tab.)
- Reclaim space from Omniscio’s own database (if it’s grown to several GB) — Settings → Diagnostics → “Reclaim disk space” schedules a one-time compaction on your next restart that shrinks the database file. Your conversations are untouched.
These help but touch system settings and need an administrator “Yes” (UAC). If you’re not comfortable, ask your Omniscio agent to do it (“Please add a Defender exclusion for my Omniscio repo and explain what you changed”) — or skip them; Tiers 1–2 already do most of the work.
- Antivirus (Defender) exclusion for a big dev repo + its worktrees and Omniscio’s data folder — real-time scanning of constant file churn can burn ~1 GB of RAM and real CPU. Elevated PowerShell:
Add-MpPreference -ExclusionPath "C:\path\to\your\repo". (Exclude the same folders from any cloud backup app too.) - Cap the Windows pagefile so it can’t fill your system drive — only if the scan showed a growable pagefile and your drive is filling up. Pick a fixed size at least as large as your RAM (too small risks crashes).
- Raise the Windows desktop-heap limit (the most advanced) if you launch hundreds of processes and Windows starts refusing new ones. Best done by your agent: “Please raise my Windows desktop heap to 64 MB and tell me what you changed” (needs a reboot).
Tier 3 — Move heavy work off your machine or your hours (developers)
Relevant if you run heavy builds/tests that compete with you while you work.
- Run heavy work when you’re away. There’s no one-click “run overnight” button, but you can wrap a heavy task in a Recipe (Settings → Automations → Recipes) and trigger it on a schedule with a Cron Job (Settings → Features → Enable Cron Jobs) — or just start it before you step away.
- Send heavy verification to the cloud. If you develop on the Omniscio repo and have cloud offload configured, route test/build/lint runs to rented cloud machines with
--cloudor the “Prefer cloud for tests on this machine” toggle in Settings → Diagnostics. This is a developer feature (needs cloud infrastructure set up) and moves verification work off your box, not the AI sessions themselves.
Tier 4 — Last resort: upgrade hardware
Only after everything above. For a machine that genuinely runs many agents at once, the real cure for swap-thrash is more RAM — RAM beats CPU here, because running out of RAM is what causes the freezes. Going from, say, 64 GB to 128 GB removes the paging-to-disk that stalls the whole machine. Check your motherboard’s maximum RAM and memory generation before buying; a new computer only makes sense if you can’t add RAM to this one.
Quick reference
| What you see | Likely cause | Where to go |
|---|---|---|
| Whole computer freezes for seconds | Out of RAM → paging to disk | Tier 1 + free RAM; Tier 4 if chronic |
| CPU high but never hits 100% | Threads waiting on the disk | It’s memory, not CPU — same as above |
| Used to run lots of sessions, now a few crawl | Old build, or a leaked background feature | Restart Omniscio; turn off unused features + restart |
| System drive filling up | Abandoned worktrees + growable pagefile | Sweep worktrees; cap the pagefile (Advanced) |
| Typing/scrolling laggy | Heavy rendering on a busy chat | Real-conversation layout + Low Power Mode |
| The Omniscio window freezes while sessions run | Interface crowded off the CPU | Reserve + dedicate a CPU core (Windows) |
| Available RAM keeps dropping but your programs aren’t using much | Windows file cache ballooned (a Dev-Drive quirk) | Restart clears it; ask your agent to cap the Windows file cache |
| Omniscio’s own database has grown to several GB | Database only grows; deleted chats leave empty space inside | Settings → Diagnostics → “Reclaim disk space” |
Still stuck? Omniscio keeps timing logs at Settings → Diagnostics → Startup Trace (slow launch) and Interaction Trace (laggy clicks/typing) — attach them to a bug report. See also Troubleshooting and Crash Recovery.
Crash Recovery
When Omniscio crashes or you close it with sessions still running, it brings them back on the next launch.
Crash recovery is the safety net that makes a crash invisible. If Omniscio quits suddenly (force-quit, OS reboot, power loss) or you close it cleanly with sessions still running, those sessions auto-resume the next time you open the app. You don't have to remember which sessions were open or click anything — Omniscio's job is to put you back where you were.
What you'll see on the next launch
- The window opens, sidebar paints immediately. Every session that was running last time shows up right away with the green “starting” ring. You can scroll, click, switch projects — nothing is blocked.
- One blue toast slides in: “Resuming N sessions from last shutdown”. It carries a Stop button and stays up while the sessions come back, clearing itself once the resume finishes.
- Sessions trickle back to running one at a time, with a gentle gap between each — at least a few seconds, stretching longer while your machine is still busy finishing the previous one. Each receives a “Please continue” nudge so the agent picks up where it left off; the message appears in the chat with an auto-response badge so it's clear Omniscio injected it, not you.
If you only have one or two sessions, this feels instant. If you have a dozen or more, the trickle is visible but the app stays fully responsive the whole time — by design, so a big recovery never freezes your machine on launch. A large batch (dozens of sessions) can take several minutes to all turn green — that's the deliberate pacing, not a stall. They stay visible as “starting” while they wait their turn, and Omniscio works through every one; nothing is dropped just for being slow.
Want one back right now? Just send it a message
The trickle is only for the background — it keeps a big recovery from freezing your machine. It is not a line you have to wait in. The moment you act on a specific session — send it a message or hit Restart — Omniscio pulls that one straight to the front and starts it right then, instead of waiting for the queue to reach it on its own. If you type a message, that message becomes its first turn (you skip the automatic “Please continue”). So when you reopen Omniscio and want a session back now, just click in and start typing — that green “starting” dot is real, and acting on it does exactly what you'd expect. The only brief exception: if that session is the very one the queue is launching at that instant, Omniscio won't double-start it — your message waits for that launch and goes in as soon as the session is up (you only see “Restoring this session… try again in a moment” if the launch runs unusually long).
What qualifies for auto-resume
- Sessions that were running when Omniscio last exited (whether from a crash or a clean close).
- Sessions whose status changed within the last 120 seconds of Omniscio starting. This recency filter prevents Omniscio from re-launching genuinely old failures from days ago — those stay marked as errors in your inbox so you can look at them. (This window applies only to a true crash, not a normal close — see the next bullet.)
- Sessions force-closed during a slow shutdown. If you quit or restart with many sessions running and Omniscio has to force some shut to exit on time, they briefly show as “error” — but they're remembered from the shutdown and resume on the next launch too, no matter how long the app was closed.
- Sessions interrupted mid-work when you closed the app. If a session was still working when Omniscio closed but slipped past the cases above, it no longer vanishes into the background — it shows up in your Inbox as Interrupted (an orange “needs you” row) so you can always find it, and it auto-resumes on the next launch too (or just waits in the Inbox if you've turned auto-resume off). A session the agent had already finished is left alone — only genuinely mid-work ones are brought back.
- Sessions you archived, paused, or ended stay put. Those terminal states are respected and never auto-resumed.
Turning it off
Go to Settings → Workflow → Auto-Resume Sessions on Restart. The toggle is on by default. Turn it off if you'd rather every interrupted session show up in your Inbox for manual triage instead of being silently revived.
When something doesn't come back
- A revived session lands in “error” a few seconds in. The CLI child spawned but exited fast — often a moved project folder, rotated OAuth token, or disk-full condition. Omniscio retries once more with a forced replay of the conversation transcript. If the second attempt also fails, the session stays in “error” for you to reopen and investigate.
- A session sits in “starting” for a long time. Almost always means the per-session spawn hit the 30-second timeout. Omniscio moves on and the session lands in “error” on the next watchdog tick.
When the machine is just too busy to launch
Separately from a session erroring out, a launch can fail transiently — your computer is momentarily too overloaded for the operating system to start one more process. This is common during a big mass-restart, when a dozen sessions all try to come back at once and the burst itself overwhelms the OS. It's not a broken setup; the machine was just slammed for a moment. Relentless relaunch handles it: instead of giving up after a few quick tries (which used to strand a pile of sessions as red errors), Omniscio keeps relaunching the session — with a gap that grows the longer the machine stays busy, up to about 30 seconds between tries — until it comes back. The session stays in its “coming back” state rather than flashing red, and you'll see a one-time “the machine looks busy, keeping at it…” note (then a quiet progress line only every tenth try, so a long recovery looks alive without spamming the chat).
It's on by default. Turn it off at Settings → Workflow → “Keep Relaunching a Session Until It's Back” if you'd rather a stubborn launch show up as a red error for manual triage. Either way, genuine faults — a real crash, a missing binary, an authentication failure — are not transient and still turn the session red right away; relentless relaunch only rides out a momentarily-busy machine, it never hides a real problem.
A retry in progress survives the restart
If a session was already in the middle of an automatic login or rate-limit retry when Omniscio closed — its last turn hit an expired-login error or a usage cap and Omniscio was retrying it — that recovery is remembered across the restart. On the next launch the session resumes with your real last instruction (not the generic “Please continue” nudge) and keeps its place in the retry budget, so a crash mid-retry doesn't lose your turn or quietly re-nudge the agent.
A session you just started survives the restart
A + New Session click (or Ctrl+T) is remembered from the moment Omniscio accepts it — not only once the session is up. If the app closes, crashes, or loses power in that first moment while the session is still coming back, the next launch brings it up again instead of leaving you a broken row. It resumes with the opening message you had already given it when there was one, or comes up as an empty session when there wasn't — never a generic “Please continue” in place of what you asked for. A request that hasn't started yet is kept until it starts or you cancel it; it is never dropped just for being old.
When a login goes bad
If a Claude login's saved credential goes dead (it can no longer refresh — you'd need to sign in again), Omniscio quarantines it automatically: new sessions stop spawning against it, and any sessions stuck on it are moved onto a healthy login and resume on their own. If Omniscio notices an idle login has gone dead, it prompts you to re-sign-in proactively, before your next session fails. Sign the account back in and its sessions pick back up. If every login is dead or out of capacity and there's nowhere healthy to move a session, it lands in a clearly visible recovery-failed state (orange dot) in your Inbox rather than silently idling — your cue to re-authenticate or add capacity. Omniscio also keeps quietly retrying a recovery-failed session on its own, on a backing-off timer, so it comes back automatically once capacity returns — you don't have to babysit it. See Authentication for adding accounts.
When the CLI drops a turn mid-response
Crash recovery handles Omniscio itself going down. Aborted-response recovery is the in-session analogue: sometimes the Claude CLI abandons a single response mid-flight — the child process exits without a result, the output stream ends abruptly, or Omniscio's stall watchdog times out waiting for the next token. There's no question to answer and nothing you typed wrong; the turn just stopped. These used to land in your Inbox as a needs-you row with no question attached — indistinguishable from a real one — and the only way forward was to click in, type “please continue”, and hope.
Now those silent stalls heal themselves. When a response aborts, Omniscio marks the session and a background scan picks it up:
- Automatic retry, usually within a minute — and invisibly. A scan runs every 60 seconds, finds the stalled session, and replays your last message through the same machinery crash recovery uses — it restarts the stuck child and re-sends your turn. Recovery is fully silent: no toast, no notification, no Inbox row, no dot. While it is retrying, the session just looks like a normal running session — there is nothing for you to do, so Omniscio shows you nothing.
- Capped at 2 automatic retries per session per day. If a session is genuinely wedged, the cap stops a retry loop from burning your account budget. After the cap, the session surfaces for the first time — a distinct red “Recovery failed” Inbox row (never the amber of a session merely waiting on you) — and you take over. Sending the session a message of your own resets the counter — if you're actively driving it, the cap won't silence it.
- A Retry button on a failed session. Once a session lands in the red “Recovery failed” state, a Retry pill (a circular-arrow icon) appears just above the message box. Clicking it resets the retry budget and forces an immediate restart. (While a session is still recovering, no button shows — the scan is handling it for you.)
Turning aborted-response recovery off
It's on by default. Go to Settings → Sessions → Aborted-response recovery to turn off the automatic retries — you just don't get the silent auto-recovery, and a stalled session that hits its cap still surfaces as a red “Recovery failed” row you can Retry. (There's also a launch-time switch, AMC_DISABLE_ABORTED_RESPONSE_RECOVERY=1, for diagnostics.)
Blank-Screen Recovery
When the Omniscio window goes blank but the titlebar buttons still work, a recovery button appears so you don't have to kill the app.
Very rarely, the Omniscio window can blank out: the sidebar, chat, and toolbar all vanish, leaving just the dark window background and the OS-drawn Minimise / Maximise / X controls in the corner. This happens when a piece of the app fails to load (almost always a stale code chunk left over from a hot reload during development) and the React app silently unmounts itself. Without a recovery affordance, the only option is closing the window and relaunching — which loses the trail of what just happened.
The Reload Omniscio button is that affordance. It's a literal on-screen button (not a hotkey — hotkeys are useless if the renderer is dead) that fades in after the window has been blank for 1.5 seconds, sits dead-centre on the screen, and rebuilds the renderer on click.
What you'll see
When the window blanks for at least 1.5 seconds, a small dark card slides into the centre of the screen with two lines of text:
- “The window went blank. Click to reload.”
- A rounded indigo Reload Omniscio button.
If the app recovers on its own (the unmount turned out to be transient — a hot-reload re-mount succeeded), the card disappears the moment the chat UI reappears. The card never lingers after the app has healed itself.
What happens when you click it
- The button label changes to Reloading… and disables to prevent double-clicks.
- Omniscio records a
[MANUAL-RECOVERY]marker inheartbeat.logwith how long the screen was blank before you clicked. This is the forensic trail — it pairs with the auto-crash-report system so the next launch can correlate “the user clicked the recovery button” with whatever was happening in the main process at the time. - Omniscio dumps the last ~50 seconds of main-process state to
heartbeat-final.logfor next-launch investigation. - Omniscio clears the renderer's cache (so a stale piece of code that caused the blank can't be served again) and reloads the renderer. You stay on the same window — only the inside of it is rebuilt.
If the reload itself fails for any reason, the button falls back to a plain page reload — you still get out of the stuck state, you just lose the forensic trail on that path.
What it does not do
- It does not restart Omniscio. Only the renderer is rebuilt. If the underlying problem is a main-process freeze (rare), the reload may complete but the same freeze can recur. The fix in that case is to close the window entirely and relaunch — Omniscio's next-launch post-mortem will reference the manual-recovery marker so you know what triggered the close.
- It does not preserve unsent drafts. The reload is a hard reset of the renderer. Omniscio auto-saves drafts every few seconds, so most of the time you lose at most a few words.
- It does not appear on a slow cold launch. The 1.5-second grace is calibrated so a normal launch (even one slowed by parallel-worktree contention) never trips it.
Turning it off
The recovery button is unconditional — there's no setting to disable it. The cost is negligible (a tiny observer that watches whether the app UI is on screen), and the failure mode it protects against (invisible app, no recovery affordance) is severe enough that an opt-out from the user's perspective isn't appropriate. Developers debugging the guardian itself can set window.__amcDisableBlankScreenGuardian = true from DevTools before page load.
Safe Mode
Restart Omniscio with every automatic behavior switched off — a calm, do-nothing app you can use to see what's happening and fix things when something feels broken. Just like Windows Safe Mode.
When Omniscio is misbehaving — automations firing when they shouldn't, a flood of sessions, something that won't stop on its own, or an app that won't even open properly — Safe Mode gives you a version of Omniscio that does nothing automatically. Everything that runs in the background is switched off, but you stay in full manual control: you can look at every session, change any setting, and start a session yourself. The app still works; it just doesn't act on its own.
How to turn it on
There are two ways in:
- The Safe Mode launcher. Your installed app comes with a separate “Omniscio — Safe Mode” shortcut (its own shield icon) that opens Omniscio straight into Safe Mode. It works even when the normal app is too broken to open — that's the whole point of a separate launcher. It lives in the app's install folder (to keep your Start Menu and Desktop uncluttered); the quickest way to find it is to right-click your normal Omniscio shortcut and choose “Open file location.”
- The Settings button. If Omniscio is already open, go to Settings → Diagnostics and click “Restart in Safe Mode.”
What's switched off
Everything that acts on its own:
- Automation — auto-landing code, the auto-fixer, dev-pipeline auto-advance, auto-spawning sessions from email or chat, the inbox pilot, and per-session auto-run rules.
- Scheduled sending — scheduled messages, drips, digests, send-later, and alarms.
- Integrations — Gmail, SMS/Telegram, JIRA/Linear/Mission Control, agent-email, and cloud share syncing.
- Phone access — the connection that serves Omniscio to your phone is off (which also reduces your exposure while you're fixing things).
- Basic graphics — Safe Mode falls back to simple graphics, like Windows Safe Mode, so the app can still open even when a display or graphics-card problem is what broke it.
What still works
- Viewing every session, all history, and all messages.
- Changing any setting (so you can actually fix what's wrong).
- Starting a session, sending a message, running things yourself.
Leaving Safe Mode
While you're in Safe Mode a banner sits across the top of the app with a “Restart Normally” button — click it and Omniscio restarts with everything turned back on. Safe Mode is deliberately “sticky”: once it's on, it stays on across restarts (even if the app crashes) until you choose Restart Normally, so a broken app can't quietly drop you back into the state that was misbehaving.
Good to know: Omniscio never runs two copies on your data at once. If the app is closed, the Safe Mode launcher opens it in Safe Mode; if it's already running, the launcher tells it to restart itself into Safe Mode. Either way your running sessions are shut down cleanly, not killed.
Changelog
What's new in each version of Omniscio.
v0.1.52 – v0.1.68
June 29, 2026- improve Rolling improvements across ~16 patch releases. This window shipped many smaller fixes, polish passes, and provider/integration updates in addition to the highlighted items below. For the authoritative per-release detail, open the in-app release notes (they appear automatically after an update, or under Settings → System).
- feat UI Usage tracking — Omniscio can now record, entirely on your own device, which named controls you click and which sidebar integrations you open, and show you a "used vs. never used" report so you can decide what to remove or hide. Find it at Settings → Diagnostics: a "Track which UI controls you use" toggle (on by default) plus a UI Usage card with most-used lists, a "Never used" list for both controls and integrations, and a today / 7-day / 30-day / all-time window. Disabled integrations are left out of "Never used" (off isn't the same as unused), and the "Never used" lists start long on day one because everything is unused until you click it — that's expected. Only the control/integration name and a timestamp are stored; no message content, file paths, or names. Nothing is sent anywhere — this toggle is a local feature switch, separate from the telemetry opt-in.
- improve PR Merge Queue Inbox — the Inbox now shows one line per pull request that needs you (an amber “needs review” or a red “merge stuck”) instead of one combined line per repo, so you can handle them one at a time. Dismissing a line archives just that pull request (middle-click on a computer, or the dismiss action on your phone) — bring it back any time with Show archived → Unarchive. Archiving a pull request now quiets it everywhere, a stuck merge included.
- feat Records — a new gamified trophy case in the Stats virtual hub tracking ~18 all-time personal bests (longest session, priciest day, longest active-day streak, lifetime token/session milestones, automation leverage, and a Peak Parallelism family for "most sessions/projects running at once"). Locked-vs-earned cards, named tier rungs with progress bars, and a confetti burst on the tab when you beat a celebration-worthy record. An opt-in app-wide toast for parallelism records lives at Settings → Notifications → Record-break notifications (off by default). Your full history is swept once to seed the parallelism trophies on day one; all data stays in your local database.
- improve Session Exports menu — the Exports submenu is now grouped into sections with dividers and can Publish to Google Docs (turns the conversation into a new Doc; off until you enable Google Docs export). Download is renamed Export to Markdown, and Export to Word is now an opt-in toggle (Settings → Sessions → Export to Word, off by default) — PDF stays always available. The repeated per-item token counts are replaced by a single size line at the foot of the menu showing words, characters, and tokens; "Copy since last compaction" keeps its own count in parentheses when it differs, with the word/character breakdown on hover.
- fix Stats → Trends charts — the date labels at the far left and right edges no longer get cut off, and they now read as friendly dates (Mar 31 instead of
03-31). Each chart also gained a value scale down the left side — plain counts on the Sessions chart, dollars on the Cost chart — so you can tell what a point is worth at a glance. Tall peaks get a little headroom now instead of jamming against the top edge. - feat Repo Foundations — a “Set up this repo” card on the project dashboard that runs the Repo Foundations skill to install a documentation system and a Claude-rules baseline (after a preview you approve). Enable at Settings → Lab → “Repo Foundations”.
- feat Code Search tab — search code across your GitHub repositories and open matches in the built-in file viewer. Enable at Settings → Lab → “Code Search tab”.
- feat GitHub Releases tab — browse a repository’s releases and create a new release (draft by default). Enable at Settings → Lab → “GitHub Releases tab”.
- feat Tasks — an in-development keyboard outliner whose rows render as real markdown. Enable at Settings → Lab → “Tasks”.
- feat Voiceprint Studio — an in-development sidebar studio that builds an email style guide in your writing voice. Enable at Settings → Lab → “Voiceprint Studio”.
- feat Language picker — choose the app’s UI language at Settings → Appearance → Language; only languages whose translation coverage passes the quality gate are offered.
- feat Web-app verification (Obscura) — agents can verify a deployed web app end-to-end after changes land. Enable at Settings → Lab.
- feat Voice History — browse and replay your past voice conversations from the sidebar, and delete any you no longer want.
- feat Life Inventory — the AI Coaching 1-to-5 self-assessment (Symptoms and Strengths) with keyboard-first re-takeable takes; results feed your coaching profile.
- feat Recurring Special Events — add birthdays, anniversaries, and holidays that create Google Calendar events plus lead-time reminders (day-of, a week before, a month before, or any number of days before).
- feat Language pilots — machine-translated UI catalogs for 34 languages, offered in the language picker: Spanish language (pilot), Tagalog language (pilot), Traditional Chinese language (pilot), Cebuano language (pilot), Ilocano language (pilot), Hiligaynon language (pilot), Waray language (pilot), Bikol language (pilot), Kapampangan language (pilot), Pangasinan language (pilot), Indonesian language (pilot), Serbian language (pilot), Hindi language (pilot), Urdu language (pilot), Romanian language (pilot), Hungarian language (pilot), Turkish language (pilot), Simplified Chinese language (pilot), Brazilian Portuguese language (pilot), Japanese language (pilot), German language (pilot), French language (pilot), Arabic language (pilot), Georgian language (pilot), Russian language (pilot), Korean language (pilot), Vietnamese language (pilot), Bengali language (pilot), Italian language (pilot), Thai language (pilot), Polish language (pilot), Punjabi language (pilot), Swahili language (pilot), and Persian language (pilot). Pick one in Settings → Appearance → Language. Untranslated strings fall back to English.
v0.1.51
May 27, 2026- feat Blank-screen recovery button — if the Omniscio window ever goes blank but the titlebar buttons still work, a Reload Omniscio button now fades in after 1.5 seconds so you can rebuild the renderer without killing the window. The click records a forensic
[MANUAL-RECOVERY]marker in the heartbeat log so the developer can correlate your report with what the main process was doing at the time. Always on; no setting to disable.
v0.1.50
May 26, 2026- feat Automatic crash reporting — Omniscio now sends a crash report on its own (by email to the developer and to Sentry) whenever it dies, so problems get fixed without you filing a bug. Covers live errors, hard native crashes, and silent force-kills (caught on the next launch via a heartbeat sentinel). Always on and independent of the telemetry opt-in; turn it off under Settings → System → Auto-Email Crash Reports, or launch with
AMC_DISABLE_CRASH_AUTOSEND=1. Anthropic API keys, tokens, and your home-folder path are stripped before anything leaves your machine, and a 15-per-day cap keeps a crash loop from flooding the inbox.
v0.1.40
May 12, 2026- feat Google Docs Export — publish Markdown to a new Google Doc from anywhere in the app (right-click on project docs / scratchpads / agent messages / markdown file links in chat / the File Peek side panel, or external
POST /gdoc/publish); preserves headings, lists, fenced code, blockquotes, links, and native Docs tables; shared Google sign-in with Calendar / Drive / Sheets; off by default. - feat Agent Instructions Sync — auto-mirror CLAUDE.md to AGENTS.md, GEMINI.md, .cursorrules, etc. (off by default)
- feat Plain Speak — rewrite long agent messages into a five-section summary (TLDR / Recommended Action / Response / Latest / Questions). V hotkey toggles between rewrite and original.
- feat Inbox Pilot — AI session triage with five outcomes (Keep Needs You / Hide / Archive / Snooze / Respond), per-session rule pinning.
- feat Daily Digest — AI-generated morning briefing aggregating Gmail, Calendar, and session activity. Briefings sidebar with Active / Snoozed / Archived tabs.
- feat Usage Forecast — live prediction of 5-hour rate-limit exhaustion with hour-of-day model; global banner, per-account row, and Usage Stats page.
- feat Statistics virtual hub — Overview / Feature Usage / Trends tabs over session count, cost, active time.
- feat Question Widget — agent questions render as one-click answer pills below the message.
- feat Nighty Tidy — per-(audit, repo) overnight scheduler with Recent Reports dashboard and inline Audit Detail Pane.
- feat Claude Files Sidebar — four-row quick access to project / global CLAUDE.md and MEMORY.md.
- feat Project Docs Auto-Injection — drop reference files in
.claude/docs/and Omniscio sends them to every new session (text inlined into the first message, binaries attached to the first message). Two buckets: top-level files always inject (with a per-project size cap), files in therag/sub-folder are listed in a table-of-contents the agent reads on demand (uncapped). - feat Bug Report Intake —
[BUG: slug]subject convention routes emails into tracked sessions with thread continuation. - improve Bug Report Intake duplicate detection — the same issue reported again within 24 hours collapses into one investigation (intake adds a "possible duplicate" hint, the agent confirms, then archives the duplicate and notes the original). New Dedup pre-check toggle, on by default.
- feat Codex Provider — spawn OpenAI Codex CLI sessions in Omniscio. Emerald pill badge; three readiness gates.
- feat Gemini Provider — spawn Google Gemini CLI sessions in Omniscio. Violet pill badge; per-turn spawn model with optional --yolo.
- feat Quick Replies (renamed from Response Snippets) — virtual hub with Settings / Quick replies / Sessions tabs, dividers, per-snippet auto-title / Plain Speak override / auto-tags, and AI edit sessions that write straight into the library.
- feat Run Recipe submenu in project context menu
- feat Hub context menu reorganized — file/path actions grouped under a Files submenu and icon / branch-visibility actions under an Appearance submenu; high-frequency actions (Edit Hub, Edit Notes, Pin, Remove) stay flat at the top level
- improve Global search — quoted phrases ("meeting") now match words exactly (no longer matches meetings or premeeting); mid-turn agent narration and tool actions are excluded from the search index so you always land on real conversation text. Unquoted searches keep the broader stem-matching behaviour.
v0.1.39
May 11, 2026- fix Overflow menu constrained to viewport height
- feat Template interpolation + auto project resolution for CLI sessions
v0.1.31 – v0.1.38
May 2026- feat PR Merge Queue — triage open GitHub pull requests into 8 lanes and spawn merge sessions in one click (opt-in via Settings → Features)
- feat Plugin auto-build toggle
- feat Recipe timeline visualizer
- feat RepoGuard SCA improvements
- feat Toolbar icon brightness consistency
- feat Silent recipe session watchdog
- fix Multiple inbox reconciliation fixes
- improve Settings search coverage and keyword matching
v0.1.20 – v0.1.30
April – May 2026- feat Focus Mode for batched notifications
- feat Weekly Summary — Monday-morning AI recap + coaching (subsumes Workflow Coach)
- feat MemPalace persistent memory system
- feat Super Prompts with remote sync
- feat Session sharing to Firebase
- feat Bookmarks system
- feat Email Summarizer with rule-based processing
- feat RSS feed integration
- feat Context Dock CLI panel
- feat Asides / Fork sessions
- improve Mobile access dark theme enforcement
- improve Scroll position memory across navigation
- improve Needs You sessions open at the latest message (newest reply + its buttons), not parked above the fold
v0.1.4 – v0.1.19
April 2026- feat Recipe engine with approval gates
- feat Cron job scheduling system
- feat Automation rules engine
- feat Voice control with wake word
- feat Gmail and Google Calendar integrations
- feat GitHub PR detail panels
- feat AgentMail integration
- feat SMS/Phone integration via Twilio
- feat Plugin system with Foundry and RepoGuard
- feat Multiple visual themes (8 themes)
- feat CLI Control API
- feat Mobile web access via tunnel
- feat Toolchain auto-installer
- feat Skills system with marketplace
- feat Global search / command palette
- feat Multi-account rate-limit recovery
- feat Guided tours
- improve Inbox multi-select with Shift+J/K
- improve Modal unification (4 shell primitives)
- improve Lazy-loaded heavy components
For the full commit history, see the project's git log.